


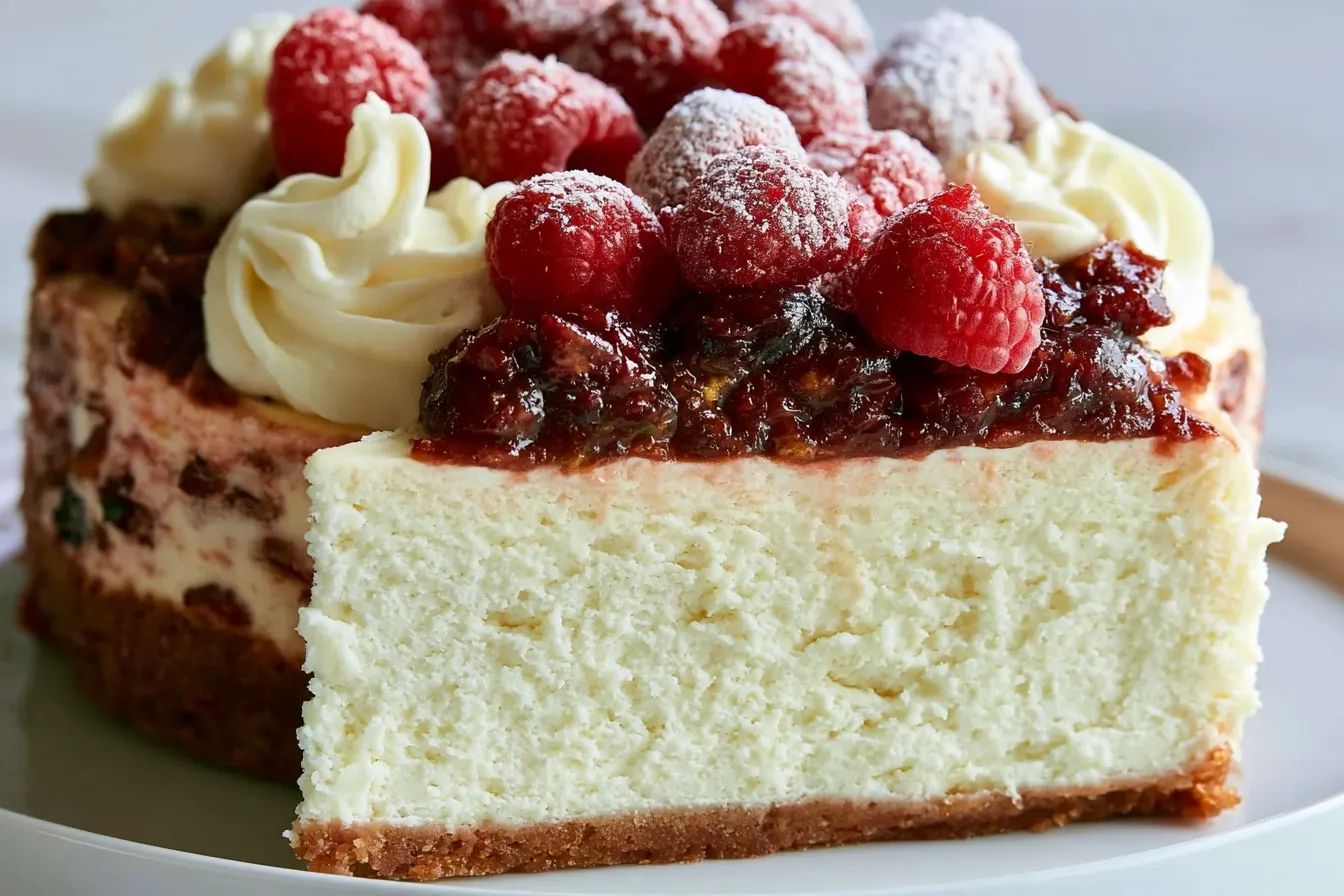
Ever wondered why cheesecake gets such a phenomenal reaction at every gathering? There’s just something about that ultra-creamy, melt-in-your-mouth texture that makes a classic New York cheesecake utterly irresistible. It’s rich, it’s decadent, and when done right, it truly makes you forget about all other desserts.
Contents

The Anatomy of an Epic Cheesecake
Let’s be real, many cheesecake recipes promise the moon and deliver… well, a perfectly fine dessert. But we’re aiming for *epic* here. What exactly makes this classic New York cheesecake stand head and shoulders above the rest? It boils down to a few critical elements, honed over years in my own kitchen. First, the cream cheese. We’re talking full-fat, brick-style cream cheese. No tubs, no low-fat nonsense. This is where that signature richness and density truly begin. Softening it correctly is paramount; cold cream cheese leads to lumps, and nobody wants lumpy cheesecake. Then there’s the sour cream. This might seem like a small addition, but it’s a game-changer. It introduces a subtle tang that brightens the entire profile, preventing the cheesecake from becoming overly sweet or cloying. It also contributes to that incredibly smooth, almost custard-like texture that defines a truly great cheesecake. Finally, the baking method. We’re using a water bath, and while it might sound intimidating, it’s actually your best friend in preventing cracks and ensuring an even, gentle bake. It creates a humid environment in your oven, allowing the cheesecake to cook slowly and uniformly, resulting in that dreamy, silken consistency. Trust me, it’s worth the extra step.What You’ll Need: Gathering Your Ingredients
Getting your ingredients ready and at the right temperature is half the battle won when it comes to baking a perfect classic New York cheesecake. Think of it as mise en place for success.
For the Graham Cracker Crust:
- 1 ½ cups graham cracker crumbs (about 10-12 full sheets)
- ¼ cup granulated sugar
- ½ cup unsalted butter, melted
- Pinch of salt
For the Cheesecake Filling:
- 32 ounces (four 8-ounce packages) full-fat cream cheese, softened to room temperature
- 1 ½ cups granulated sugar
- ¼ cup all-purpose flour
- 1 teaspoon pure vanilla extract
- ½ teaspoon fresh lemon zest (optional, but highly recommended)
- ¼ teaspoon salt
- 1 cup full-fat sour cream, at room temperature
- 4 large eggs, at room temperature
For the Sour Cream Topping (Optional, but Divine):
- 1 cup full-fat sour cream
- 2 tablespoons granulated sugar
- 1 teaspoon pure vanilla extract
Crafting Your Masterpiece: Step-by-Step Baking
Baking a cheesecake is more about patience and technique than sheer difficulty. Follow these steps, and you’ll be rewarded with a show-stopping dessert.Step 1: Prepare Your Crust
Preheat your oven to 350°F (175°C). In a medium bowl, combine the graham cracker crumbs, granulated sugar, melted butter, and a pinch of salt. Mix until thoroughly combined and the crumbs are evenly moistened. Press the mixture firmly and evenly into the bottom of a 9-inch springform pan. You can use the bottom of a glass or a flat measuring cup to get it really compact. Bake for 10 minutes, then remove from the oven and let cool slightly while you prepare the filling. Reduce oven temperature to 325°F (160°C).Step 2: Get Ready for the Water Bath
Wrap the outside of your springform pan tightly with several layers of heavy-duty aluminum foil. Make sure it’s completely sealed to prevent any water from seeping in. This is crucial for the water bath.Step 3: Mix the Cream Cheese Base
In the bowl of a stand mixer fitted with the paddle attachment, or with a large bowl and a hand mixer, beat the softened cream cheese on medium-low speed until smooth and creamy, about 2-3 minutes. Scrape down the sides of the bowl frequently. Add the granulated sugar, flour, vanilla extract, lemon zest (if using), and salt. Beat on low speed until just combined and no lumps remain. Don’t overmix! Overmixing at this stage can incorporate too much air, which can lead to cracks.Step 4: Incorporate Remaining Wet Ingredients
Stir in the sour cream until just combined. Then, add the eggs one at a time, beating on low speed only until each egg is incorporated before adding the next. Again, do not overmix. The batter should be smooth and luscious.
Step 5: Bake the Cheesecake
Pour the cheesecake filling over the cooled graham cracker crust in the foil-wrapped springform pan. Place the springform pan inside a larger roasting pan. Carefully pour hot water into the roasting pan, ensuring it comes about halfway up the sides of the springform pan. Carefully transfer the roasting pan to your preheated 325°F (160°C) oven. Bake for 60-75 minutes, or until the edges are set but the center still has a slight wobble when gently shaken. Tip: Resist the urge to open the oven door frequently! Each time you do, you lose heat and humidity, which can contribute to cracking. Peek through the oven window if you must check on it.Step 6: Cool and Chill
Once baked, turn off the oven but leave the cheesecake in the water bath inside the oven with the door ajar for 1 hour. This slow cooling helps prevent cracks. After an hour, carefully remove the springform pan from the water bath and remove the foil. Let it cool completely on a wire rack at room temperature for another 1-2 hours. Once at room temperature, cover loosely with plastic wrap and refrigerate for at least 6 hours, or preferably overnight, before serving. Chilling is essential for the cheesecake to fully set and achieve its perfect texture.Step 7: Prepare the Sour Cream Topping (Optional)
If you’re making the topping, whisk together the sour cream, granulated sugar, and vanilla extract in a small bowl until smooth. Once the cheesecake is fully chilled, spread this topping evenly over the surface of the cheesecake before serving.Troubleshooting Your Cheesecake: Common Questions Answered
Even seasoned bakers have questions about cheesecake. Here are some of the most common dilemmas and their solutions to help you achieve cheesecake perfection every time.Why did my cheesecake crack?
Cracks are usually caused by rapid temperature changes or overbaking. Overmixing the batter can also incorporate too much air, which then expands and contracts, leading to cracks. The water bath helps immensely by providing a moist, even heat, and slowly cooling the cheesecake in the oven also helps prevent sudden temperature shifts. Make sure your ingredients are at room temperature to avoid overmixing.Can I make this cheesecake ahead of time?
Absolutely! Cheesecake is an excellent make-ahead dessert. In fact, it tastes even better the next day after the flavors have had a chance to meld and the texture has fully set. You can prepare it 1-2 days in advance, cover it tightly (without the topping if using), and store it in the refrigerator. Add the sour cream topping just before serving.What if I don’t have a springform pan?
While a springform pan is ideal for its easy release, you can make this in a regular 9-inch round cake pan. Line the bottom and sides with parchment paper, leaving an overhang to help lift the cheesecake out once cooled. It might be a bit trickier to remove cleanly, but it’s definitely doable. Make sure to still use the foil wrap and water bath.How do I know when the cheesecake is done baking?
The key is to look for a set perimeter with a slight wobble in the very center. If the entire cheesecake is firm, it’s likely overbaked. The residual heat will continue to cook the center as it cools. Trust the wobble!Can I freeze leftover cheesecake?
Yes, cheesecake freezes beautifully. Once fully chilled, you can slice it into individual portions or freeze it whole (without the sour cream topping). Wrap slices tightly in plastic wrap, then a layer of foil. For a whole cheesecake, chill until firm, then wrap several layers of plastic wrap and foil. It will keep in the freezer for up to 1 month. Thaw in the refrigerator overnight before serving.Perfect Pairings and Serving Suggestions
A classic New York cheesecake is incredible on its own, but a few simple additions can elevate the experience even further. Think of it as painting the perfect picture – the cheesecake is the canvas, and these are your accent colors. Fresh berries, particularly strawberries, raspberries, or blueberries, are a natural companion. Their bright acidity and freshness cut through the richness of the cheesecake beautifully. A simple berry compote, gently warmed, is also a fantastic choice. For a touch of decadence, a drizzle of homemade caramel sauce or a rich chocolate ganache can transform each slice. A sprinkle of toasted pecans or candied walnuts adds a lovely textural contrast. And don’t forget the coffee! A strong espresso or a robust dark roast is the ideal beverage to accompany a slice of this creamy delight. For an after-dinner treat, a glass of dessert wine, like a late-harvest Riesling or a rich Port, would be absolutely divine.Storage and Reheating (Not Really!)
Cheesecake doesn’t really “reheat” in the traditional sense, as it’s meant to be served chilled. However, proper storage is key to maintaining its exquisite texture and flavor. Once baked and cooled, any leftover cheesecake should be stored in an airtight container in the refrigerator. If you don’t have an airtight container large enough, cover the entire springform pan loosely with plastic wrap, being careful not to let the plastic touch the surface of the cheesecake if it has a topping. It will keep beautifully for up to 5-7 days. If you’ve added a fresh fruit topping, it’s best to add that just before serving individual slices, as the fruit can weep and make the topping soggy over time. For the sour cream topping, it holds up well when stored with the cheesecake. Remember, the colder the cheesecake, the cleaner the slice. Use a sharp knife, and for extra clean cuts, run the knife under hot water and wipe it dry between each slice.
Classic New York Cheesecake
Indulge in an ultra-creamy, melt-in-your-mouth Classic New York Cheesecake with a graham cracker crust and optional sour cream topping.
📝 Ingredients
👩🍳 Instructions
- 1Preheat oven to 350°F (175°C). In a medium bowl, combine graham cracker crumbs, ¼ cup sugar, melted butter, and a pinch of salt. Press firmly into a 9-inch springform pan. Bake for 10 minutes, then remove and cool slightly. Reduce oven temperature to 325°F (160°C).
- 2Wrap the outside of the springform pan tightly with several layers of heavy-duty aluminum foil to prevent water seepage during the water bath.
- 3In a stand mixer with the paddle attachment, beat softened cream cheese on medium-low until smooth, 2-3 minutes. Scrape bowl. Add 1½ cups sugar, flour, 1 tsp vanilla, lemon zest (if using), and ¼ tsp salt. Beat on low until just combined and lump-free, avoiding overmixing.
- 4Stir in 1 cup sour cream until just combined. Add eggs one at a time, beating on low speed only until each is incorporated.
- 5Pour filling into the prepared crust. Place the springform pan inside a larger roasting pan. Carefully pour hot water into the roasting pan, coming halfway up the sides of the springform pan. Transfer to the preheated 325°F (160°C) oven.
- 6Bake for 60-75 minutes, until edges are set but the center still has a slight wobble. Turn off the oven, leave the cheesecake in the water bath with the oven door ajar for 1 hour.
- 7Remove from water bath and foil. Cool completely on a wire rack (1-2 hours). Cover loosely and refrigerate for at least 6 hours, or overnight.
- 8If using topping: Whisk 1 cup sour cream, 2 tbsp sugar, and 1 tsp vanilla. Spread over chilled cheesecake just before serving.
💡 Notes
Ensure all dairy and eggs are at room temperature for the smoothest filling. A water bath is crucial for preventing cracks. For clean slices, use a hot, wiped knife between cuts. Store leftovers in the refrigerator for up to 5-7 days.
🥗 Nutrition (per serving)
Calories 480 kcal
Protein 9g
Total Fat 32g
Saturated Fat 19g
Carbs 40g
Fiber 1g
Sugar 30g
Sodium 280mg
Cholesterol 160mg
Rate This Recipe
☆ ☆ ☆ ☆ ☆



