


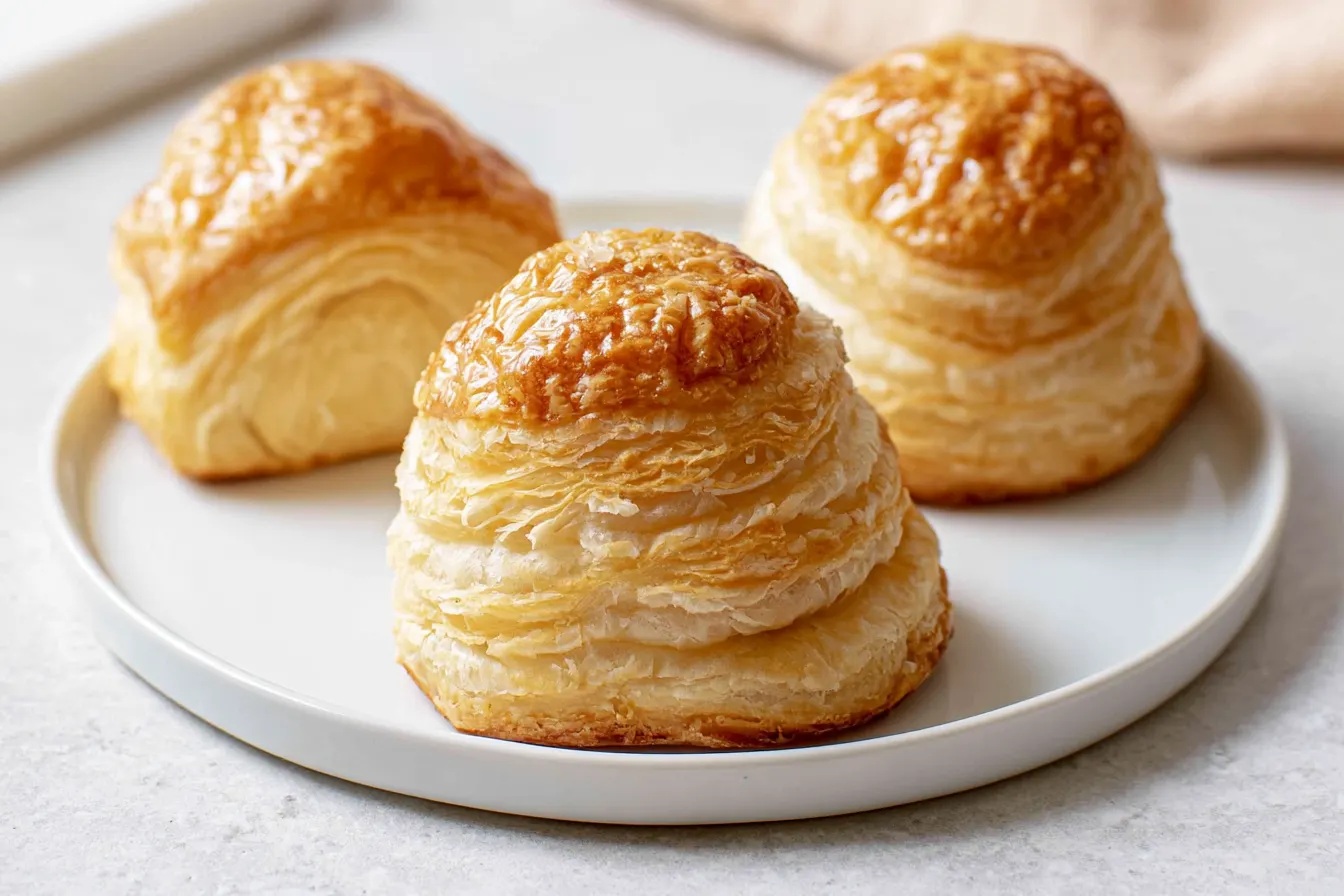
There’s a certain sound in the kitchen that always makes me smile: the gentle rustle of a perfectly baked croissant, or the delicate shatter of a palmiers cookie. That sound, my friends, is the sound of layers – hundreds of impossibly thin, buttery, flaky layers. It’s the sound of traditional French puff pastry, or Pâte Feuilletée as the French so eloquently call it. For years, I’d admire it from afar, thinking it was an alchemy best left to patisserie chefs with years of training. But then, a rainy weekend and a sudden urge for something truly special hit, and I decided it was time to demystify this culinary marvel.
- Why Bother Making It Yourself? The Untapped Potential of Homemade Puff Pastry
- The Simple Ingredients for a Grand Result
- The Art of Lamination: Crafting Your Puff Pastry
- Common Pitfalls and How to Dodge Them
- Frequently Asked Questions About Pâte Feuilletée
- Storage and Freezing Your Flaky Masterpiece
- Beyond the Basics: Using Your Homemade Puff Pastry
The truth is, making puff pastry from scratch isn’t difficult in the way that, say, molecular gastronomy is difficult. It’s more about patience and precision than complex techniques. It’s a rhythmic dance of rolling, folding, and chilling. Each turn of the dough builds anticipation, promising a golden, ethereal result that store-bought versions simply can’t replicate.
If you’ve ever found yourself staring wistfully at a perfectly puffed vol-au-vent or a gleaming mille-feuille, wondering how such delicate architecture comes to be, you’re in the right place. This isn’t just a recipe; it’s an invitation to embark on a rewarding baking journey that will elevate your dessert game and impress anyone lucky enough to taste your creations.

Why Bother Making It Yourself? The Untapped Potential of Homemade Puff Pastry
I get it. The supermarket freezer aisle beckons with its convenient, pre-rolled sheets of puff pastry. And don’t get me wrong, they have their place for quick weeknight tarts or emergency appetizers. But there’s a chasm, a vast, delicious chasm, between that and the genuine article. Homemade traditional French puff pastry offers a depth of flavor, a crispness, and a melt-in-your-mouth tenderness that’s simply unparalleled.
The difference lies in the butter, for one. When you make it yourself, you control the quality. High-fat, European-style butter is your best friend here, contributing to an incredibly rich taste and a superior flakiness. Beyond that, the sheer number of ultra-thin layers you achieve through careful laminating creates an airy texture that practically dissolves on the tongue. It’s an experience, not just an ingredient.
Think of it this way: would you compare a freeze-dried coffee granule to a perfectly brewed espresso? Probably not. The same principle applies to puff pastry. Once you taste the real deal, there’s no going back. Plus, the satisfaction of creating something so elegant from just flour, water, salt, and butter? Priceless.
The Simple Ingredients for a Grand Result
You’ll be surprised at how few ingredients are required to create something so magnificent. The magic truly happens through the technique rather than a long list of exotic items. Quality, however, is key. Seek out good butter!
For the Détrempe (The Base Dough):
- 2 cups (240g) All-Purpose Flour: Unbleached is often preferred for its slightly higher protein content, which lends strength to the dough.
- 1 teaspoon (6g) Fine Sea Salt: Crucial for flavor. Don’t skip it!
- ¾ cup (180ml) Ice Water: Keeping the dough cold is paramount to prevent the butter from melting prematurely.
For the Beurre Manié (The Butter Block):
- 1 ½ cups (340g) Unsalted European-Style Butter: This is the star. European butter typically has a higher fat content (82%+) which makes it more pliable and less prone to breaking during rolling, leading to better layers.
- ¼ cup (30g) All-Purpose Flour: Mixed with the butter, this helps stabilize the butter block and makes it easier to work with.

The Art of Lamination: Crafting Your Puff Pastry
Lamination is the heart of puff pastry. It’s the process of repeatedly folding and rolling the butter into the dough, creating hundreds of distinct, paper-thin layers. Each “turn” is a set of folds that multiplies these layers. We’ll be doing six single turns.
Step 1: Preparing the Détrempe
- In a large bowl, whisk together the flour and salt.
- Gradually add the ice water, mixing with your hands or a Danish dough whisk until a shaggy dough forms. Be careful not to overmix; we want minimal gluten development at this stage.
- Gather the dough into a ball, flatten it slightly into a disc, wrap tightly in plastic wrap, and refrigerate for at least 30 minutes, or up to 2 hours. This allows the flour to fully hydrate and the gluten to relax.
Step 2: Crafting the Beurre Manié
- While the détrempe chills, prepare your butter block. Cut the cold butter into ½-inch cubes.
- In a medium bowl, combine the butter cubes with the ¼ cup of flour. Using your hands, a stand mixer with a paddle attachment, or even a food processor (pulse carefully!), mix until the butter and flour are thoroughly combined and form a pliable, homogenous mass. It should be firm but moldable, like cold playdough.
- Form the butter mixture into an 8×8 inch square (or roughly 8×8 inches, it doesn’t have to be perfect). You can do this by patting it between two sheets of parchment paper or by using a rolling pin. Refrigerate for 20-30 minutes until firm but still pliable.
Step 3: Encasing the Butter (The First Fold)
- On a lightly floured surface, roll out the chilled détrempe into a 12×12 inch square. Aim for even thickness.
- Place the chilled butter block diagonally in the center of the dough square, like a diamond. The corners of the butter block should point towards the middle of each side of the dough square.
- Fold each corner of the dough over the butter block, bringing them to the center to completely enclose the butter. Pinch the seams together firmly to seal. You should now have a neat package with the butter fully enclosed.

Step 4: The First Turn (and the Rhythm of Lamination)
- Lightly flour your work surface and the top of the dough package. Gently roll the dough into a rectangle, about 18-20 inches long and 8-10 inches wide. The key is to roll evenly and consistently, applying pressure to stretch the dough without tearing it.
- The Single Turn: Fold the dough into thirds, like a business letter. Bring one end of the rectangle about two-thirds of the way down, then fold the remaining third over that. You should have three distinct layers.
Tip: Always brush off excess flour before folding to prevent it from getting incorporated into the layers, which can make the pastry tough. - Rotate the folded dough 90 degrees (so the open seam is on your right or left). Wrap it tightly in plastic wrap and refrigerate for at least 30 minutes. This chilling time is critical; it allows the gluten to relax and the butter to firm up, preventing it from oozing out during the next roll.
Step 5: Repeating the Turns (The Patience Game)
You need to complete a total of six single turns. After each turn, you’ll repeat the process from Step 4:
- Remove the dough from the fridge.
- Lightly flour your surface and the dough.
- Roll the dough out into an 18-20×8-10 inch rectangle.
- Perform a single turn (fold into thirds).
- Brush off excess flour, rotate 90 degrees, wrap tightly, and refrigerate for another 30 minutes.
Keep track of your turns! Some bakers gently press an indentation with their finger into the dough after each turn (e.g., one indentation for the first turn, two for the second, etc.) or keep a small tally on a sticky note. After the sixth turn, your traditional French puff pastry is ready to be used or stored.
Common Pitfalls and How to Dodge Them
Even experienced bakers can stumble with puff pastry. It’s a delicate dance, but understanding common missteps can save you a lot of grief (and butter!).
Butter Leaking Out
This is perhaps the most common issue. It usually happens if your butter block is too soft, or if your dough isn’t cold enough. If you see butter starting to ooze, stop immediately, re-wrap the dough, and pop it back in the fridge for a good 20-30 minutes. Ensure your kitchen isn’t too warm, and work quickly. Also, make sure your initial butter enclosure in Step 3 is well-sealed.
Uneven Layers
If your final product doesn’t puff evenly, it’s often due to inconsistent rolling. Try to apply even pressure across the dough when rolling, and aim for a uniform thickness at each stage. Lumpy dough will lead to lumpy layers. Rolling too aggressively or letting the butter get too warm can also cause layers to merge.
Tough Pastry
Overworking the dough, especially the détrempe, can lead to excessive gluten development, resulting in a tough rather than flaky pastry. Be gentle when mixing the initial dough and avoid stretching it too much during rolling. Also, ensure you’re letting the dough rest adequately between turns to relax the gluten.
Not Puffing Enough
This can be a combination of issues: not enough layers (missed a turn?), butter that was too soft and integrated into the dough rather than remaining distinct, or not baking at a high enough temperature. Puff pastry needs a blast of high heat initially to create that steam explosion that separates the layers.
Frequently Asked Questions About Pâte Feuilletée
Can I use regular unsalted butter instead of European-style?
You can, but the results won’t be quite as spectacular. European-style butter has a higher fat content (around 82-84% compared to 80% for American butter) and less water, which makes it more pliable, less likely to crack during rolling, and results in a richer flavor and better rise. If you use regular butter, you might find it harder to work with and your layers might not be as pronounced.
How long does homemade puff pastry last?
Freshly made puff pastry can be stored in the refrigerator, tightly wrapped, for up to 3 days. For longer storage, it freezes beautifully. Wrap it very well in plastic wrap, then a layer of foil, and it will keep in the freezer for up to 3 months. Thaw overnight in the refrigerator before using.
What’s the best way to roll out the dough without sticking?
A lightly floured surface is key, but don’t overdo it. Too much flour will dry out the dough and can make it tough. A pastry cloth or silicone mat can also be helpful. If the dough starts to stick, gently lift it and add a tiny sprinkle of flour underneath. Keep your rolling pin floured too.
What temperature should I bake puff pastry at?
Generally, puff pastry bakes best at a relatively high temperature, usually between 400-425°F (200-220°C). The initial high heat creates a burst of steam from the water in the butter and dough, which forces the layers apart and creates the characteristic puff. After 10-15 minutes, you can sometimes reduce the temperature slightly to ensure even cooking without burning the exterior.
Can I make puff pastry by hand, or do I need special equipment?
Absolutely, you can make it entirely by hand! In fact, many purists prefer it. All you need is a good rolling pin, a clean, cool work surface, and a bit of arm strength. A stand mixer can help with the initial mixing of the détrempe and beurre manié, but it’s not essential. Patience and a cool hand are your best tools.
Storage and Freezing Your Flaky Masterpiece
Congratulations, you’ve made traditional French puff pastry! Now what? Proper storage ensures your hard work pays off when you’re ready to bake.
Refrigeration
Once you’ve completed all six turns, you can use the dough immediately. However, if you’re not ready, wrap the block of dough tightly in several layers of plastic wrap. This prevents it from drying out and absorbing fridge odors. Store it in the coldest part of your refrigerator for up to 3 days.
Freezing for Later
Puff pastry freezes beautifully. After wrapping it in plastic wrap, add an additional layer of aluminum foil for extra protection against freezer burn. Label it with the date. It will keep well in the freezer for up to 3 months.
Thawing Frozen Puff Pastry
When you’re ready to use it, transfer the frozen pastry to the refrigerator and let it thaw slowly overnight. Avoid thawing at room temperature, as this can make the butter too soft and compromise the layers. Once thawed, handle it as you would fresh dough.
Beyond the Basics: Using Your Homemade Puff Pastry
Now that you have this incredible ingredient at your fingertips, the possibilities are endless. Forget those bland frozen sheets; your homemade puff pastry is ready to truly shine.
Sweet Delights
- Mille-feuille: Layer baked puff pastry sheets with crème pâtissière and fresh fruit for an iconic French dessert.
- Palmiers: Simply roll out the dough, sprinkle with sugar, fold, slice, and bake for delicate, crispy “elephant ears.”
- Apple Tarts: A simple square of pastry, topped with thinly sliced apples, a sprinkle of sugar, and cinnamon.
- Turnovers: Fill with fruit compote, chocolate, or a sweet cheese mixture.
Savory Applications
- Vol-au-vents: Small, hollow puff pastry cases perfect for creamy savory fillings like chicken à la king or mushroom ragout.
- Sausage Rolls: Wrap quality sausage meat in strips of pastry for a comforting snack or appetizer.
- Beef Wellington: The ultimate showstopper, encasing tender beef with duxelles in a golden pastry crust.
- Savory Tarts: Top with caramelized onions, goat cheese, tomatoes, or a medley of roasted vegetables.
The beauty of traditional French puff pastry is its versatility. It’s a blank canvas for both sweet and savory creations, and once you master the technique, you’ll find yourself reaching for it again and again. So, go on, give it a try. Your taste buds (and your dinner guests) will thank you!

Traditional French Puff Pastry (Pâte Feuilletée)
Master the art of traditional French puff pastry from scratch – a flaky, buttery base for countless sweet and savory delights.
📝 Ingredients
👩🍳 Instructions
- 1Prepare the Détrempe: In a large bowl, whisk together 2 cups flour and salt. Gradually add ice water, mixing until a shaggy dough forms. Do not overmix. Gather into a disc, wrap tightly in plastic, and refrigerate for 30 minutes to 2 hours.
- 2Prepare the Beurre Manié: Cut cold butter into ½-inch cubes. In a medium bowl, combine butter with ¼ cup flour. Mix until thoroughly combined and pliable. Form into an 8x8 inch square between parchment paper. Refrigerate for 20-30 minutes.
- 3Enclose the Butter: On a lightly floured surface, roll out the chilled détrempe into a 12x12 inch square. Place the butter block diagonally in the center. Fold each corner of the dough over the butter, pinching seams firmly to seal completely.
- 4First Turn: Lightly flour work surface and dough. Roll the dough package into an 18-20 inch long, 8-10 inch wide rectangle. Fold the dough into thirds, like a business letter. Brush off excess flour. Rotate 90 degrees, wrap tightly, and refrigerate for 30 minutes.
- 5Repeat Turns: Repeat step 4 five more times, for a total of six single turns. After each turn, ensure the dough is rolled evenly, folded neatly, excess flour is brushed off, and it's chilled for 30 minutes before the next turn. Keep track of your turns! After the sixth turn, the puff pastry is ready to use or store.
💡 Notes
Always use cold ingredients and work in a cool kitchen. If the butter starts to leak or dough becomes too soft, stop and chill immediately. The quality of your butter significantly impacts the final flakiness and flavor. This recipe makes approximately 1.5 lbs of puff pastry dough.



