


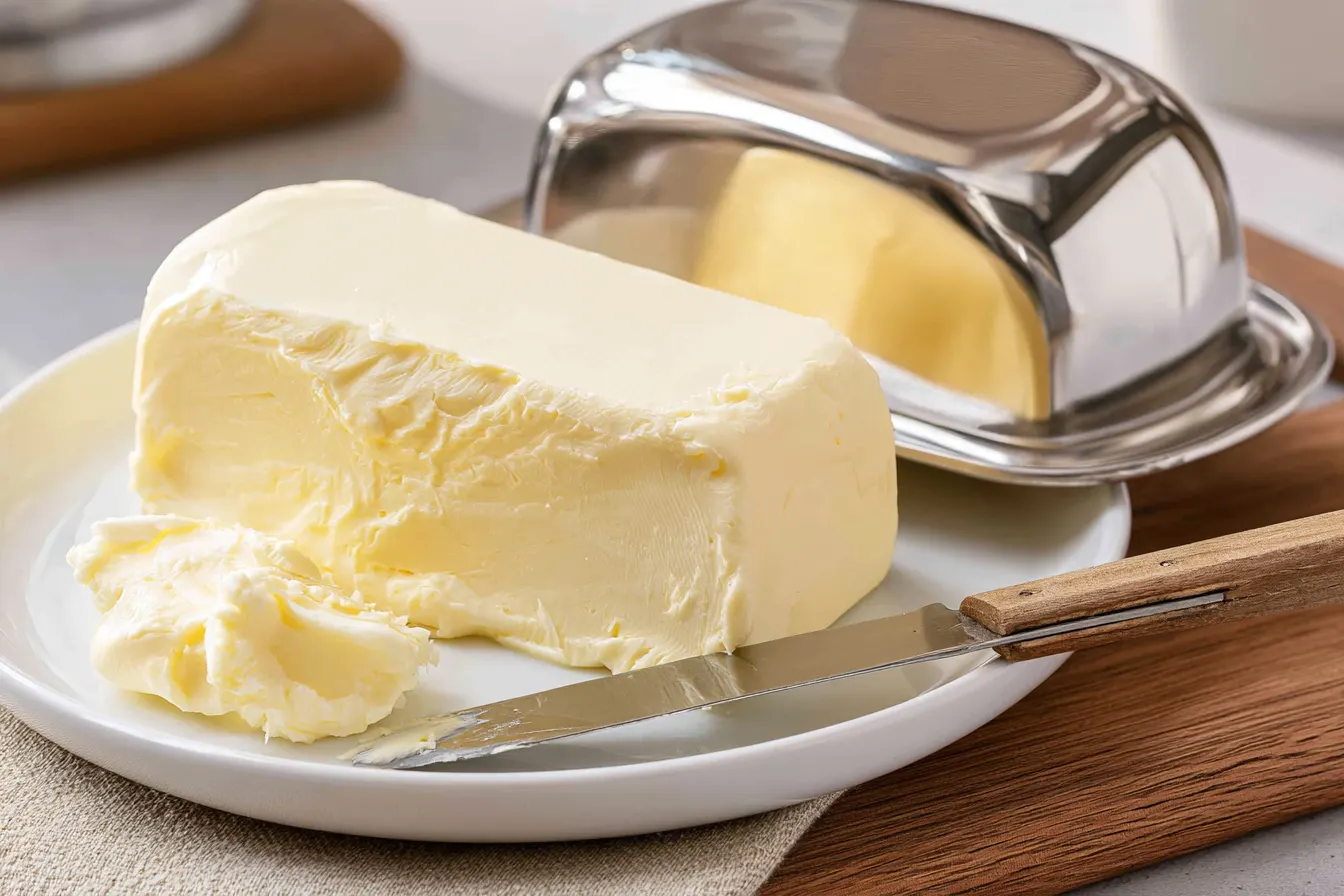
There’s a sound I love, a rhythmic thumping and splashing that fills my kitchen on a quiet afternoon. It’s the sound of cream transforming, morphing from a liquid luxury into something even more magical: fresh, homemade butter. If you’ve never experienced the joy of spreading your own golden, velvety butter on a warm piece of toast, you’re truly missing out on a simple pleasure that elevates everyday eating.
- Just One Ingredient? Unlocking the Secret to Amazing Butter
- Gear Up: Tools You’ll Need (and a Few You Won’t!)
- Understanding the Transformation: From Cream to Butter
- Five Fantastic Ways to Make Butter at Home
- The Crucial Step: Washing Your Homemade Butter
- Flavoring Your Fresh Batch: Salted vs. Unsalted
- Storing Your Homemade Goodness
- What to Do with All That Buttermilk
- Common Butter-Making Hiccups & Solutions
- Frequently Asked Questions About Homemade Butter

Just One Ingredient? Unlocking the Secret to Amazing Butter
It really does start with just one ingredient: heavy cream. But not just any heavy cream. To achieve that beautiful golden hue and rich, creamy texture, you’ll want to seek out the highest quality heavy cream you can find. Look for cream with a high fat content, ideally 36% or more. Pastured cream, if you can find it, will yield butter with a more vibrant color and deeper flavor, thanks to the cows’ diets. It truly makes a noticeable difference in the final product. Think about it: the butter in your grocery store has traveled, been processed, and often sits for a while. Making it yourself means you’re getting the freshest possible version, free from any additives or preservatives. It’s a pure, unadulterated taste of dairy goodness.Gear Up: Tools You’ll Need (and a Few You Won’t!)
One of the best parts about learning how to make butter at home is how few specialized tools are required. Chances are, you already own most of what you’ll need.The Essentials:
- Heavy Cream: As mentioned, the star of the show. Aim for at least 1 pint (2 cups) to get a decent yield.
- Large Bowl: For containing splashes and providing space for the cream to expand.
- Fine-Mesh Sieve or Colander: Essential for separating the buttermilk from the butter solids.
- Spatula or Wooden Spoon: For pressing and working the butter.
- Ice Water: Crucial for washing the butter and firming it up.
- Pinch of Salt (Optional): For flavor, if you prefer salted butter.
Method-Specific Tools:
Depending on which of the five methods you choose, you might need one of these:
- Stand Mixer: With a whisk attachment. This is my go-to for ease and speed.
- Hand Mixer: A good alternative if you don’t have a stand mixer.
- Food Processor: Surprisingly effective and very fast.
- Mason Jar with a Tight Lid: For the most hands-on, old-fashioned (and fun!) method.
- Immersion Blender: Another surprisingly quick and effective tool.
Understanding the Transformation: From Cream to Butter
Before we dive into the methods, let’s briefly touch on what’s happening. Cream is an emulsion of fat globules suspended in water. When you agitate cream, you’re essentially beating these fat globules until their protective membranes break down. They then cling together, forming solid butterfat, and separate from the liquid, which is the buttermilk. This process involves several stages:- Whipped Cream: Initially, the cream will fluff up into soft, then stiff, peaks. Keep going!
- Grainy/Curdled Stage: The whipped cream will start to look a little broken, separating into yellowish clumps and clear liquid. Don’t panic; you’re almost there.
- Butter & Buttermilk Separation: Suddenly, it will “break.” The solid butterfat will clump together, leaving a distinct pool of liquid buttermilk.

Five Fantastic Ways to Make Butter at Home
Here are my favorite methods, ranging from hands-on and meditative to quick and effortless. Each one yields delicious, fresh butter.1. The Stand Mixer Method (My Personal Favorite)
This is the least labor-intensive and most consistent method, perfect for making larger batches.
How to Do It:
- Pour the Cream: Add 2 cups of cold heavy cream to the bowl of your stand mixer.
- Whip it Up: Attach the whisk attachment and begin mixing on medium-low speed. The cream will gradually thicken.
- Increase Speed: Once it’s thick, increase the speed to medium-high. You’ll see it turn into whipped cream, then become more solid and yellow.
- Watch for the Break: Keep mixing! Eventually, the mixture will “break,” and butter solids will clump together, separating from the buttermilk. This usually takes 5-10 minutes from start to finish.
- Collect the Butter: Pour the contents of the bowl into a fine-mesh sieve set over another bowl to catch the buttermilk.
2. The Hand Mixer Method (A Great Alternative)
Similar to the stand mixer, but you’ll be holding the mixer yourself. It’s still quite efficient!
How to Do It:
- Cream in a Deep Bowl: Pour 2 cups of cold heavy cream into a deep bowl to minimize splatters.
- Whip Away: Use your hand mixer with whisk attachments on medium-high speed.
- Follow the Stages: Just like with the stand mixer, you’ll go through whipped cream and then the grainy stage before the butter separates from the buttermilk. This might take a little longer, perhaps 8-15 minutes.
- Separate: Once the butter forms, pour through a sieve to collect the solids and the liquid.
3. The Food Processor Method (Surprisingly Speedy)
If you have a powerful food processor, this can be incredibly fast, often just a few minutes!
How to Do It:
- Process the Cream: Pour 1-2 cups of cold heavy cream into your food processor fitted with the S-blade.
- Pulse and Process: Pulse a few times, then process continuously. The cream will thicken quickly, almost instantly forming whipped cream.
- Keep Going: Continue processing. It will seem like it’s taking forever to break, but then it will happen suddenly. The butter will form large clumps, and the buttermilk will slosh around.
- Drain and Collect: Immediately turn off the processor and pour the contents into a sieve.
4. The Mason Jar Method (Fun and Kid-Friendly)
This is the most “manual” method but also incredibly satisfying. It’s a fantastic activity for kids!
How to Do It:
- Fill the Jar: Pour 1 cup of cold heavy cream into a clean, pint-sized Mason jar. Don’t fill it more than halfway, as you need room for agitation.
- Shake, Shake, Shake: Screw the lid on TIGHTLY. Now, shake the jar vigorously. You’re aiming for a strong, continuous motion.
- Observe the Changes: After a few minutes, you’ll have whipped cream. Keep shaking! It will eventually become grainy and then separate. This can take anywhere from 10-25 minutes, depending on your vigor.
- Retrieve the Butter: Once the butter forms a solid ball, open the jar and pour the buttermilk into a separate container.
5. The Immersion Blender Method (Unexpectedly Simple)
A great option if you don’t have a stand mixer or food processor but own an immersion blender.
How to Do It:
- Deep Container: Pour 1-2 cups of cold heavy cream into a tall, narrow container (like a measuring cup or a jar) where your immersion blender can operate without too much splashing.
- Blend it Up: Place the immersion blender into the cream, making sure the head is fully submerged. Start blending on high speed.
- Watch it Transform: The cream will quickly thicken into whipped cream. Keep blending steadily. It will start to look lumpy and then, with surprising speed, break into butter and buttermilk.
- Separate: Once separated, turn off the blender and pour the mixture through a sieve.

The Crucial Step: Washing Your Homemade Butter
This step is non-negotiable for good-quality, long-lasting butter. Washing removes residual buttermilk, which can cause your butter to spoil quickly.How to Wash Butter:
- Transfer to a Bowl: Place your freshly churned butter solids into a clean bowl.
- Add Ice Water: Pour in a generous amount of very cold ice water, enough to cover the butter.
- Knead and Press: Using a spatula or your clean hands, gently knead and press the butter in the water. You’ll see the water turn cloudy as the buttermilk is released.
- Drain and Repeat: Drain the cloudy water and add fresh ice water. Repeat this process 3-5 times until the water remains clear. This indicates all the buttermilk has been washed out.
- Squeeze Dry: Once washed, press the butter firmly against the side of the bowl with your spatula or hands to squeeze out as much remaining water as possible.
Flavoring Your Fresh Batch: Salted vs. Unsalted
Once your butter is clean and pressed dry, you can choose to salt it or leave it unsalted.For Salted Butter:
Sprinkle about 1/4 to 1/2 teaspoon of fine sea salt per cup of butter (the yield from 2 cups of heavy cream). Use your spatula or hands to thoroughly incorporate the salt. Taste and adjust if necessary. The salt enhances the flavor and acts as a mild preservative.
Storing Your Homemade Goodness
Proper storage ensures your delicious homemade butter stays fresh and flavorful.Short-Term Storage:
Wrap your butter tightly in parchment paper or beeswax wrap, then place it in an airtight container in the refrigerator. It will last for about 1-2 weeks.
Long-Term Storage:
For longer storage, you can freeze homemade butter. Wrap it well in plastic wrap, then an additional layer of foil or freezer bag. It will keep in the freezer for up to 6 months.
What to Do with All That Buttermilk
Don’t discard the buttermilk! This isn’t the cultured buttermilk you buy in stores (which has added bacteria), but it’s fantastic for baking. It’s fresh, tangy, and perfect for many recipes.Ideas for Fresh Buttermilk:
- Pancakes or Waffles: The acidity reacts with baking soda, creating light and fluffy baked goods.
- Biscuits: Creates tender, flaky biscuits.
- Marinades: Tenderizes chicken and other meats.
- Smoothies: Adds a tangy kick.
- Baking Projects: Use it in any recipe that calls for liquid, especially those with baking soda.
Common Butter-Making Hiccups & Solutions
Even though making butter is simple, a few things can go awry. Here’s how to troubleshoot.My Cream Isn’t Turning into Butter!
Possible Causes:
- Cream Temperature: If it’s too warm, it won’t churn effectively. Make sure it’s cold.
- Low-Fat Cream: You need heavy cream, not half-and-half or whipping cream with lower fat content.
- Not Enough Agitation: Keep going! Sometimes it just takes more time and effort.
- Too Much Cream in Jar: If using the Mason jar method, don’t overfill it. You need space for the cream to slosh.
My Butter is Crumbly/Greasy!
Possible Causes:
- Over-churned: While rare with butter, sometimes it can become too warm or overworked.
- Insufficient Washing: If there’s still buttermilk left in the butter, it can affect the texture.
It’s Splattering Everywhere!
Possible Causes:
- Shallow Bowl: Using a bowl that’s too shallow for machine methods.
- Too High Speed Too Soon: Starting with max speed on a stand or hand mixer.
Frequently Asked Questions About Homemade Butter
Got more questions? Here are some common ones I hear about making your own butter.Can I use ultra-pasteurized heavy cream?
While you *can* use ultra-pasteurized cream, it often takes significantly longer to churn and may yield a slightly different texture or flavor compared to regular pasteurized heavy cream. The high heat processing can alter the milk proteins, making it harder for the fat globules to coalesce. I recommend regular pasteurized for best results.
How much butter does 2 cups of heavy cream yield?
Typically, 2 cups (1 pint) of heavy cream will yield about 1/2 to 3/4 cup of butter, plus about 1 to 1 1/4 cups of fresh buttermilk. The exact amount can vary slightly based on the fat content of your cream and how thoroughly you wash and press the butter.
Is homemade butter cheaper than store-bought?
This depends heavily on the price of heavy cream in your area. Sometimes, especially with sales, it can be comparable or even cheaper. However, the real value of homemade butter lies in its superior freshness, flavor, and the satisfaction of making it yourself, rather than purely cost savings.
Can I flavor my butter with herbs or spices?
Absolutely! After washing and salting (if desired), you can mix in fresh chopped herbs like chives, parsley, or dill, minced garlic, a pinch of smoked paprika, or even a touch of honey and cinnamon for a sweet compound butter. Just ensure any additions are finely chopped to distribute evenly.
How can I make cultured butter?
To make cultured butter, you’d start by culturing your heavy cream. Mix 2 cups of heavy cream with 1-2 tablespoons of cultured buttermilk (the store-bought kind with active cultures) or a dairy starter culture. Let it sit at room temperature for 12-24 hours until it thickens and develops a tangy flavor, then proceed with any of the butter-making methods. This yields a more complex, slightly tangy butter, similar to European-style butter.

Homemade Butter (5 Ways)
Learn to make fresh, delicious butter at home with just one ingredient and five easy methods!
📝 Ingredients
👩🍳 Instructions
- 1Choose your method: Stand Mixer, Hand Mixer, Food Processor, Mason Jar, or Immersion Blender.
- 2For Stand Mixer: Pour cream into a stand mixer bowl. Whisk on medium-high speed until it turns into whipped cream, then becomes grainy, and finally separates into butter solids and buttermilk (5-10 minutes).
- 3For Hand Mixer: Pour cream into a deep bowl. Whisk on medium-high speed until butter separates from buttermilk (8-15 minutes).
- 4For Food Processor: Pour cream into the food processor with S-blade. Process continuously until butter separates (3-7 minutes).
- 5For Mason Jar: Pour cream (max halfway) into a pint jar. Shake vigorously until butter separates (10-25 minutes).
- 6For Immersion Blender: Pour cream into a tall, narrow container. Blend on high until butter separates (5-12 minutes).
- 7Once butter has separated, pour the contents through a fine-mesh sieve set over a bowl to collect the buttermilk. Reserve the buttermilk for baking.
- 8Transfer the butter solids to a clean bowl and cover with ice water. Using a spatula or clean hands, knead and press the butter in the water to release residual buttermilk. Drain the cloudy water and repeat 3-5 times until the water runs clear.
- 9Press the washed butter firmly against the sides of the bowl to squeeze out as much water as possible. For salted butter, mix in 1/4 to 1/2 teaspoon of fine sea salt, to taste.
- 10Shape the butter into a log or block, wrap tightly in parchment paper or beeswax wrap, and store in an airtight container in the refrigerator for up to 1-2 weeks, or freeze for up to 6 months.
💡 Notes
Ensure your heavy cream is cold for best results. Use fresh buttermilk in your favorite baking recipes. For flavored butter, incorporate herbs or spices after washing and salting.



