


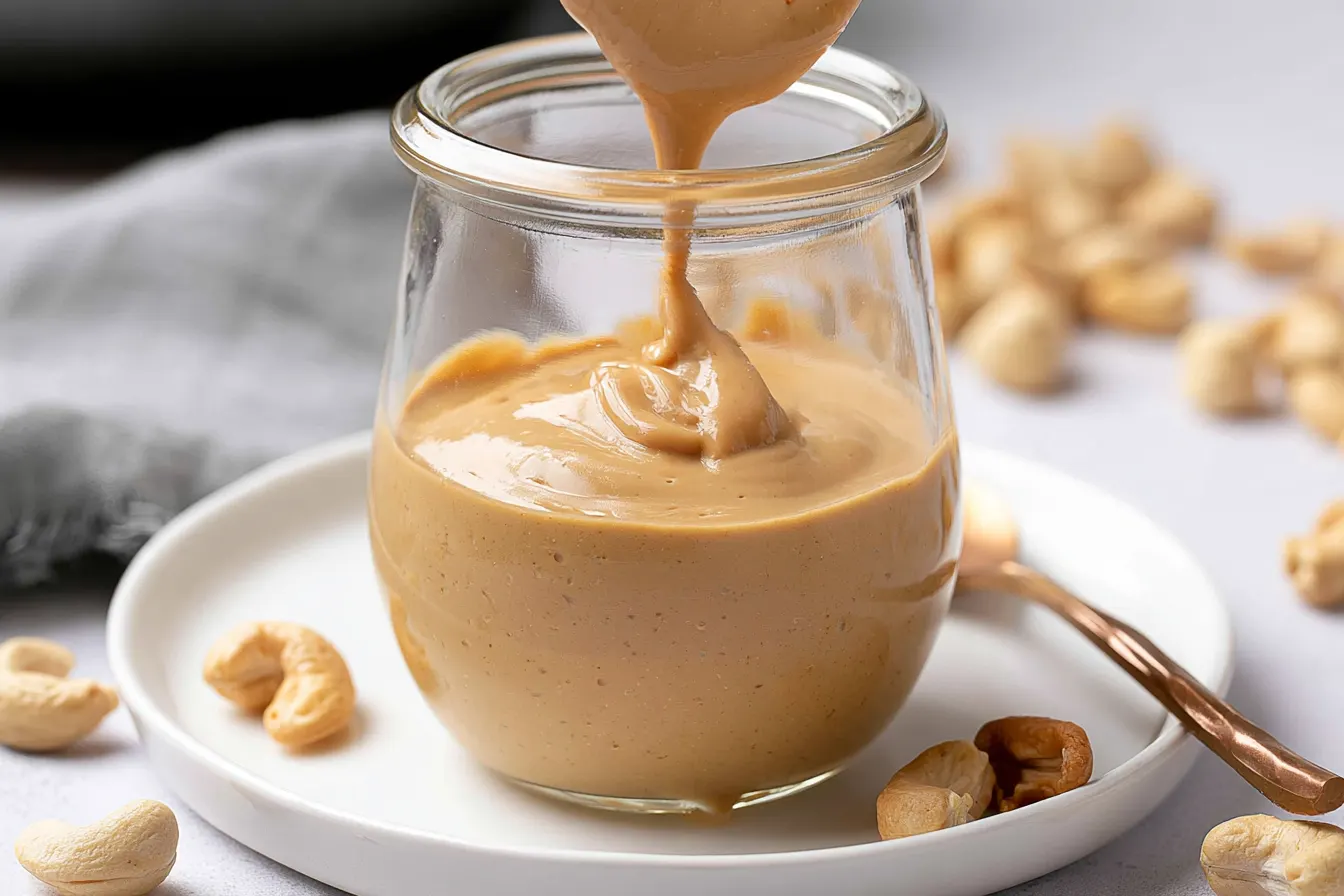
Have you ever stared at the price tag of a jar of gourmet cashew butter in the grocery store and quietly gasped? It’s downright shocking! For something so incredibly simple to make at home, the markup is often astronomical. Today, we’re going to bypass those hefty price tags entirely and learn how to make cashew butter that’s not only more delicious but also ridiculously easy on your wallet.

Just Two Ingredients, Endless Possibilities
You might think creating something so luxurious would require a long list of fancy items, but the beauty of homemade cashew butter lies in its minimalism. You truly only need one core ingredient, with an optional second for a touch of flavor enhancement. It’s a testament to how incredible nature’s pantry really is.The Star of the Show: Raw Cashews
This is where the magic begins. Opt for good quality raw cashews. While roasted cashews can work, raw ones give you more control over the final flavor profile and often yield a smoother butter. Look for whole or large pieces if possible, as they tend to be less broken and processed. Quality Matters: Fresh, plump cashews will always give you the best results. If your cashews seem a bit stale, a quick toast can sometimes revive them, but it’s best to start with fresh nuts. To Salt or Not to Salt: A tiny pinch of sea salt can really amplify the natural sweetness of the cashews. It’s completely optional, but I find it pushes the flavor from “good” to “oh my goodness.” A Hint of Sweetness (Optional): If you like a slightly sweeter nut butter, a touch of maple syrup or a date can be blended in. But honestly, the natural sweetness of cashews is often enough.The Simple Process: From Nut to Creamy Dream
Making your own nut butter is less about complex steps and more about patience and the right equipment. Think of it as a meditation in your kitchen. You’re simply encouraging the cashews to release their natural oils and transform their texture.
Gather Your Tools
You don’t need much, but a good food processor is key. Food Processor: This is non-negotiable. A high-speed blender can also work, but food processors tend to handle the thick consistency better and require less scraping down. Make sure it has a strong motor. Spatula: Essential for scraping down the sides of the food processor bowl. Airtight Jar: For storing your magnificent creation.Step-by-Step Cashew Butter Creation
This is where the transformation happens. It’s pretty magical to watch.1. The Initial Grind: From Hard to Crumbly
Pour your raw cashews into the bowl of your food processor. Secure the lid. Now, turn it on and let it run. At first, you’ll hear a lot of noise as the cashews break down into small pieces. It will look like coarse crumbs, almost like sand. This stage usually takes about 1-2 minutes. Scrape down the sides of the bowl with your spatula.2. The Sticky Phase: A Cashew Paste
Continue processing. The crumbs will start to clump together, forming a thick, sticky paste. It might look like a ball of dough rolling around in your processor. This is a good sign! Keep scraping down the sides as needed to ensure everything gets evenly processed. This stage can take another 2-3 minutes.3. The Creamy Transformation: Oil Release!
This is the most exciting part! As you continue to process, the natural oils from the cashews will begin to release. The thick paste will gradually start to smooth out and thin. It will become noticeably creamier and more liquid. This is where patience truly pays off. Let it run, scraping down the sides every minute or so. You’ll notice the texture changing from a thick mass to a wonderfully pourable, smooth butter. This final stage can take anywhere from 5 to 10 minutes, depending on your food processor’s power. Tip: If your food processor starts to feel very warm, give it a 5-minute break to cool down before continuing. This prevents overheating and prolongs the life of your appliance.4. Season and Store
Once your cashew butter reaches your desired level of smoothness – some like it a little rustic, others prefer it super silken – you can add a tiny pinch of sea salt if you wish. Pulse a few more times to incorporate. Transfer your freshly made cashew butter into a clean, airtight jar. It’s ready to enjoy immediately!
Flavor Twists and Variations
While plain cashew butter is divine on its own, it’s also a fantastic canvas for other flavors. Don’t be afraid to experiment once you’ve mastered the basic recipe!Sweet and Spiced Options
Cinnamon Swirl: Add 1/2 teaspoon of ground cinnamon during the last few minutes of processing for a warm, comforting flavor. Vanilla Bean Dream: Scrape in the seeds from half a vanilla bean (or add 1/2 teaspoon of vanilla extract) for an elegant touch. Maple Pecan: A tablespoon of maple syrup and a handful of toasted pecans blended in can create a decadent spread. Chocolate Hazelnut: Add a tablespoon of cocoa powder and a tablespoon of melted dark chocolate (cooled slightly) for a healthier “Nutella” vibe.Savory Enhancements
Smoked Paprika & Chili: A pinch of smoked paprika and a tiny dash of cayenne pepper can transform it into a savory spread perfect for crackers or a veggie dip. Garlic & Herb: Blend in a small roasted garlic clove and some dried herbs (like rosemary or thyme) for a unique sandwich spread.Common Questions About Homemade Nut Butters
It’s natural to have a few queries when venturing into DIY kitchen projects. Here are some of the most common questions I get about making cashew butter.What if my cashew butter isn’t getting smooth?
Patience is key! The process of breaking down nuts and releasing their oils takes time. Keep running your food processor. It might seem like it’s stuck in the crumbly or pasty stage forever, but eventually, the oils will release. Ensure you’re scraping down the sides regularly to help it along. If your food processor is struggling, a quick 5-minute break might help it reset.Do I need to roast the cashews first?
You don’t *have* to, but roasting cashews can deepen their flavor and sometimes help them release their oils a little faster. If you want to roast them, spread them in a single layer on a baking sheet and bake at 300°F (150°C) for 8-10 minutes, until lightly golden and fragrant. Let them cool completely before processing. I often prefer raw for a milder, creamier taste.How long does homemade cashew butter last?
Stored in an airtight container in the refrigerator, homemade cashew butter will typically last for about 2-3 weeks. Because it doesn’t have any preservatives, it won’t last as long as store-bought varieties. You might notice some oil separation over time; this is normal. Just give it a good stir before using.Can I make cashew butter in a blender?
Yes, you can, especially if you have a high-speed blender. However, blenders often require more liquid to get things moving, and you might need to stop and scrape down the sides more frequently. A food processor is generally the preferred tool for nut butters due to its wider base and better ability to handle thick consistencies.Why is my cashew butter grainy?
Graininess usually means the cashews haven’t been processed long enough. Keep going! The longer you process, the smoother it will become. Sometimes, using a less powerful food processor or one that’s not designed for heavy-duty tasks can result in a slightly grainier texture. Starting with very fresh cashews can also help achieve maximum smoothness.Storage and Shelf Life
Once you’ve made your delicious batch, you’ll want to keep it fresh for as long as possible. Proper storage ensures you can enjoy that creamy goodness for weeks to come.Airtight is Right
The most crucial step is to store your cashew butter in a clean, airtight container. A glass jar with a tight-fitting lid is ideal. This prevents oxidation and keeps unwanted odors from your fridge away from your precious spread.Refrigerator or Pantry?
Because homemade cashew butter contains no preservatives, it’s best stored in the refrigerator. While it might be okay at room temperature for a few days, refrigeration significantly extends its shelf life. It will firm up slightly when chilled, so if you prefer a softer spread, take it out of the fridge 10-15 minutes before you plan to use it.Dealing with Oil Separation
Don’t be alarmed if you see a layer of oil on top of your cashew butter after a few days in the fridge. This is completely natural and a sign that you’re using pure ingredients! Simply give it a good stir with a knife or spoon before each use to reincorporate the oils.Beyond the Toast: Ways to Enjoy Your Homemade Cashew Butter
Now that you’ve got a jar of this golden delight, what do you do with it? The possibilities are truly endless! It’s so much more versatile than just a breakfast spread.Smoothies and Shakes
Add a tablespoon or two to your morning smoothie for an extra boost of protein and healthy fats. It adds a wonderful creaminess and richness. It pairs beautifully with banana, berries, or even a touch of cocoa powder.Dips and Sauces
Cashew butter can form the base of incredibly creamy and dairy-free sauces. Think savory cashew cream for pasta, a dipping sauce for spring rolls, or even a base for salad dressings. Its mild flavor makes it adaptable to both sweet and savory applications.Baking and Desserts
Substitute cashew butter for other nut butters in cookie recipes, or use it as a binder in no-bake energy bites. Swirl it into brownie batter or drizzle it over a bowl of oatmeal or yogurt for an indulgent touch. You can even whip it into a quick frosting!Savory Spreads and Sandwiches
Spread it on apple slices, celery sticks, or rice cakes for a quick snack. Use it in sandwiches as a healthier alternative to mayo or as a base for an elevated veggie sandwich. A simple cashew butter and jelly sandwich is a classic for a reason! This homemade cashew butter isn’t just a recipe; it’s a gateway to healthier, tastier eating and a wonderful way to feel more connected to the food you consume. Give it a try, and prepare to be utterly amazed by how simple and delicious it is!
Creamiest Homemade Cashew Butter
Learn how to make rich, creamy cashew butter at home in minutes with just one simple ingredient for a healthy, delicious spread.
📝 Ingredients
👩🍳 Instructions
- 1Place the raw cashews into the bowl of a high-speed food processor.
- 2Process the cashews for 1-2 minutes until they break down into a fine, sandy crumb texture. Stop and scrape down the sides of the bowl with a spatula.
- 3Continue processing for another 2-3 minutes. The crumbs will start to clump together and form a thick, sticky paste. Scrape down the sides again.
- 4Keep processing. The cashews will release their natural oils, and the paste will gradually smooth out and become creamy and liquid. This can take an additional 5-10 minutes. Be patient and scrape down the sides as needed.
- 5Once the cashew butter reaches your desired smoothness, add the optional sea salt. Pulse a few more times to combine.
- 6Transfer the homemade cashew butter to a clean, airtight jar. Store in the refrigerator.
💡 Notes
For a deeper flavor, you can lightly toast the cashews at 300°F (150°C) for 8-10 minutes before processing. Let them cool completely. For variations, add a touch of vanilla extract, cinnamon, or maple syrup during the final processing stage. Oil separation is natural; just stir well before each use.



