


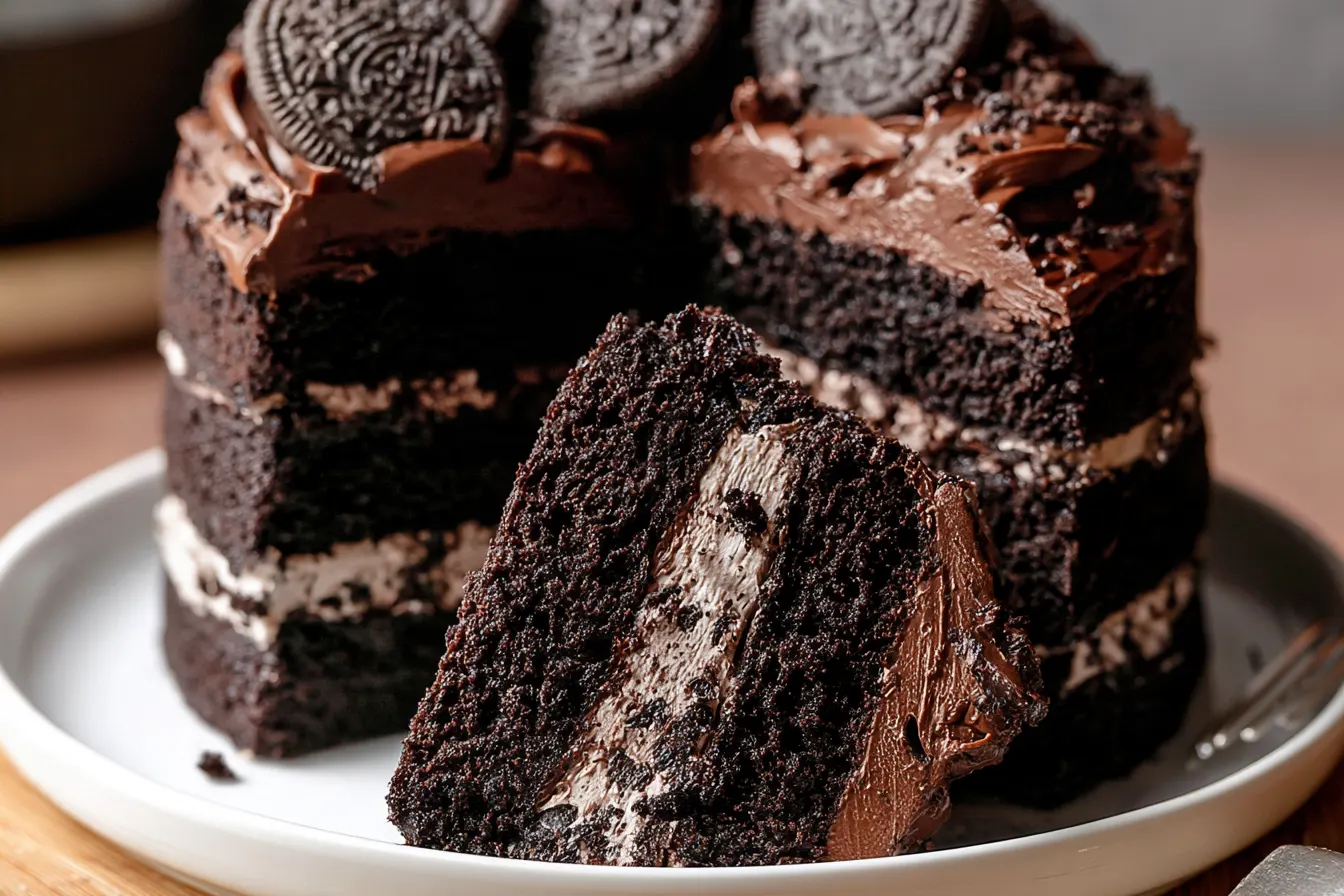
A few years back, I made a chocolate cake for a potluck, and while it tasted fine, it looked… well, let’s just say it resembled a deflated tire more than a celebratory dessert. The frosting slid off, the layers were uneven, and I vowed then and there to master the art of the truly show-stopping cake. This Chocolate Oreo Cake is the delicious culmination of that quest, and it’s everything you dream of: moist, rich, and absolutely packed with cookie goodness.
Forget dry, crumbly cake layers and lackluster frosting. We’re talking deep, dark chocolate cake that stays incredibly moist, paired with a luscious Oreo buttercream so good you’ll want to eat it with a spoon. And, of course, a generous shower of crushed Oreos both inside and out, because why hold back?
This recipe isn’t just about making a cake; it’s about creating an experience. It’s the kind of dessert that makes eyes widen and smiles appear, perfect for birthdays, celebrations, or just a Tuesday when you need a little extra joy.

There are chocolate cakes, and then there are *chocolate* cakes. This particular recipe falls firmly into the latter category, and then some. What sets this Chocolate Oreo Cake apart isn’t just the sheer volume of cookies involved, but the careful balance of textures and flavors that make every single bite an absolute dream.
We start with a cocoa-rich, super moist chocolate cake base. It’s a foundational recipe I’ve tweaked over the years, ensuring it bakes up perfectly tender and never dry, providing the ideal canvas for our star ingredient. The deep chocolate flavor holds its own against the creamy, sweet frosting without being overshadowed.
Then comes the magic: the Oreo frosting. This isn’t just vanilla buttercream with some cookie crumbs thrown in. It’s a fluffy, decadent creation where finely crushed Oreos are fully incorporated, giving it a distinctive speckled appearance and an unmistakable flavor. It’s sweet, but not cloyingly so, with that beloved hint of cookie crunch.
And for good measure, we’re layering in more crushed Oreos between the cake layers, ensuring that every slice delivers that delightful textural contrast. It’s indulgent, yes, but also incredibly satisfying. This isn’t a cake for the faint of heart, but it is a cake for anyone who truly loves chocolate and Oreos.
Gather Your Ingredients for Chocolatey Goodness
Building a show-stopping cake starts with the right components. Here’s what you’ll need for this truly epic Chocolate Oreo Cake. I always recommend getting everything to room temperature before you start; it makes a huge difference in the final texture of your cake and frosting.
For the Rich Chocolate Cake Layers:
- All-purpose flour: Provides the structure. Don’t overmix, or you’ll get tough cake!
- Granulated sugar: Sweetness and moisture.
- Unsweetened cocoa powder: Use a good quality Dutch-processed cocoa for a darker color and richer flavor.
- Baking soda & baking powder: Our leavening agents, working together for a perfect rise.
- Salt: Balances the sweetness and enhances the chocolate flavor.
- Eggs: Binds everything together and adds richness.
- Buttermilk: Reacts with the baking soda for tenderness and a subtle tang. If you don’t have buttermilk, you can make your own by adding 1 tablespoon of white vinegar or lemon juice to regular milk and letting it sit for 5 minutes.
- Vegetable oil: Contributes to the cake’s incredible moisture.
- Vanilla extract: Essential for rounding out the flavors.
- Hot coffee: This is my secret weapon for a deep, intense chocolate flavor! It doesn’t make the cake taste like coffee, it just amplifies the cocoa.
For the Dreamy Oreo Frosting:
- Unsalted butter: Softened to room temperature is key for a smooth buttercream.
- Powdered sugar: For sweetness and structure. Sift it if it’s lumpy!
- Heavy cream: Helps with the frosting’s creamy texture and whip.
- Vanilla extract: A touch to complement the Oreo flavor.
- Oreo cookies: You’ll need quite a few! Some for crushing into fine crumbs for the frosting, and some for larger pieces to fold into the layers and for decoration.
- Pinch of salt: Just a tiny bit to cut through the sweetness.

Crafting Your Bakery-Worthy Chocolate Oreo Cake
Ready to bake? This process is broken down into manageable steps. Don’t rush, enjoy the process, and you’ll be rewarded with a truly spectacular cake.
Baking the Decadent Chocolate Layers
Preheat your oven to 350°F (175°C) and prepare two 8-inch round cake pans. Grease them well and dust with cocoa powder, or line the bottoms with parchment paper for easy removal. This ensures your beautiful cake layers won’t stick.
In a large bowl, whisk together the dry ingredients: flour, granulated sugar, cocoa powder, baking soda, baking powder, and salt. Make sure there are no lumps; a good whisking here makes a difference.
In a separate medium bowl, combine the wet ingredients: eggs, buttermilk, vegetable oil, and vanilla extract. Give them a good whisk until everything is smoothly incorporated.
Pour the wet ingredients into the dry ingredients. Mix on low speed with an electric mixer, or by hand with a whisk, until just combined. Don’t overmix! A few lumps are fine, overmixing develops gluten and can make your cake tough.
Carefully pour in the hot coffee. The batter will be thin, and that’s exactly what we want. Stir until just combined. The hot coffee helps bloom the cocoa, intensifying the chocolate flavor.
Divide the batter evenly between your prepared cake pans. Bake for 30-35 minutes, or until a wooden skewer inserted into the center comes out with moist crumbs, not wet batter.
Tip: Resist the urge to open the oven door too early, especially in the first 20 minutes, as this can cause your cakes to sink in the middle. The smell alone will tell you when they’re getting close!
Let the cakes cool in their pans for about 10-15 minutes before inverting them onto a wire rack to cool completely. They must be completely cool before frosting, or your beautiful buttercream will melt.
Whipping Up the Crumbly Oreo Frosting
While your cake layers are cooling, prepare the star of the show – the Oreo frosting. Take about 25-30 Oreo cookies. Separate about 15-20 of them and process them into very fine crumbs in a food processor. The remaining 10-15 can be coarsely chopped for layering and garnish.
In a large bowl, using an electric mixer, beat the softened unsalted butter on medium speed until it’s light and fluffy, about 2-3 minutes. This aerates the butter and creates a much lighter frosting.
Gradually add the powdered sugar, about a cup at a time, beating well after each addition. The mixture will be quite thick at first.
Pour in the heavy cream and vanilla extract. Continue beating on medium-high speed until the frosting is light, fluffy, and smooth. This could take another 3-5 minutes. Don’t be afraid to let it whip!
Fold in the finely crushed Oreo crumbs. Mix until they are evenly distributed throughout the buttercream. Now you have your irresistible Oreo frosting!

Assembling Your Magnificent Chocolate Oreo Cake
Once your cake layers are completely cool, it’s time for assembly. If your cake layers have domed tops, you can use a serrated knife to level them. This creates a much neater stack.
Place one cake layer on your serving platter or cake stand. Spread about 1 cup of the Oreo frosting evenly over the top. Sprinkle about half of your coarsely chopped Oreos over the frosting.
Carefully place the second cake layer on top. Repeat the frosting and chopped Oreo layer.
Finally, place the third cake layer on top. Use the remaining frosting to cover the top and sides of the entire cake. Use an offset spatula or a bench scraper for a smooth finish.
Garnish the cake with the remaining coarsely chopped Oreos, pressing them gently into the sides and piling them on top. For an extra touch, you can even pipe a few frosting swirls around the top edge.
Refrigerate the cake for at least 30 minutes before slicing. This helps the frosting set and makes for cleaner cuts. Serve at room temperature for the best flavor and texture. Enjoy every glorious bite!
Your Chocolate Oreo Cake Questions Answered
Even seasoned bakers have questions. Here are some common queries about this fantastic Chocolate Oreo Cake, with my best tips and tricks.
Why does the recipe use hot coffee? Will my cake taste like coffee?
Don’t worry, your cake won’t taste like coffee! Hot coffee is a secret weapon for chocolate cakes. It intensifies the chocolate flavor, making it deeper and richer, without imparting any coffee taste of its own. It’s a flavor enhancer, much like salt enhances other flavors.
Can I make this Chocolate Oreo Cake ahead of time?
Absolutely! The chocolate cake layers can be baked 1-2 days in advance, cooled completely, wrapped tightly in plastic wrap, and stored at room temperature. The Oreo frosting can also be made a day in advance and stored in the refrigerator. Just let it come to room temperature and give it a quick whip before frosting the cake. A fully assembled cake can be stored in an airtight container at room temperature for up to 2 days, or in the refrigerator for up to 4-5 days.
What if I don’t have buttermilk?
No problem! You can easily make your own buttermilk substitute. For 1 cup of buttermilk, simply measure out 1 cup of regular milk (dairy or non-dairy) and stir in 1 tablespoon of white vinegar or lemon juice. Let it sit for about 5-10 minutes until it curdles slightly. Then, use it as directed in the recipe.
My frosting seems too thick/too thin. How can I fix it?
If your frosting is too thick, add heavy cream one tablespoon at a time, beating until it reaches your desired consistency. If it’s too thin, you can add more sifted powdered sugar, one tablespoon at a time, until it thickens up. Temperature also plays a role, so ensure your butter was truly at room temperature when you started.
Can I freeze slices of this Chocolate Oreo Cake?
Yes, you can! Individual slices can be wrapped tightly in plastic wrap, then again in aluminum foil, and frozen for up to 1-2 months. Thaw them in the refrigerator overnight or at room temperature for a few hours before enjoying. This is a great way to portion out the cake and enjoy it over time.
Perfect Pairings and Serving Suggestions
This Chocolate Oreo Cake is a showstopper all on its own, but a few simple additions can elevate the experience even further. Think about what complements rich chocolate and creamy cookies.
A simple glass of cold milk is a classic pairing that never disappoints. The cool creaminess cuts through the richness of the cake perfectly. For adults, a good quality espresso or a robust cup of coffee would be a delightful accompaniment, highlighting the deep chocolate notes.
If you’re feeling extra indulgent, a scoop of vanilla bean ice cream or a drizzle of chocolate fudge sauce makes for a truly decadent dessert plate. A scattering of fresh raspberries or strawberries can also add a lovely tart contrast and a pop of color, balancing the sweetness.
This cake is substantial, so small slices are often sufficient, especially after a meal. But let’s be honest, sometimes you just want a big, glorious piece. Serve it with your favorite company, or enjoy a quiet moment of bliss all to yourself.
Troubleshooting Common Cake Baking Hurdles
Baking a beautiful cake can feel intimidating, but many common issues are easily preventable or fixable. Here’s how to navigate a few potential bumps in the road when making your Chocolate Oreo Cake.
Cake layers sticking to the pan:
This is usually due to inadequate greasing and flouring (or cocoa-dusting). Always use butter or shortening, then dust thoroughly with flour or cocoa powder, tapping out any excess. For extra security, I always line the bottom of my pans with parchment paper. Make sure the cakes are completely cool before attempting to remove them from the pans.
Dry or crumbly cake:
Overmixing the batter is a common culprit. When you add the wet ingredients to the dry, mix only until just combined. Also, ensure you don’t overbake! An oven thermometer can help verify your oven’s true temperature, as many ovens run hot or cold. The hot coffee in this recipe helps tremendously with moisture, so don’t skip it!
Sunk cake in the middle:
Opening the oven door too early, especially in the first two-thirds of baking, can cause a sudden temperature drop and lead to a collapsed cake. Also, too much leavening agent or incorrect measurement of ingredients can contribute. Make sure your baking soda and baking powder aren’t expired.
Runny or grainy frosting:
Room temperature butter is crucial for smooth frosting. If your butter is too cold, the frosting will be lumpy and grainy. If it’s too warm (starting to melt), your frosting will be runny. If your frosting is grainy from powdered sugar, try sifting the sugar before adding it, and beat the frosting for a few extra minutes to dissolve any remaining sugar granules.
Storing and Keeping Your Cake Fresh
Once you’ve put all that effort into creating this magnificent Chocolate Oreo Cake, you’ll want to make sure it stays fresh and delicious for as long as possible. Proper storage is key!
At room temperature: If your kitchen isn’t overly warm, an assembled and frosted cake can sit at room temperature for up to two days. Make sure it’s covered loosely with a cake dome or in an airtight container to prevent it from drying out. The fat in the buttercream helps preserve it.
In the refrigerator: For longer storage, or if your home is warm, store the cake in an airtight container in the refrigerator for up to 4-5 days. Be aware that refrigerated cake can sometimes dry out slightly, so bring it to room temperature for at least an hour before serving for the best texture and flavor.
For freezing: As mentioned in the FAQ, individual slices or even the whole cake (unfrosted layers, or fully frosted and then frozen) can be frozen. Wrap tightly in plastic wrap, then foil, to protect against freezer burn. Thaw in the refrigerator. Freezing can be a lifesaver for leftovers or to get a head start on party prep.
No matter how you store it, this Chocolate Oreo Cake is sure to be a treat every time you reach for a slice. It’s a testament to the fact that some of the best things in life are rich, chocolatey, and packed with cookies!
I hope you absolutely adore this recipe as much as I do. It truly is a labor of love, but one that pays off in spades with every single bite. Happy baking!

Decadent Chocolate Oreo Cake
Indulge in this rich, moist chocolate cake layered with creamy Oreo frosting and crunchy cookie pieces. A bakery-quality treat!
📝 Ingredients
👩🍳 Instructions
- 1Preheat oven to 350°F (175°C). Grease and flour (or cocoa dust) two 8-inch round cake pans, or line bottoms with parchment paper.
- 2In a large bowl, whisk together flour, granulated sugar, cocoa powder, baking soda, baking powder, and salt.
- 3In a separate medium bowl, whisk together eggs, buttermilk, vegetable oil, and 1 teaspoon vanilla extract.
- 4Pour the wet ingredients into the dry ingredients. Mix on low speed with an electric mixer or by hand until just combined.
- 5Carefully pour in the hot coffee. Stir until just combined; the batter will be thin. Do not overmix.
- 6Divide batter evenly between prepared pans. Bake for 30-35 minutes, or until a wooden skewer inserted into the center comes out with moist crumbs.
- 7Let cakes cool in pans for 10-15 minutes, then invert onto a wire rack to cool completely.
- 8For the frosting: Finely crush 15-20 Oreo cookies in a food processor. Coarsely chop remaining 10-15 Oreos for layering and garnish.
- 9In a large bowl, beat softened butter on medium speed until light and fluffy, about 2-3 minutes.
- 10Gradually add sifted powdered sugar, 1 cup at a time, beating well after each addition.
- 11Add heavy cream and 1 teaspoon vanilla extract. Beat on medium-high speed for 3-5 minutes until light and fluffy.
- 12Fold in the finely crushed Oreo crumbs until evenly distributed.
- 13To assemble: Place one cooled cake layer on a serving plate. Spread with about 1 cup of Oreo frosting. Sprinkle with half of the coarsely chopped Oreos.
- 14Place the second cake layer on top. Repeat with frosting and the remaining chopped Oreos.
- 15Place the third cake layer on top. Frost the top and sides of the entire cake with the remaining frosting.
- 16Garnish with any extra chopped Oreos or whole Oreos as desired. Refrigerate for at least 30 minutes before slicing for clean cuts. Serve at room temperature.
💡 Notes
Ensure all dairy ingredients and eggs are at room temperature for the best cake and frosting texture. For a dairy-free option, use a dairy-free buttermilk substitute and plant-based butter and cream. Leftover cake stores well at room temperature for 2 days or refrigerated for up to 5 days in an airtight container.



