


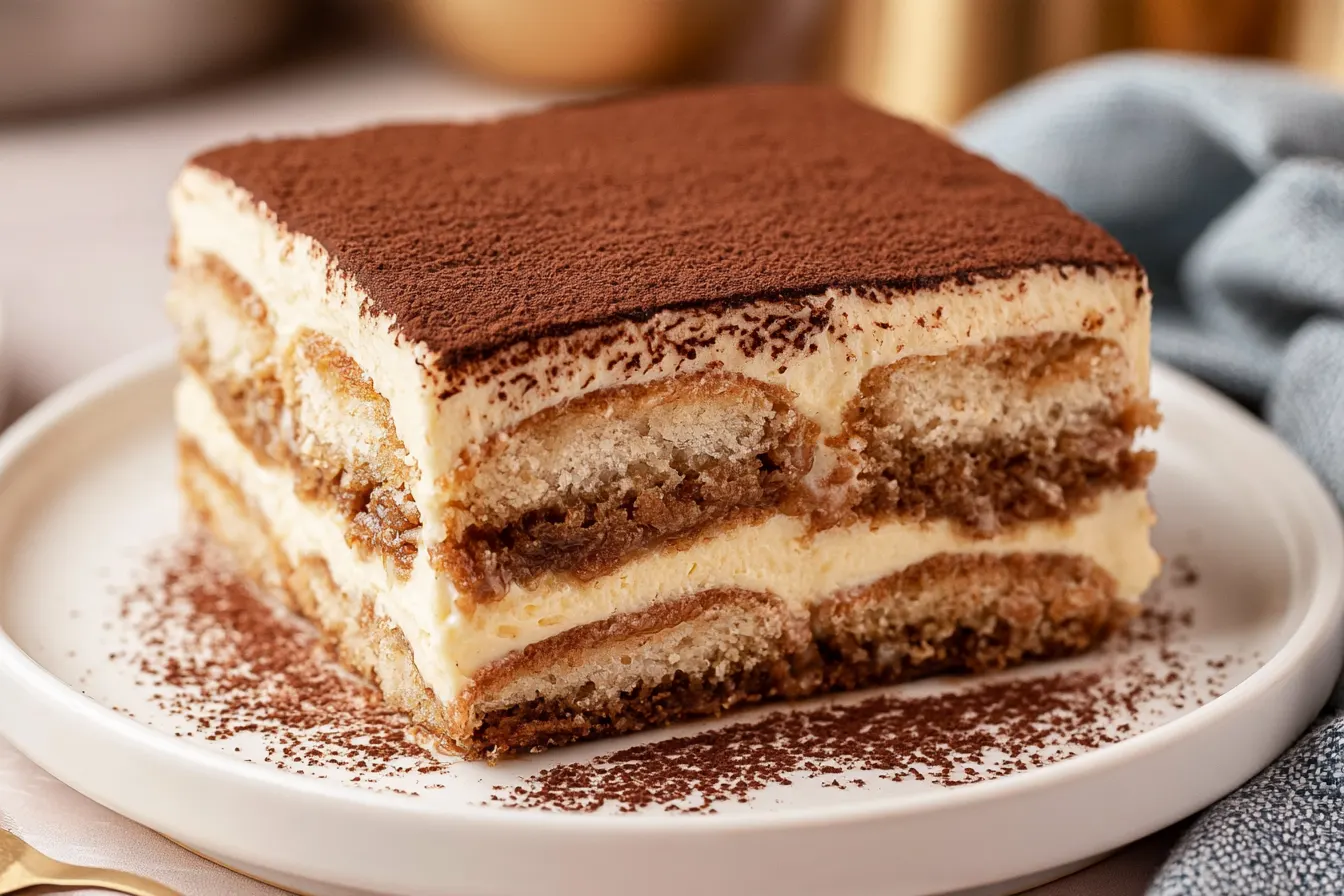
I still remember the first time I tasted a truly authentic tiramisu. It wasn’t in some fancy restaurant, but in a tiny, bustling trattoria tucked away on a side street in Rome. The way the light, coffee-soaked ladyfingers melted into the impossibly creamy mascarpone, dusted with bitter cocoa – it was pure magic. That moment cemented my lifelong love for this dessert, and ever since, I’ve been on a quest to replicate that exact sensation in my own kitchen. After countless attempts and a fair few “almosts,” I can confidently say this Classic Italian Tiramisu recipe captures that perfect balance of textures and flavors.

Why This Tiramisu Stands Out
What makes this particular Classic Italian Tiramisu recipe so special? It’s all about the balance, really. We’re not skimping on quality ingredients, because in a dessert this simple, every component shines. The espresso needs to be strong and fragrant, the mascarpone cheese fresh and full-fat, and the ladyfingers – well, they need to be the right kind to absorb all that delicious coffee without turning into mush. I’ve refined the ratio of coffee to liqueur, ensuring each ladyfinger is perfectly saturated, delivering that signature bittersweet kick without overpowering the delicate cream. The mascarpone cream itself is a dream – lightened just enough with whipped egg yolks and a touch of sugar, it’s airy yet substantial, a cloud of dairy perfection that cradles the coffee-infused biscuits. This isn’t a race; it’s a careful construction of flavors and textures that results in something truly sublime.Gather Your Supplies: Ingredients for Italian Tiramisu
Before we get to the fun part of layering, let’s make sure we have everything we need. Using good quality ingredients makes all the difference here, so don’t be tempted to cut corners if you can help it. This isn’t a long list, but each item plays a crucial role.For the Coffee Soak
- Strong Espresso: About 2 cups, freshly brewed and cooled. An Italian roast is ideal for that authentic flavor.
- Coffee Liqueur or Dark Rum: 1/4 cup (optional, but highly recommended for depth). Marsala wine is another traditional choice.
- Granulated Sugar: 2 tablespoons, to sweeten the coffee slightly.
For the Mascarpone Cream
- Large Egg Yolks: 6, separated from the whites.
- Granulated Sugar: 3/4 cup, divided.
- Mascarpone Cheese: 16 ounces (two 8-ounce containers), full-fat, chilled.
- Heavy Cream: 1 cup, chilled (for stability and extra richness).
- Vanilla Extract: 1 teaspoon, pure vanilla for the best flavor.
The Essential Layers
- Ladyfingers (Savoiardi): About 24-30 (one standard 7-ounce package). Look for the dry, crisp kind, not the soft, cake-like ones.
- Unsweetened Cocoa Powder: For dusting. A good quality Dutch-processed cocoa works wonders.

Crafting Your Heavenly Tiramisu: Step-by-Step
Alright, chef, it’s time to bring this masterpiece to life! Take your time, enjoy the process, and soon you’ll have a dessert that will impress everyone.1. Prepare Your Coffee Infusion
First things first, brew your espresso. You’ll want it nice and strong. Once brewed, pour it into a shallow dish or bowl. Stir in the 2 tablespoons of granulated sugar until dissolved. If you’re using coffee liqueur or dark rum, now’s the time to add it. Give it a good stir, then set it aside to cool completely. This is critical – warm coffee will make your ladyfingers disintegrate.
2. Whip Up the Mascarpone Cream Base
In a heatproof bowl set over a saucepan of simmering water (a double boiler), whisk together the egg yolks and 1/2 cup of the granulated sugar. Whisk constantly for about 8-10 minutes, until the mixture is pale, thick, and has nearly doubled in volume. It should reach about 160°F (71°C) on an instant-read thermometer. This cooking step is essential for both texture and safety! Once cooked, remove from heat and let it cool for a few minutes.
While the egg mixture cools slightly, in a separate large bowl, gently whisk the mascarpone cheese to loosen it. Be careful not to over-whisk, or it can curdle. Add the vanilla extract and fold it into the mascarpone until just combined.
3. Create the Whipped Cream and Fold
In another clean, chilled bowl, whip the heavy cream with the remaining 1/4 cup of granulated sugar until soft peaks form. Don’t over-whip it; we want it light and fluffy, not stiff. Gently fold the cooled egg yolk mixture into the mascarpone cheese until smooth. Then, carefully fold in the whipped cream in two additions, being mindful not to deflate the air you’ve just incorporated. You want a light, airy, and uniform cream.
Tip: For the best results with your whipped cream, chill your mixing bowl and whisk attachment in the freezer for 10-15 minutes before whipping. This helps the cream whip up faster and hold its volume longer.

4. Assemble the Layers
Now for the construction! Grab a 9×13-inch baking dish or a similar sized serving dish. Quickly dip each ladyfinger into the cooled coffee mixture, one at a time, for just 1-2 seconds per side. Don’t let them soak too long, or they’ll become soggy. Arrange a single layer of coffee-soaked ladyfingers at the bottom of your dish.
Spread half of the mascarpone cream evenly over the ladyfingers. Repeat with another layer of dipped ladyfingers, followed by the remaining mascarpone cream. Smooth the top with a spatula.
5. Chill and Serve
Cover the dish tightly with plastic wrap and refrigerate for at least 4 hours, but preferably overnight. This chilling time is crucial; it allows the flavors to meld and the ladyfingers to soften perfectly, giving you that quintessential tiramisu texture. Just before serving, dust generously with unsweetened cocoa powder using a fine-mesh sieve.
Your Tiramisu Questions Answered
I know you might have a few lingering questions about perfecting this Italian classic. Here are some of the common ones I get asked:Can I make tiramisu without eggs?
While traditional tiramisu uses egg yolks (often cooked, as in this recipe, for safety), you can find egg-free versions. These often rely on extra whipped cream or a combination of mascarpone and cream cheese to achieve a similar texture. However, the cooked egg yolks contribute significantly to the rich, custardy mouthfeel that makes classic tiramisu so special.
What’s the best type of coffee for tiramisu?
For an authentic flavor, a strong, dark-roast espresso is paramount. Think Italian-style roasts. If you don’t have an espresso machine, strong brewed coffee will work, but make sure it’s potent – almost twice as strong as your usual morning cup – to stand up to the other rich flavors. Avoid instant coffee if possible, as the flavor won’t be as robust.
How long does homemade tiramisu last in the fridge?
When properly covered and refrigerated, your homemade tiramisu should last for 3-4 days. The flavors actually deepen and improve after the first day, making it an excellent make-ahead dessert! After day four, the ladyfingers can start to get a bit too soft.
Can I freeze tiramisu?
Yes, you can! Tiramisu freezes surprisingly well. Assemble it in a freezer-safe dish, cover it tightly with plastic wrap, then aluminum foil, and it will keep for up to 1-2 months. Thaw it overnight in the refrigerator before dusting with cocoa and serving. The texture might be slightly softer after thawing, but it will still be delicious.
What if my mascarpone cream is too runny?
This can happen if the mascarpone is over-whipped, or if the egg yolk mixture wasn’t cooked long enough or cooled sufficiently before folding. If it’s just slightly runny, a longer chill time in the fridge (even 24 hours) can help it firm up. If it’s very runny, you might need to try again, ensuring your egg yolks are properly cooked and cooled, and that you’re gentle when folding in the whipped cream and mascarpone.
Storing Your Tiramisu Masterpiece
Once you’ve made this incredible Classic Italian Tiramisu, you’ll want to ensure it stays perfect for as long as possible. Leftovers (if there are any!) should be covered tightly with plastic wrap and stored in the refrigerator. As mentioned, it’s actually even better the next day once all those wonderful flavors have had a chance to meld together. Just remember to dust with fresh cocoa powder right before serving for that beautiful finish. For parties or gatherings, making it a day ahead is ideal. This not only saves you time on the day of the event but also guarantees the best possible flavor and texture. No last-minute rushing, just pure dessert bliss!
The BEST Classic Italian Tiramisu Recipe
Indulge in this authentic Classic Italian Tiramisu recipe featuring coffee-soaked ladyfingers layered with rich mascarpone cream and cocoa.
📝 Ingredients
👩🍳 Instructions
- 1Prepare the Coffee Soak: In a shallow dish, combine the cooled espresso, optional coffee liqueur or rum, and 2 tablespoons of sugar. Stir until sugar dissolves. Set aside.
- 2Make the Egg Yolk Base: In a heatproof bowl set over a saucepan of simmering water (ensure the bowl does not touch the water), whisk egg yolks and 1/2 cup granulated sugar constantly for 8-10 minutes, until mixture is pale, thick, and reaches 160°F (71°C). Remove from heat and let cool for a few minutes.
- 3Prepare the Mascarpone Cream: In a large bowl, gently whisk the chilled mascarpone cheese to loosen it. Stir in the vanilla extract. Once the egg yolk mixture has cooled slightly, fold it into the mascarpone until just combined.
- 4Whip the Heavy Cream: In a separate chilled bowl, whip the heavy cream with the remaining 1/4 cup granulated sugar until soft peaks form. Be careful not to over-whip.
- 5Combine Cream Mixtures: Gently fold the whipped cream into the mascarpone-egg yolk mixture in two additions, until smooth and well combined, being careful not to deflate the air.
- 6Assemble the Tiramisu: Quickly dip each ladyfinger into the cooled coffee mixture for 1-2 seconds per side. Arrange a single layer of soaked ladyfingers in the bottom of a 9x13-inch baking dish.
- 7Layer and Chill: Spread half of the mascarpone cream evenly over the ladyfingers. Repeat with another layer of dipped ladyfingers, followed by the remaining mascarpone cream. Smooth the top with a spatula.
- 8Refrigerate: Cover the dish tightly with plastic wrap and refrigerate for at least 4 hours, or preferably overnight, to allow flavors to meld and the dessert to set.
- 9Serve: Just before serving, generously dust the top with unsweetened cocoa powder using a fine-mesh sieve. Slice and enjoy!
💡 Notes
Ensure your espresso is strong and fully cooled before dipping ladyfingers to prevent sogginess. For a non-alcoholic version, simply omit the liqueur. This dessert improves with time, so making it a day ahead is recommended.



