


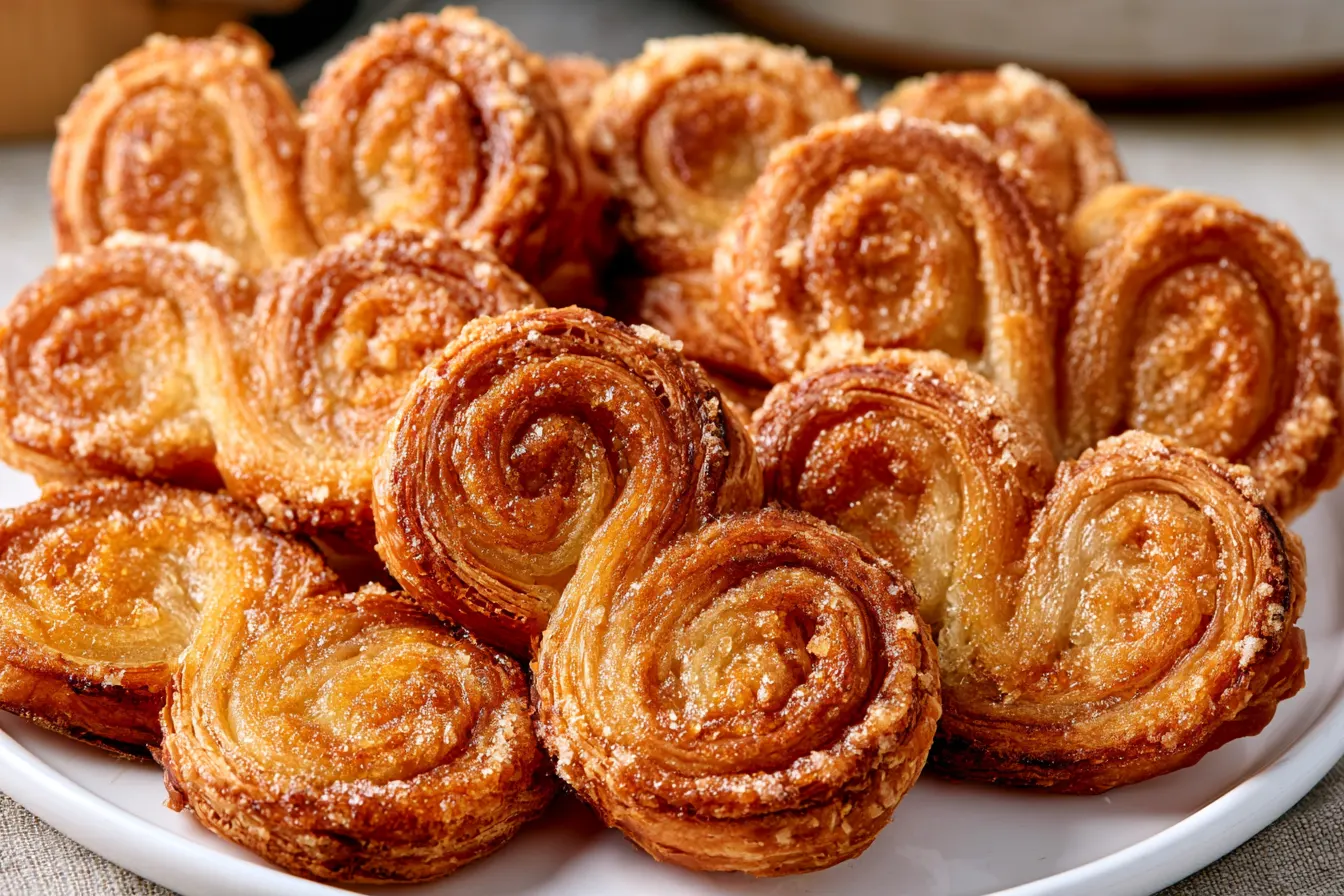
There’s something truly magical about watching a sheet of cold, unassuming puff pastry transform into something utterly elegant and delicious. These classic French palmiers, often called elephant ears, are a testament to how simplicity can lead to pure culinary joy. With just two ingredients – yes, really, just two! – you can create a treat that’s simultaneously crisp, buttery, and perfectly sweet.
- What Makes These Palmiers So Irresistible?
- Gather Your Supplies: The Shortest Ingredient List Ever
- Mastering the Fold: Two Ways to Shape Your Palmiers
- Baking Your Beautiful Palmiers: The Key to Crispness
- Common Pitfalls and How to Sidestep Them
- Frequently Asked Questions About Palmiers
- Serving Suggestions: Beyond the Cookie Jar

What Makes These Palmiers So Irresistible?
You might think a two-ingredient recipe couldn’t possibly be that special, but oh, how wrong you’d be! The beauty of a classic palmier lies in its contrasting textures and simple, pure flavors. Each bite delivers a satisfying crunch, followed by the delicate flakiness of butter-rich pastry, all kissed with a sweet, caramelized sugar coating. They’re light, airy, and dangerously addictive. The key to their allure is the puff pastry itself. When baked, the hundreds of layers of butter and dough separate, creating pockets of air that expand and crisp up. The sugar, sprinkled generously, melts and caramelizes around the edges, forming a beautiful, golden-brown crust that shatters delightfully with every bite. It’s a masterclass in how basic ingredients, handled with a little care, can create something truly extraordinary.Gather Your Supplies: The Shortest Ingredient List Ever
Seriously, this is as minimal as it gets. Quality matters here, especially with so few components.The Essentials
- 1 sheet (14 oz / 400g) all-butter puff pastry: This is non-negotiable. While some brands offer puff pastry made with vegetable shortening, for the best flavor and flakiness, seek out an all-butter variety. It makes a world of difference in taste and texture. Ensure it’s thawed according to package directions, usually in the refrigerator overnight or at room temperature for about 30-40 minutes.
- ½ cup (100g) granulated sugar: Regular white sugar works perfectly here. It provides the sweetness and, most importantly, caramelizes beautifully to give the palmiers their signature crisp, golden-brown exterior.

Mastering the Fold: Two Ways to Shape Your Palmiers
This is where the magic happens! The way you fold the pastry directly impacts the final shape and texture of your palmiers. Both methods are straightforward, but they yield slightly different results in appearance. I encourage you to try both to see which you prefer!Method 1: The Classic “Book Fold”
This technique creates a more traditional, heart-like shape with distinct layers.- Prepare your surface: Lightly flour a clean countertop or a large piece of parchment paper. Unfold your thawed puff pastry sheet onto it.
- Sugar the first side: Sprinkle about ¼ cup of granulated sugar evenly over the entire surface of the puff pastry. Use a rolling pin to gently press the sugar into the pastry. This helps it adhere and creates a more even caramelization.
- Fold the edges to the center: Imagine a line down the center of the pastry, lengthwise. Fold one long edge inward, bringing it to meet that imaginary center line. Do the same with the other long edge, so both edges meet in the middle.
- Fold again: Now, fold one half of the pastry over the other, like closing a book. You should have a long, rectangular log of pastry.
- Chill (optional but recommended): For easier slicing, wrap the log in plastic wrap and refrigerate for 15-20 minutes. This firms up the butter and prevents squishing.
Method 2: The “Rolled In” Method (Often Called Elephant Ears)
This method tends to produce slightly rounder, more uniform palmiers that resemble classic elephant ears.- Sugar the surface: As with the first method, lightly flour your surface and unfold the pastry. Sprinkle ¼ cup of sugar evenly over the pastry and gently press it in with a rolling pin.
- Roll from the long sides: Starting from one long side, tightly roll the pastry inward towards the center. Stop when you reach the middle.
- Roll from the other side: Now, take the other long side and roll it inward, meeting the first roll exactly in the center. You’ll end up with two rolls meeting in the middle, creating a single log.
- Chill: Again, wrap in plastic and chill for 15-20 minutes. This step is particularly helpful for maintaining the distinct spiral shape during slicing.
Baking Your Beautiful Palmiers: The Key to Crispness
This is where your patience pays off. Baking palmiers requires a bit of attention to ensure even browning and that perfect, crunchy caramelization.Step-by-Step Baking Instructions
- Preheat and prep: Preheat your oven to 400°F (200°C). Line two large baking sheets with parchment paper. This is crucial for preventing sticking, especially as the sugar melts and caramelizes.
- Slice the pastry: Remove your chilled pastry log from the refrigerator. Using a sharp knife, slice the log into ½-inch (1.25 cm) thick pieces. You should get about 12-16 palmiers per sheet of puff pastry, depending on the size of your sheet.
- Arrange on baking sheets: Place the sliced palmiers on the prepared baking sheets, leaving at least 2 inches (5 cm) between each one. They will expand quite a bit as they bake.
- Bake the first side: Bake for 8-10 minutes, or until the bottoms are golden brown and the sugar is visibly bubbling and caramelizing.
- Flip and finish: Carefully flip each palmier over using a thin spatula. Bake for another 5-7 minutes, or until the second side is also deeply golden brown and caramelized. Tip: Keep a close eye on them during the final few minutes; sugar can go from perfectly golden to burnt very quickly!
- Cool: Immediately transfer the baked palmiers to a wire rack to cool completely. They will crisp up significantly as they cool. Resisting the urge to eat them warm is the hardest part!

Common Pitfalls and How to Sidestep Them
Even with a simple recipe, there are a few things that can go awry. Here’s how to ensure your palmiers turn out perfectly every time.My Palmiers Are Soft, Not Crispy!
This is usually a sign they haven’t baked long enough, or your oven temperature might be a little off. The sugar needs to fully caramelize and the pastry needs to dry out and crisp up. Don’t be afraid to let them get a deep golden brown. If they’re still soft after cooling, pop them back in a 350°F (175°C) oven for a few minutes to crisp up.They Stuck to the Baking Sheet!
Ah, the dreaded sticky situation. This almost always happens if you don’t use parchment paper. The melting sugar turns into a sticky, molten caramel that will fuse to an unlined baking sheet. Always, always use parchment paper!My Palmiers Unfurled While Baking!
This can happen if the pastry wasn’t chilled enough before slicing, or if the folds weren’t tight enough. Chilling helps the butter solidify, holding the shape better. Also, ensure your slices are uniform; very thin slices are more prone to unraveling.Some Are Burnt, Others Are Pale!
Oven hot spots are often the culprit here. Rotate your baking sheets halfway through baking. Also, ensure your palmiers are spaced adequately on the tray; overcrowding can lead to uneven baking.Frequently Asked Questions About Palmiers
Got more questions? I’ve got answers!Can I use store-bought puff pastry?
Absolutely, and it’s highly recommended for ease! Just make sure it’s an all-butter variety for the best flavor and flakiness. Brands like Pepperidge Farm (in the US) or Dufour (a premium option) are excellent choices.Can I make palmiers ahead of time?
You can prepare the pastry log (after folding and before slicing) and keep it tightly wrapped in plastic in the refrigerator for up to 2 days. When you’re ready to bake, just slice and proceed with the baking instructions. Baked palmiers are best enjoyed the day they’re made for maximum crispness, but they’ll keep well in an airtight container for 2-3 days.What if I don’t have enough sugar?
The sugar is critical for both flavor and texture. It caramelizes to give that signature crunch. While you could technically make them with less, they won’t have the same crispness or sweetness. Don’t skimp!Can I add other flavors to my palmiers?
You sure can! Before sprinkling the sugar, you can lightly dust the pastry with cinnamon, cardamom, or even a tiny bit of citrus zest (orange or lemon) for a different twist. Just remember, a little goes a long way.Why are my palmiers not perfectly symmetrical?
Don’t worry, homemade palmiers rarely are! The beauty of them is their rustic charm. As long as they’re crisp and delicious, they’re perfect. Practice makes them more uniform, but even the “imperfect” ones taste amazing.Serving Suggestions: Beyond the Cookie Jar
While palmiers are undeniably perfect on their own as a simple cookie or afternoon treat, they also shine in other roles. They make a delightful accompaniment to a cup of coffee or tea, especially a strong black tea that balances their sweetness. For a more elegant presentation, serve them alongside a scoop of vanilla bean ice cream or a dollop of crème fraîche and fresh berries. They also make a fantastic, easy dessert to bring to a potluck or party – they always disappear fast! Consider breaking them into pieces and using them as a crunchy topping for yogurt parfaits or even a fancy fruit salad. The possibilities are surprisingly endless for such a simple pastry.
Classic French Palmiers
Crispy, buttery, and sweet, these classic French palmiers are made with just two ingredients: puff pastry and sugar.
📝 Ingredients
👩🍳 Instructions
- 1Preheat your oven to 400°F (200°C). Line two large baking sheets with parchment paper and set aside.
- 2Lightly flour a clean work surface or a large piece of parchment paper. Unfold the thawed puff pastry sheet onto the prepared surface.
- 3Evenly sprinkle ¼ cup of the granulated sugar over the entire surface of the puff pastry. Use a rolling pin to gently press the sugar into the pastry. This helps it adhere and creates a more even caramelization.
- 4For the 'Book Fold' method: Imagine a line down the center of the pastry, lengthwise. Fold one long edge inward, bringing it to meet that imaginary center line. Do the same with the other long edge, so both edges meet in the middle. Then, fold one half of the pastry over the other, like closing a book.
- 5For the 'Rolled In' method: Starting from one long side, tightly roll the pastry inward towards the center. Stop when you reach the middle. Take the other long side and roll it inward, meeting the first roll exactly in the center. You'll end up with two rolls meeting in the middle, creating a single log.
- 6Wrap the pastry log tightly in plastic wrap and refrigerate for 15-20 minutes. This firms up the butter, making it easier to slice and helping the palmiers hold their shape better during baking.
- 7Remove the chilled pastry log from the refrigerator. Using a sharp knife, slice the log into ½-inch (1.25 cm) thick pieces. You should get about 12-16 palmiers per sheet of puff pastry.
- 8Place the sliced palmiers on the prepared baking sheets, leaving at least 2 inches (5 cm) between each one as they will expand significantly.
- 9Bake for 8-10 minutes, or until the bottoms are deeply golden brown and the sugar is visibly bubbling and caramelizing. Keep a close eye on them to prevent burning.
- 10Carefully flip each palmier over using a thin spatula. Bake for another 5-7 minutes, or until the second side is also deeply golden brown and caramelized. The edges should be crisp and hard.
- 11Immediately transfer the baked palmiers to a wire rack to cool completely. They will crisp up further as they cool. Serve once cooled to room temperature for the best texture.
💡 Notes
Ensure you use all-butter puff pastry for the best flavor and flakiness. Parchment paper is essential to prevent sticking. Baked palmiers are best enjoyed the day they are made, but can be stored in an airtight container at room temperature for 2-3 days. If they lose crispness, reheat them in a 300°F (150°C) oven for 5 minutes.



