


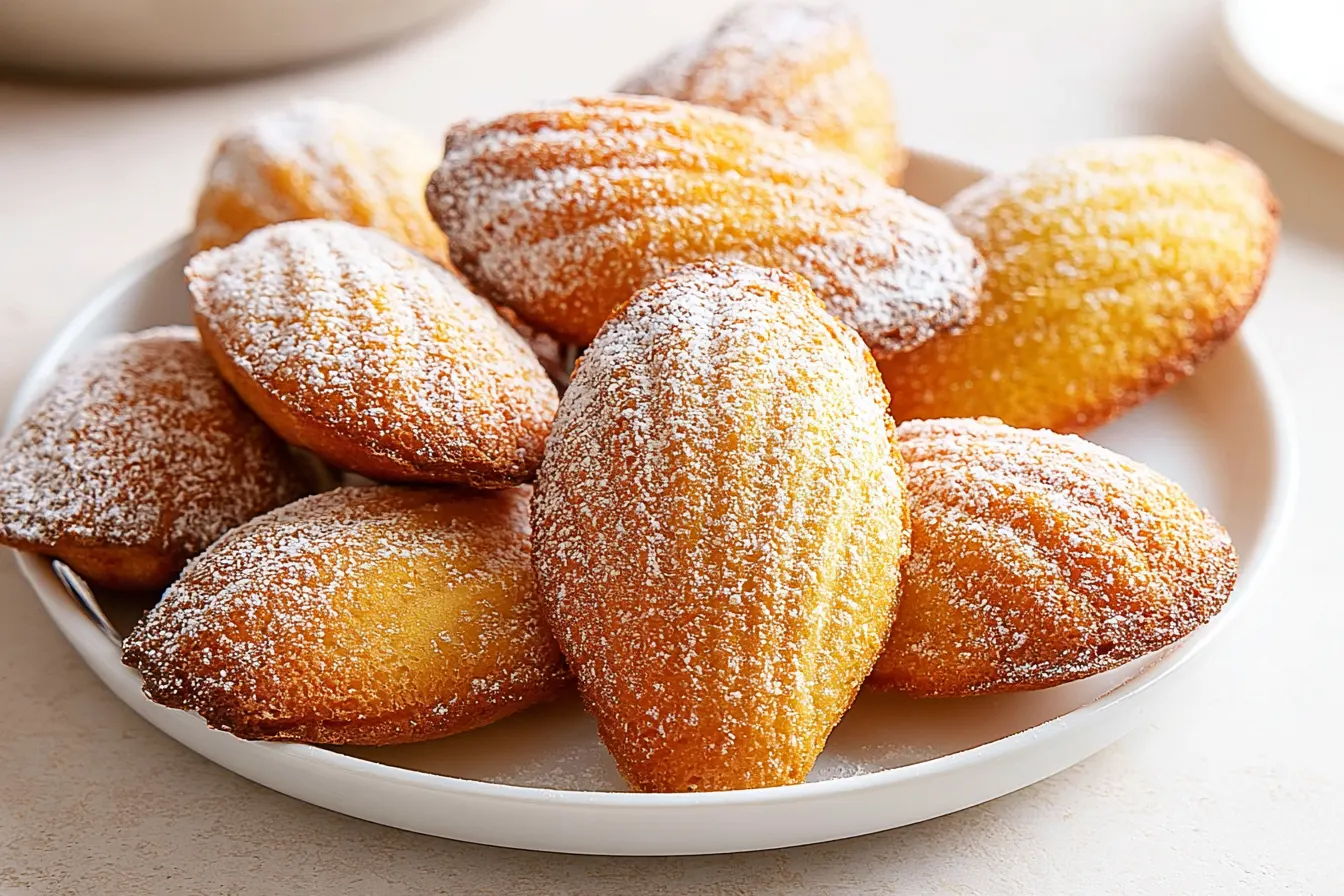
Have you ever wondered how some desserts manage to feel both incredibly fancy and utterly comforting all at once? That’s the magic of Classic French Madeleines. These delicate, shell-shaped cakes have a way of transporting you straight to a Parisian café, even if you’re just sipping tea in your kitchen. They’re petite, they’re elegant, and they deliver a surprising burst of buttery flavor in every bite.
- Why These Madeleines Will Win Your Heart (and Taste Buds)
- Gathering Your Baking Arsenal: What You’ll Need
- Crafting Your Classic French Madeleines: Step-by-Step
- Common Madeleines Mistakes (and How to Avoid Them)
- Frequently Asked Questions About Madeleines
- Serving Suggestions and Flavor Twists
- The Delight of a Simple Pleasure

Why These Madeleines Will Win Your Heart (and Taste Buds)
So, what makes this particular madeleine recipe stand out? It’s all about balance and a few key techniques that ensure that iconic shape and irresistible texture. We’re not just throwing ingredients into a bowl; we’re giving them the love and respect they deserve to truly shine. Many recipes rush the process, but a little chill time for the batter is crucial here – it helps develop that signature “hump” and a more profound flavor. Think of it as giving the ingredients a chance to get to know each other before their grand debut in the oven. Another secret weapon here is browned butter. Oh, browned butter, how I love thee! It adds an incredible depth and nutty aroma that elevates these madeleines from merely delicious to truly unforgettable. It’s a simple extra step that makes a world of difference, infusing every crumb with a warmth and complexity that plain melted butter just can’t achieve. This isn’t just a recipe; it’s a small journey to discover the subtle art of French baking, made accessible for everyone.Gathering Your Baking Arsenal: What You’ll Need
Before we get our hands buttery, let’s make sure we have everything prepped. Good ingredients are the foundation of any great bake, and madeleines are no exception. For that distinctive shape, a proper madeleine pan is non-negotiable. Metal ones conduct heat beautifully, which is key for getting that perfect golden crust and rise. You’ll also want a sturdy whisk, a couple of mixing bowls, and a rubber spatula for folding.The Pantry Staples
These ingredients are likely already lurking in your kitchen, but it’s always good to double-check. Freshness counts, especially for things like baking powder and eggs.- All-Purpose Flour: Just your standard white flour.
- Granulated Sugar: For sweetness and a little crispness.
- Large Eggs: At room temperature, please! They emulsify better.
- Unsalted Butter: We’ll be browning this for extra flavor.
- Baking Powder: Our leavening agent for that lovely rise.
- Vanilla Extract: Pure vanilla, not imitation, makes a difference.
- Pinch of Salt: To balance the sweetness and enhance flavors.
The Optional Flourish
These aren’t strictly necessary but can add a lovely touch.- Lemon Zest: A little finely grated zest adds a bright, fresh note that pairs beautifully with the buttery richness.
- Powdered Sugar: For dusting the finished madeleines, giving them that classic elegant look.
Crafting Your Classic French Madeleines: Step-by-Step
Let’s get baking! The process is broken down into easy-to-follow steps. Don’t rush, enjoy the rhythm of mixing and waiting.Step 1: Prep Your Pan and Brown That Butter
First things first, grab your madeleine pan. Brush each cavity generously with melted butter (you can use a bit from the unsalted butter you’ll be browning) and then dust it with flour, tapping out any excess. This ensures your madeleines release easily and beautifully. Pop the prepared pan into the fridge while you make the batter. This chill helps prevent the batter from spreading too quickly. Next, it’s time for the magic of browned butter. In a light-colored saucepan over medium heat, melt your unsalted butter. Keep stirring it gently. It will foam, then sizzle, and eventually, little brown bits will appear at the bottom, and it will smell wonderfully nutty. This usually takes about 5-7 minutes. Immediately remove it from the heat and pour it into a heatproof bowl to stop the cooking. Let it cool slightly – you don’t want it scorching your eggs!Step 2: Whisk the Wet and Dry Ingredients Separately
In a large bowl, whisk together the eggs, granulated sugar, and vanilla extract until the mixture is pale and slightly frothy. If you’re adding lemon zest, stir it in here. The goal isn’t to create a meringue, but just to combine everything well and dissolve the sugar. In a separate, smaller bowl, whisk together the all-purpose flour, baking powder, and pinch of salt. This ensures the leavening is evenly distributed.Step 3: Combine and Chill the Batter
Gently fold the dry ingredients into the wet ingredients in three additions, mixing until just combined after each addition. Be careful not to overmix; overworking the gluten can lead to tough madeleines. Once the flour is incorporated, stream in the slightly cooled browned butter, folding it in until no streaks remain.Tip: Don’t skip the chilling step! Cover the bowl with plastic wrap and refrigerate the batter for at least 1 hour, or even better, overnight. This resting period allows the flour to fully hydrate, the flavors to meld, and the butter to firm up, all contributing to that coveted “hump” and delicate texture.

Step 4: Bake Your Beautiful Shells
Preheat your oven to 375°F (190°C). Retrieve your chilled madeleine pan and batter. Spoon about 1 tablespoon of batter into the center of each prepared cavity. Resist the urge to overfill, as the batter will spread and rise. You want them to have room to form their distinctive shape. Bake for 8-12 minutes, or until the edges are golden brown and the centers have puffed up with that characteristic “hump.” The exact timing will depend on your oven and the size of your madeleine pan. Keep an eye on them; they bake quickly!Step 5: Cool and Admire
As soon as they’re out of the oven, immediately invert the madeleines onto a wire rack to cool completely. If you leave them in the hot pan, they might continue to cook or become soggy. Once cooled, you can dust them lightly with powdered sugar for a classic finish.
Common Madeleines Mistakes (and How to Avoid Them)
Baking madeleines is a relatively straightforward process, but a few pitfalls can trip up even experienced bakers. Knowing these common blunders can help you ensure your batch turns out perfect every time.No Hump?
The signature “hump” is often seen as the mark of a well-baked madeleine. If yours are flat, a few things could be at play. Most commonly, the batter wasn’t chilled long enough (or at all). Chilling causes the butter to solidify, creating a temperature shock when it hits the hot oven, which helps the batter rise dramatically in the center. Another culprit could be overmixing the batter, which develops too much gluten, or an oven that isn’t hot enough. Make sure your oven is fully preheated!Sticking to the Pan?
This is incredibly frustrating! The key here is proper pan preparation. You must generously butter and flour each cavity, even if your pan is non-stick. For extra insurance, some bakers like to freeze the buttered and floured pan for a few minutes before adding the batter. A well-chilled pan also helps here. If they still stick, you might need a new pan, as older non-stick coatings can wear down.Dry or Tough Texture?
Overmixing the batter is the biggest cause of tough madeleines. Once you add the flour, mix only until just combined. Overworking the gluten develops its elasticity, leading to a chewy, rather than delicate, crumb. Baking them for too long can also dry them out. Keep a close eye on them in the oven and pull them out as soon as they’re golden at the edges and the hump has set.Too Much Spread?
If your madeleines are spreading too much and losing their distinct shape, your batter might be too warm, or your pan wasn’t chilled sufficiently. The goal is for the cold batter to hit a hot pan, giving it a quick burst of rise before it has a chance to spread excessively. Ensure your butter wasn’t too hot when incorporated, as this can also warm the batter too much.Frequently Asked Questions About Madeleines
Got more questions about these delightful little cakes? You’re in good company! Here are some common queries I get about making Classic French Madeleines.What kind of madeleine pan should I use?
For the best results, a metal madeleine pan is highly recommended. Metal, especially non-stick aluminum or carbon steel, conducts heat beautifully and helps achieve that lovely golden crust and distinct hump. Silicone pans can work, but they often don’t brown as well and might not give you as pronounced a hump.Can I make the batter ahead of time?
Absolutely, and in fact, it’s encouraged! Chilling the batter for at least an hour is crucial for the texture and the famous “hump.” You can even prepare the batter a day or two in advance and store it in an airtight container in the refrigerator. Just give it a gentle stir before spooning it into the pan.How do I store leftover madeleines?
Madeleines are best enjoyed the day they are baked. Their delicate texture is at its peak when fresh. If you do have leftovers, store them in an airtight container at room temperature for up to 2-3 days. They tend to dry out quickly, so I don’t recommend refrigerating them. For longer storage, you can freeze them (see below).Can madeleines be frozen?
Yes, they can! Once completely cooled, arrange them in a single layer on a baking sheet and freeze until solid. Then, transfer them to an airtight freezer-safe bag or container. They’ll keep for up to 1 month. Thaw them at room temperature for an hour or so, or for a warm treat, pop them in a preheated oven at 300°F (150°C) for a few minutes.What can I do if I don’t have a madeleine pan?
While the signature shell shape is part of their charm, you can still make madeleine-like cakes without a specific pan. You could try baking the batter in mini muffin tins for a similar small cake, though you won’t get the shell pattern or the distinct hump. Adjust baking time accordingly for smaller cakes. Honestly, though, if you love madeleines, investing in a pan is worth it!Serving Suggestions and Flavor Twists
These Classic French Madeleines are perfectly delightful on their own, especially when still slightly warm from the oven. They pair beautifully with a cup of tea or coffee, making them an ideal afternoon treat. For a touch of elegance, dust them with a little powdered sugar just before serving. Want to get a little creative? Dip half of a cooled madeleine in melted dark or white chocolate and then sprinkle with chopped nuts, sprinkles, or a little sea salt. You can also add other flavorings to the batter besides lemon zest, such as orange zest, a pinch of cardamom, or a touch of almond extract for an entirely different experience. They’re a blank canvas for your culinary imagination!The Delight of a Simple Pleasure
There’s something uniquely satisfying about baking something that feels a little bit fancy, but is actually quite simple to achieve. These Classic French Madeleines fit that bill perfectly. They’re a testament to how a few basic ingredients, treated with care and a little bit of patience, can create something truly magical. The aroma alone as they bake is enough to lift your spirits, and the first bite is pure, buttery bliss. Whether you’re making them for a special occasion, a quiet afternoon with a book, or just because you fancy a little taste of France, these madeleines are sure to impress. Don’t be shy about trying them; you might just discover your new favorite baked good. The joy of pulling that pan from the oven, seeing those perfect little humps, and knowing you created such elegance with your own hands is truly a wonderful feeling. Happy baking!
Classic French Madeleines with Browned Butter
Delicate, buttery Classic French Madeleines with a signature hump and nutty browned butter flavor. Perfect for tea time!
📝 Ingredients
👩🍳 Instructions
- 1Prepare the Madeleine Pan: Brush each cavity of a madeleine pan generously with melted butter (you can use a small portion of the 1/2 cup butter from the recipe). Dust thoroughly with flour, tapping out any excess. Place the prepared pan in the refrigerator.
- 2Brown the Butter: In a light-colored saucepan over medium heat, melt the remaining 1/2 cup (113g) unsalted butter. Continue cooking, stirring occasionally, until the butter foams, then sizzles, and eventually, golden-brown bits appear at the bottom, and it smells nutty (about 5-7 minutes). Immediately pour the browned butter into a heatproof bowl to stop the cooking. Let it cool slightly, but ensure it remains liquid.
- 3Whisk Dry Ingredients: In a small bowl, whisk together the all-purpose flour, baking powder, and salt. Set aside.
- 4Combine Wet Ingredients: In a large bowl, whisk together the room temperature eggs, granulated sugar, and vanilla extract (and lemon zest, if using) until the mixture is pale and slightly frothy, and the sugar has mostly dissolved.
- 5Mix Batter: Gently fold the dry ingredients into the wet ingredients in three additions, mixing until just combined after each addition. Be careful not to overmix. Stream in the slightly cooled browned butter, folding until no streaks remain. Do not overmix.
- 6Chill the Batter: Cover the bowl with plastic wrap and refrigerate the batter for at least 1 hour, or preferably overnight. This chilling step is crucial for developing flavor and creating the signature 'hump'.
- 7Preheat Oven and Bake: Preheat your oven to 375°F (190°C). Retrieve the chilled madeleine pan and batter. Spoon approximately 1 tablespoon of batter into the center of each prepared cavity. Do not overfill. Place the pan in the preheated oven.
- 8Cook Until Golden: Bake for 8-12 minutes, or until the edges are golden brown and the centers have puffed up with a distinct 'hump'. Baking time may vary slightly depending on your oven and pan.
- 9Cool and Serve: As soon as they are baked, immediately invert the madeleines onto a wire rack to cool completely. If desired, dust lightly with powdered sugar before serving. Madeleines are best enjoyed the day they are baked.
💡 Notes
For best results, ensure eggs are at room temperature. The chilling step for the batter is critical for achieving the iconic madeleine hump and delicate texture. If you don't have a madeleine pan, you can use a mini muffin tin, but they won't have the shell shape. Store leftovers in an airtight container at room temperature for up to 2-3 days. They can also be frozen for longer storage.



