


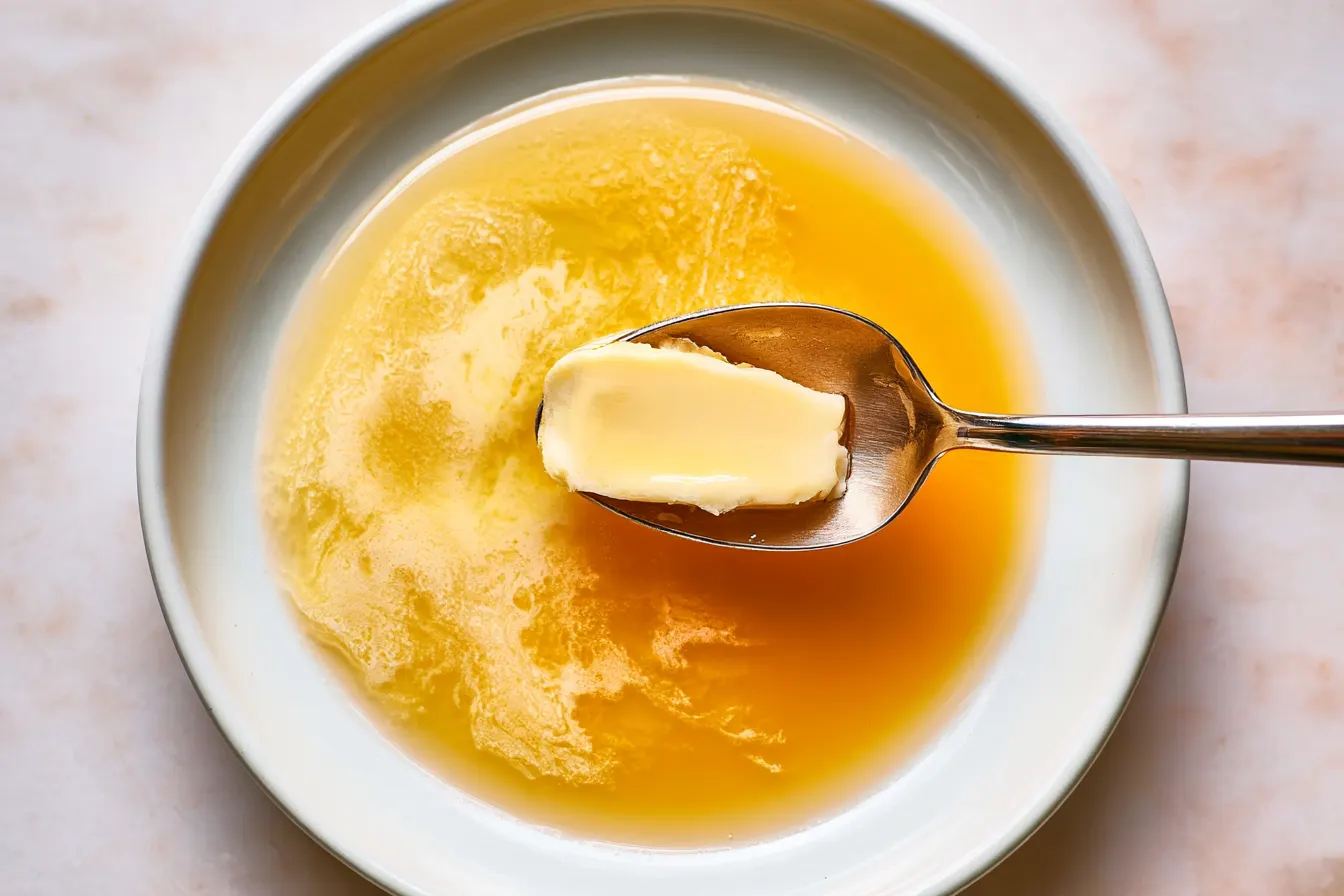
Have you ever noticed how some recipes just *sing*? That deep, nutty aroma that fills the kitchen, the richness that coats your tongue, the way a simple cookie or a pan of brownies can transcend from good to absolutely unforgettable? More often than not, the secret to that magical transformation lies in one incredibly simple, yet often overlooked, technique: learning how to make brown butter.
I can still vividly recall the first time I truly understood the power of brown butter. It was during an internship at a small, artisanal bakery. The head pastry chef, a woman with a no-nonsense demeanor and a twinkle in her eye, was making a batch of financier cakes. The smell that wafted from her pan as the butter cooked was intoxicating – a warm, toasty, caramel-like fragrance that made my stomach rumble.
She explained that browning butter wasn’t just about melting it; it was about transforming it, coaxing out complex notes that elevate anything it touches. From that day on, I’ve been a brown butter evangelist, and today, I’m sharing all my tips and tricks so you can master this fundamental technique and bring that same depth of flavor to your own kitchen.

The Alchemy of Brown Butter: What’s Happening in the Pan?
So, what exactly is happening when you brown butter? It’s a beautiful culinary process called the Maillard reaction. This isn’t just about burning the butter; it’s a controlled cooking of the milk solids present in butter.
Butter is primarily fat, but it also contains water and milk solids (proteins and sugars). When you heat butter, the water evaporates first. Once the water is gone, the milk solids begin to cook and caramelize, turning from white to a beautiful golden-brown. This caramelization creates hundreds of new flavor compounds, giving brown butter its signature nutty, toasty, almost toffee-like taste.
It’s a delicate balance. You want those milk solids to toast, but not burn. A keen eye and a bit of patience are your best friends here. Think of it as developing flavor, not just melting fat.
Why Go Brown? The Flavor Advantage
Using regular melted butter in a recipe is fine, but using brown butter is often *better*. It adds an instant layer of sophistication and depth that plain butter simply can’t. Imagine the difference between a plain sugar cookie and one with a hint of toasted caramel and nuts. That’s the brown butter effect!
It enhances everything from sweet treats like cookies, cakes, and glazes, to savory dishes like pasta sauces, roasted vegetables, and pan-seared fish. Once you start incorporating brown butter, you’ll find yourself wondering how you ever cooked without it.

Your Essential Ingredient: Just Butter
This is perhaps the shortest ingredient list you’ll ever encounter on my blog, and that’s the beauty of it!
What Kind of Butter Works Best?
- Unsalted Butter: This is my go-to. Using unsalted butter gives you full control over the salt content in your final dish. While you *can* use salted butter, just be mindful of the added salt and adjust your recipe accordingly.
- High-Quality Butter: Since butter is the star of the show, using a good quality butter can make a difference in the nuanced flavor. European-style butters, with their slightly higher fat content, can produce a particularly rich brown butter. However, any standard unsalted butter will work wonderfully.
Mastering the Technique: Browning Butter Step-by-Step
Browning butter is less a recipe and more a technique. It requires your full attention, but it’s incredibly rewarding. Don’t walk away from the stove!
Choosing the Right Equipment
A light-colored, heavy-bottomed saucepan or skillet is your best friend here. A light bottom allows you to clearly see the color of the milk solids as they change, preventing you from accidentally burning them. A heavy bottom ensures even heat distribution, which helps prevent scorching.
The Browning Process
- Melt It Down: Place your desired amount of unsalted butter into your saucepan over medium heat. Let it melt completely, swirling the pan occasionally. You’ll notice it start to foam and bubble.
- Listen and Watch: The butter will continue to bubble and foam. The foaming is the water evaporating. As the water cooks off, the foaming will subside slightly, and you’ll start to see tiny white specks at the bottom of the pan. These are the milk solids.
- The Color Change Begins: Keep cooking, swirling occasionally. The milk solids will begin to turn a pale golden color, then a rich amber, and finally a deep, nutty brown. You’ll also notice a distinct change in aroma – from a milky smell to a warm, nutty, caramel-like fragrance. This is where the magic happens!
- Remove from Heat IMMEDIATELY: This is crucial. Once the butter reaches a deep golden-brown color and smells wonderfully nutty, remove the pan from the heat immediately. The residual heat in the pan can quickly take it from perfectly browned to burnt in a matter of seconds.
- Transfer and Cool: Pour the hot brown butter (including all those delicious browned bits!) into a heat-proof bowl or container. This stops the cooking process and prevents it from burning. If you leave it in the hot pan, it will continue to cook and can easily scorch.
Tip: Don’t discard those browned bits! They are packed with flavor and are essential to the nutty taste of brown butter. Scrape them all into your bowl.
Common Pitfalls and How to Avoid Them
Even though it’s a simple process, there are a few places where things can go wrong. But don’t worry, they’re easily avoided!
Too High Heat
If your heat is too high, the butter will melt and brown too quickly, increasing the risk of burning. Stick to medium heat to give yourself enough time to observe the changes and react.
Walking Away
Seriously, don’t do it! Browning butter requires your undivided attention. It can go from perfect to burnt in a blink. Stay at the stove, watch the color, and smell the aromas.
Not Transferring Quickly Enough
Leaving the brown butter in the hot pan after removing it from the heat is a common mistake. The residual heat will continue to cook the milk solids, often leading to a burnt taste. Always pour it into a separate, cool bowl right away.
Frequently Asked Questions About Browning Butter
Can I use brown butter in any recipe that calls for melted butter?
For most baking recipes that call for melted butter, absolutely! It adds incredible depth. For savory dishes, it also works beautifully. Just be mindful of the nutty flavor it imparts and ensure it complements the other ingredients.
How do I store brown butter?
Once cooled, brown butter can be stored in an airtight container in the refrigerator for up to two weeks. It will solidify, just like regular butter. You can gently reheat it or let it come to room temperature before using, depending on your recipe.
What if I accidentally burn my butter?
Unfortunately, there’s no coming back from burnt butter. It will have a bitter, acrid taste. It’s best to discard it and start fresh. That’s why keeping a close eye on it is so important!
Can I make a big batch of brown butter to use later?
Yes, you certainly can! Many bakers like to brown a larger quantity of butter and store it in the fridge. This way, it’s ready to go whenever a recipe calls for that wonderful nutty flavor. Just make sure to measure out the amount needed for your recipe after it’s been browned and cooled.
Does browning butter change its volume?
Slightly. As the water evaporates during the browning process, you will lose a tiny bit of volume. For most home baking and cooking, this difference is negligible and won’t impact your recipe. If a recipe calls for a precise amount of brown butter (e.g., “1/2 cup browned butter”), you would brown a bit more than 1/2 cup of whole butter, then measure the browned butter after the fact.
Ideas for Using Your Liquid Gold
Now that you’re a brown butter expert, let’s talk about all the amazing ways you can use it!
- Cookies: Brown butter chocolate chip cookies are legendary for a reason.
- Cakes & Muffins: Swirl it into batters for extra richness. Think brown butter banana bread or apple muffins.
- Glazes & Frostings: A brown butter glaze on a bundt cake or a brown butter cream cheese frosting takes things to another level.
- Pasta: Toss it with sage and pasta for a simple yet incredibly flavorful sauce.
- Vegetables: Drizzle over roasted asparagus, green beans, or sweet potatoes.
- Sauces: Use it as the base for a pan sauce with chicken or fish.
- Pancakes & Waffles: Add it to your batter or drizzle it over the top with syrup.
The possibilities are truly endless. Once you experience the magic of brown butter, you’ll be finding excuses to add it to everything. It’s a simple step that yields monumental flavor rewards, and it’s a technique every home cook and baker should have in their repertoire. Happy browning!

How to Make Perfect Brown Butter
Unlock deep, nutty flavor by mastering brown butter in just minutes. Elevate any dish with this simple technique!
📝 Ingredients
👩🍳 Instructions
- 1Place the unsalted butter in a light-colored, heavy-bottomed saucepan over medium heat. This type of pan helps you clearly see the color change.
- 2Allow the butter to melt completely. As it melts, it will begin to foam and bubble. This is the water content evaporating.
- 3Continue to cook, swirling the pan occasionally. The foaming will subside, and you'll start to see small white specks forming at the bottom of the pan. These are the milk solids.
- 4Keep a close eye on the butter. The milk solids will gradually change from white to a pale golden, then to a rich amber, and finally to a deep, nutty brown. A distinct nutty, toasted aroma will fill your kitchen.
- 5As soon as the butter reaches a deep golden-brown color and smells wonderfully nutty (this happens quickly!), immediately remove the pan from the heat. The residual heat in the pan can cause it to burn very fast.
- 6Pour the hot brown butter, including all the browned bits at the bottom, into a separate heat-proof bowl or container to stop the cooking process. Do not leave it in the hot pan.
- 7Allow the brown butter to cool slightly before using, or cool completely to solidify for later use. Store solidified brown butter in an airtight container in the refrigerator for up to 2 weeks.
💡 Notes
Always use a light-colored pan to monitor the color change effectively. Don't walk away from the stove, as butter can go from perfect to burnt in seconds. The browned bits are packed with flavor, so make sure to scrape them all into your storage container or recipe.



