


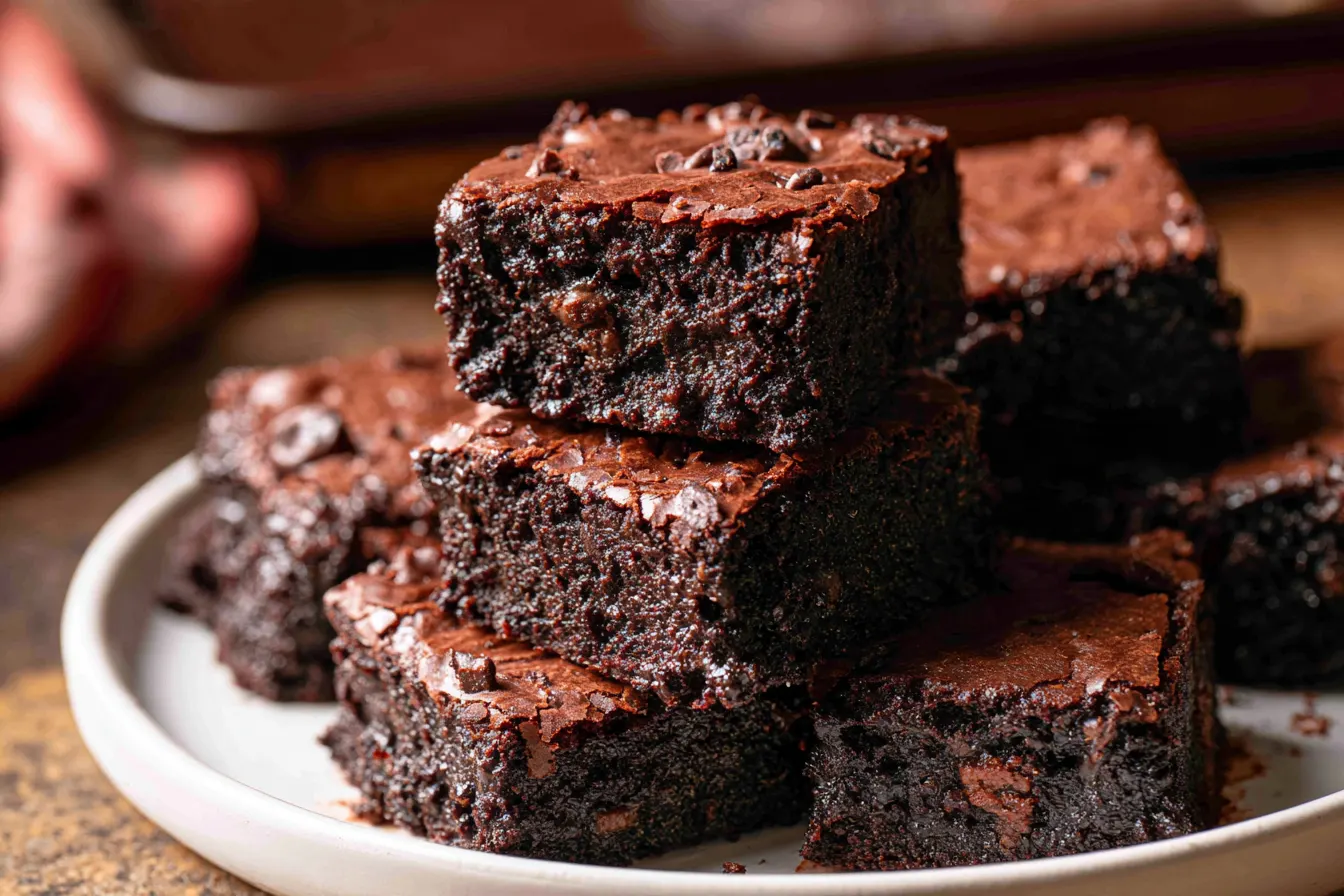
I used to think brownies were, well, just brownies. A classic, comforting square of chocolatey goodness, certainly, but not exactly a canvas for culinary experimentation. Then, on a particularly dreary Tuesday, while rummaging through my fridge for something, anything, to spark a little joy, my eyes landed on a forgotten tub of white miso paste. A lightbulb flickered. Could the salty, umami depth of miso actually play nice with the rich sweetness of chocolate? The idea of black cocoa miso brownies was born in that very moment, a delicious defiance of convention.
- Why Miso and Black Cocoa Are Your New Best Friends
- Ingredients for These Gourmet Black Cocoa Miso Brownies
- Crafting Your Black Cocoa Miso Brownies: Step-by-Step
- Getting the Perfect Brownie Texture
- Frequently Asked Questions About Miso Brownies
- Serving Suggestions and Flavor Pairings
- Why These Are The Best Black Cocoa Miso Brownies
- Storage and Reheating Tips for Maximum Enjoyment
There’s something truly magical about contrasting flavors dancing together on your palate. We see it in salted caramel, in chili chocolate, and now, my friends, we’re going to experience it in a brownie that will absolutely reset your expectations. This isn’t just a brownie; it’s an experience, a delightful push-and-pull between sweet, savory, and an incredibly deep chocolate flavor thanks to a special ingredient.
Forget everything you thought you knew about your favorite fudgy treat. These black cocoa miso brownies are here to challenge — and ultimately conquer — your dessert routine, offering a sophisticated twist that’s still undeniably comforting.

Why Miso and Black Cocoa Are Your New Best Friends
Let’s talk about the stars of this show. First, black cocoa powder. If you’ve ever had an Oreo cookie, you’ve tasted black cocoa. It’s cocoa powder that has been heavily dutched, meaning it’s been treated with an alkali to reduce its acidity. This process gives it that incredibly dark, almost midnight-black color and a less bitter, smoother, intensely chocolatey flavor profile. It’s what transforms these from regular chocolate brownies into something truly dramatic and deep, like a gourmet bakery showstopper.
Then there’s the miso. Specifically, white miso (shiro miso). It’s fermented soybean paste, and while it might sound unusual for a dessert, its savory, slightly sweet, and incredibly complex umami notes are exactly what these brownies need. Miso acts as a natural flavor enhancer, much like salt does in many desserts, but it brings so much more to the table. It deepens the chocolate flavor, balances the sweetness, and adds an almost indefinable richness that will have people asking, “What IS that amazing flavor?” It’s not overtly “miso-y” in the finished product; it’s more of a secret weapon that elevates everything around it.
The combination is a stroke of genius, if I do say so myself. The deep, almost brooding chocolate of the black cocoa finds its perfect counterpoint in the salty, earthy, and subtly sweet undertones of the miso. It’s a flavor pairing that sounds daring but tastes utterly harmonious, creating a brownie that’s complex, incredibly moist, and utterly addictive.
Ingredients for These Gourmet Black Cocoa Miso Brownies
Gathering your ingredients is the first step to brownie bliss. You’ll notice a few familiar faces and some exciting new additions that make all the difference. Quality really shines through here, especially with your chocolate and miso.

The Wet Ingredients & Flavor Boosters
- Unsalted Butter: Good quality butter is essential for that rich, fudgy texture. If you only have salted, you can use it, but reduce the added salt in the recipe by half a teaspoon.
- Granulated Sugar: Provides sweetness and helps create that glossy, crackly top.
- Brown Sugar: Adds moisture and a hint of molasses flavor, contributing to the chewiness.
- Large Eggs: Bind everything together and add structure. Make sure they’re at room temperature for better emulsion.
- Vanilla Extract: Pure vanilla extract, please! It enhances all the chocolate flavors.
- White Miso Paste: This is your secret ingredient! Look for shiro (white) miso – it’s milder and sweeter than red or yellow miso.
The Dry Elements & Chocolatey Depth
- Black Cocoa Powder: The star for that intense color and deep, smooth chocolate flavor. Don’t confuse it with Dutch-processed cocoa, though similar, black cocoa is specifically super-dutched.
- All-Purpose Flour: Just enough to provide structure without making the brownies cakey.
- Salt: Essential for balancing sweetness and bringing out all the flavors.
- Chocolate Chips or Chunks: Use good quality semi-sweet or dark chocolate chips. They melt into pockets of pure indulgence.
Crafting Your Black Cocoa Miso Brownies: Step-by-Step
Don’t be intimidated by the unique ingredients; the process for these miso brownies is quite straightforward. We’re essentially making a classic brownie batter with a couple of clever additions.

Prep Your Pan and Oven
Preheat your oven to 350°F (175°C). Grease and flour an 8×8 inch baking pan, or line it with parchment paper, leaving an overhang on two sides to easily lift the brownies out later. This small step makes a world of difference for clean removal!
Melt the Butter and Chocolate
In a large microwave-safe bowl or a saucepan over low heat, melt the unsalted butter. Once melted, stir in the chocolate chips until they are fully melted and smooth. If using a microwave, heat in 30-second intervals, stirring well after each, until smooth. Let this mixture cool slightly.
Whisk in the Sweetness and Umami
To the slightly cooled chocolate and butter mixture, add the granulated sugar and brown sugar. Whisk vigorously until well combined and glossy. Now, here’s where the magic happens: whisk in the white miso paste until it’s fully incorporated. It might look a little lumpy at first, but keep going until it’s smooth.
Add the Eggs and Vanilla
One at a time, crack in the large eggs, whisking well after each addition until fully combined. The mixture will become lighter in color and thick. Stir in the vanilla extract. Don’t overmix here; just combine until smooth.
Fold in the Dry Ingredients
In a separate medium bowl, whisk together the black cocoa powder, all-purpose flour, and salt. Gradually add the dry ingredients to the wet ingredients, folding gently with a spatula until just combined. Tip: Be careful not to overmix the batter. Overmixing develops the gluten in the flour, which can lead to cakey, tough brownies instead of fudgy ones. Stop mixing as soon as you no longer see streaks of dry flour.
Bake to Perfection
Pour the brownie batter into your prepared baking pan, spreading it evenly with a spatula. Bake for 25-30 minutes, or until a toothpick inserted into the center comes out with moist crumbs, but not wet batter. The edges should be set, but the center might still look a little soft. This is exactly what you want for fudgy brownies!
Cool and Devour
Remove the brownies from the oven and let them cool completely in the pan on a wire rack. This is crucial for fudginess and clean cuts! Once cooled, use the parchment paper overhang to lift them out of the pan, slice into squares, and enjoy the delicious mystery of sweet and savory.
Getting the Perfect Brownie Texture
Achieving that ideal brownie texture – fudgy, chewy, and rich – is all about a few key factors. It’s not just about the ingredients, but how you treat them.
The Secret to Fudgy Brownies
The ratio of fat to flour is critical. More fat (butter, chocolate) and less flour will result in a fudgier brownie. That’s why we’re using a good amount of butter and relying heavily on the black cocoa powder for flavor, not just bulk. Also, don’t overbake! An underbaked brownie is almost always better than an overbaked one when it comes to fudginess. The residual heat in the pan will continue to cook the brownies slightly as they cool.
The Glossy, Crackle Top
That beautiful, shiny, crackly top is often a sign of a good brownie. It’s usually achieved by whisking the sugar and eggs together vigorously enough to dissolve some of the sugar before adding the flour. In this recipe, by whisking the sugars into the warm butter and chocolate, we’re helping dissolve that sugar, which contributes to that desirable crust.
Why Room Temperature Eggs Matter
Using room temperature eggs helps them incorporate more easily and evenly into the batter. Cold eggs can cause the butter to seize up, leading to a lumpy batter. Letting them sit on the counter for 30 minutes before you start baking is a small step that makes a difference in the final texture.
Frequently Asked Questions About Miso Brownies
What kind of miso should I use?
For these brownies, white miso (shiro miso) is definitely preferred. It’s the mildest and sweetest variety, providing that subtle umami balance without overwhelming the chocolate. Red or yellow miso can be too strong and savory for a dessert application.
Where can I find black cocoa powder and miso paste?
Black cocoa powder can sometimes be found in well-stocked grocery stores in the baking aisle, or easily ordered online. Miso paste is typically found in the refrigerated section of most grocery stores, often near the tofu or international foods. Health food stores are also a good bet for both ingredients.
Can I make these gluten-free?
I haven’t tested this specific recipe with gluten-free flour, but generally, a 1:1 gluten-free baking flour blend (one that contains xanthan gum) should work. The texture might be slightly different, but the flavor should still be fantastic.
How do I store these miso brownies?
Store these black cocoa miso brownies in an airtight container at room temperature for up to 3-4 days. For longer storage, you can refrigerate them for up to a week. They also freeze beautifully for up to 3 months; just wrap individual squares tightly in plastic wrap and then foil.
Can I add other mix-ins?
Absolutely! While they are perfect as is, you could certainly fold in a handful of chopped nuts (pecans or walnuts would be lovely), a sprinkle of flaky sea salt on top before baking for an extra salty kick, or even some white chocolate chips for a visual contrast. Just don’t overdo it, as the miso and black cocoa are the stars!
Serving Suggestions and Flavor Pairings
These black cocoa miso brownies are so rich and flavorful, they honestly don’t need much accompaniment. But if you’re feeling fancy, here are a few ideas to elevate the experience:
- A Scoop of Ice Cream: A classic pairing. Vanilla bean ice cream would be perfect, allowing the brownie flavors to shine. A scoop of coffee or even a subtle matcha ice cream could also be an adventurous and delicious match.
- Flaky Sea Salt: A sprinkle of flaky sea salt over the top of each brownie just before serving amplifies the sweet and savory notes even further, adding a delightful textural contrast.
- Espresso or Strong Coffee: The deep chocolate notes are wonderfully complemented by a shot of espresso or a robust cup of coffee.
- A Dusting of Cocoa: For a simple yet elegant touch, a light dusting of more black cocoa powder or even regular unsweetened cocoa powder just before serving looks beautiful.
- Slightly Warm: While they are delicious at room temperature, a quick 10-15 second zap in the microwave can bring out their fudgy texture and intensified chocolate aroma, making them extra decadent.
Whatever you choose, these brownies are sure to impress with their unique depth and satisfying richness. They’re a conversation starter and a true testament to the exciting world of flavor exploration!
Why These Are The Best Black Cocoa Miso Brownies
You might be wondering, with all the brownie recipes out there, what makes these stand out? It’s not just the unique ingredients; it’s the balance, the texture, and the unexpected harmony of flavors that truly sets them apart. Many “unique” recipes can sometimes feel like a gimmick, but here, the miso and black cocoa aren’t just additions; they’re integral to the brownie’s identity.
The black cocoa provides an unparalleled depth of chocolate that isn’t bitter, but intensely satisfying. It creates a backdrop that allows the subtle complexities of the miso to emerge. The miso, in turn, acts as a natural enhancer, rounding out the sweetness and adding a layer of umami that makes each bite more intriguing than the last. It’s the kind of flavor that makes you pause, ponder, and then immediately reach for another piece.
Beyond the taste, the texture is spot-on: incredibly fudgy, dense, and moist, with that coveted shiny, crackly top. There’s no cakey dry crumb here, just pure, unadulterated brownie perfection. This isn’t just a recipe; it’s a culinary journey that takes a beloved classic and elevates it to something truly special, proving that sometimes, the most unexpected pairings lead to the most delightful discoveries.
Storage and Reheating Tips for Maximum Enjoyment
Once you’ve made a batch of these glorious black cocoa miso brownies, you’ll want to make sure they last as long as possible (or at least until they’re all devoured, which might not be long!). Proper storage is key to maintaining their incredible fudgy texture and rich flavor.
At Room Temperature
For the first few days, your brownies are perfectly happy hanging out on the counter. Place them in an airtight container to prevent them from drying out. They’ll stay wonderfully fudgy for up to 3-4 days. Placing a piece of parchment paper between layers can also help prevent them from sticking together if you’re stacking them.
Refrigeration
If you need them to last a bit longer, or if you simply prefer a firmer, chewier brownie (sometimes I do!), pop them into an airtight container and store them in the refrigerator. They’ll keep well for about a week. When you’re ready to eat, you can enjoy them chilled, or let them come to room temperature for about 15-20 minutes. A quick zap in the microwave for 10-15 seconds will also bring back that warm, gooey center.
Freezing for Future Cravings
Brownies are excellent candidates for freezing, which is perfect for portion control or having a treat ready for unexpected guests. To freeze, first ensure the brownies are completely cooled. Then, cut them into individual squares. Wrap each square tightly in plastic wrap, and then wrap again in aluminum foil. Place the wrapped brownies in a freezer-safe bag or container. They’ll keep in the freezer for up to 3 months.
To thaw, simply take out a frozen brownie and let it sit at room temperature for an hour or two, or gently warm it in the microwave until soft and fudgy. Freezing doesn’t compromise their texture or flavor, so you can enjoy these delightful treats long after baking day.

Black Cocoa Miso Brownies
Rich, fudgy black cocoa brownies with a surprising depth from white miso paste. A sweet and savory delight!
📝 Ingredients
👩🍳 Instructions
- 1Preheat your oven to 350°F (175°C). Line an 8x8 inch baking pan with parchment paper, leaving an overhang on two sides.
- 2In a large microwave-safe bowl or a saucepan over low heat, melt the unsalted butter. Remove from heat and stir in the chocolate chips until fully melted and smooth. Let cool slightly for 5 minutes.
- 3Add the granulated sugar and brown sugar to the chocolate mixture. Whisk vigorously until well combined and glossy. Stir in the white miso paste until fully incorporated and smooth.
- 4Add the eggs one at a time, whisking well after each addition until fully combined and the mixture is lighter in color and thick. Stir in the vanilla extract.
- 5In a separate medium bowl, whisk together the black cocoa powder, all-purpose flour, and salt. Gradually add the dry ingredients to the wet ingredients, folding gently with a spatula until just combined. Be careful not to overmix.
- 6Pour the batter into your prepared baking pan, spreading it evenly. Bake for 25-30 minutes, or until a toothpick inserted into the center comes out with moist crumbs, but not wet batter. The edges should be set.
- 7Remove from the oven and let cool completely in the pan on a wire rack before lifting out and slicing into squares. Enjoy!
💡 Notes
For an extra touch, sprinkle flaky sea salt on top of the brownies before baking. Store in an airtight container at room temperature for up to 4 days, or refrigerate for up to a week. Brownies can also be frozen for up to 3 months; wrap individual squares tightly in plastic wrap and then foil.



