


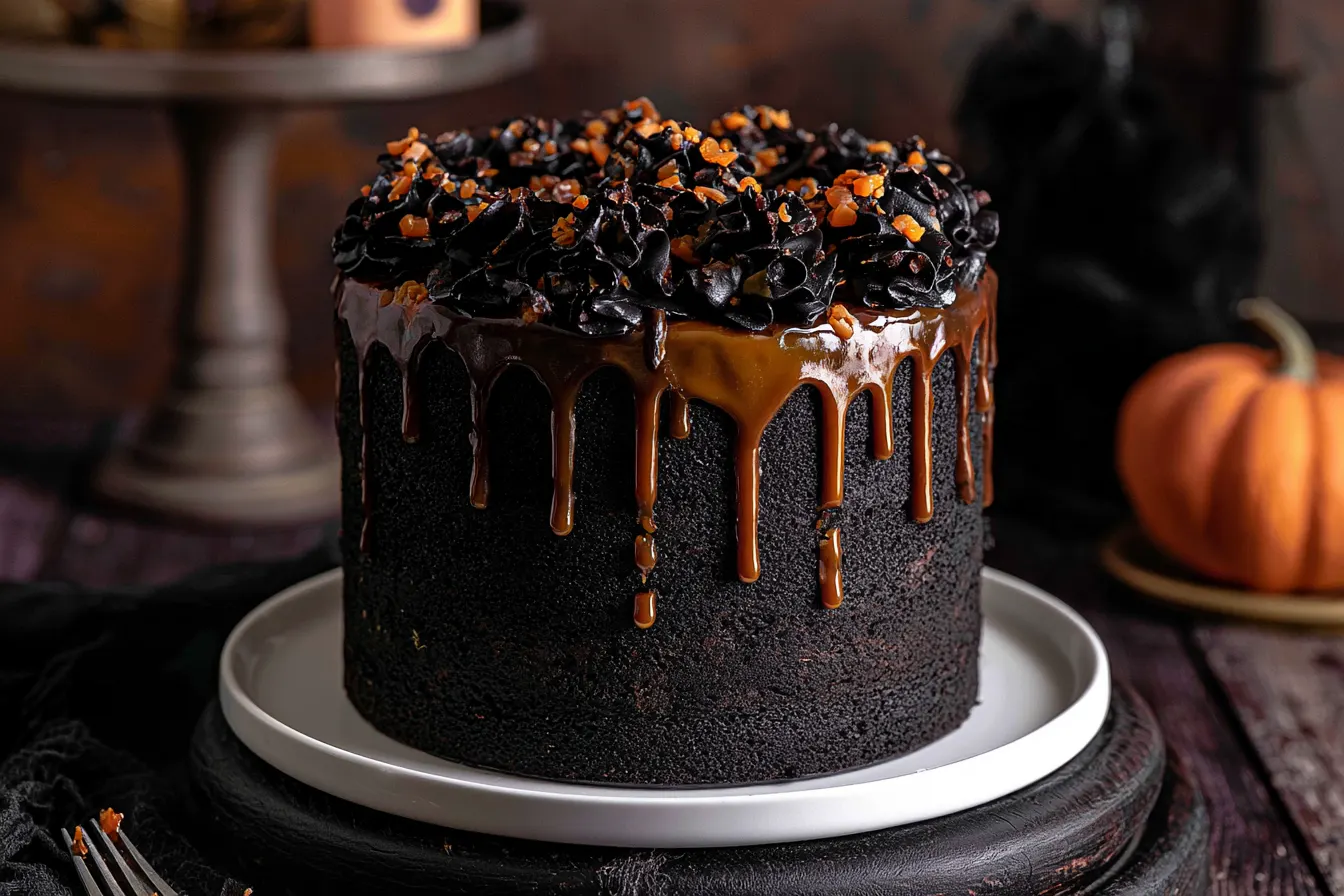
Okay, let’s be real for a second: have you ever baked a cake for a holiday party, and it just… didn’t quite live up to the festive hype? Like, you tried, bless your heart, but it ended up looking more sad beige than spooky spectacular? I’ve been there. Many times. Which is precisely why I became obsessed with perfecting this black velvet Halloween cake. It’s not just another chocolate cake; it’s a statement, a centerpiece, and frankly, a magic trick in edible form.
Forget the food coloring fiascos that leave your cakes looking like a bruised eggplant. This recipe leans into the deep, rich hues of black cocoa, giving you a naturally dark, incredibly moist, and utterly dramatic cake that screams Halloween without a single artificial dye in the batter itself. The secret weapon? A touch of espresso powder that deepens the chocolate flavor without making it taste like coffee.
The texture is pure velvet – dense yet tender, with a crumb that melts in your mouth. And the frosting? Oh, the frosting. We’re talking about a black cocoa buttercream so decadent and smooth, it’s practically a dessert on its own. Get ready for applause, gasps, and maybe even a few ghostly moans of delight when you unveil this beauty.

Why This Black Velvet Cake is Your Halloween Must-Bake
So, what sets this particular black velvet cake apart from the ghoulish crowd? It comes down to a few carefully chosen ingredients and techniques that elevate it from good to truly phenomenal.
The Magic of Black Cocoa
Firstly, the star of our show: black cocoa powder. This isn’t your everyday unsweetened cocoa. Black cocoa is extra Dutch-processed, meaning it has been treated with an alkali to reduce its acidity significantly. This process results in a very dark, almost jet-black powder with a less bitter, smoother flavor profile. Think Oreos – that iconic dark color and distinct taste come from black cocoa. Using it in the cake batter ensures a naturally deep color without relying on excessive food coloring, which can sometimes alter the texture or flavor of your cake. It provides a more robust, sophisticated chocolate note that’s less sweet and more intense.
Buttermilk’s Tender Touch
Another crucial player is buttermilk. This acidic liquid reacts with the baking soda in our recipe, creating a powerful leavening action that results in an incredibly tender, moist crumb. The acidity also helps to break down the gluten in the flour, preventing the cake from becoming tough. It also adds a subtle tang that beautifully complements the richness of the black cocoa, balancing the flavors and keeping the cake from being overly sweet.
A Hint of Espresso for Depth
You might raise an eyebrow at the espresso powder, but trust me on this one. It doesn’t make the cake taste like coffee. Instead, it acts as a flavor enhancer, deepening the chocolate notes and making them sing. Just a small amount intensifies the cocoa, giving the cake a more complex and luxurious chocolate profile that’s truly irresistible. It’s a classic baker’s trick for making chocolate taste more “chocolatey.”
The Buttercream: A Silky Dream
And let’s not forget the frosting! This black cocoa buttercream is not just about looks. It’s made with quality butter, a generous amount of black cocoa, and just the right amount of powdered sugar to achieve a silky-smooth texture that’s easy to spread and pipe. A splash of heavy cream ensures it’s light and fluffy, never greasy or overly sweet.
Gathering Your Ghoulish Ingredients
Before we dive into the delicious darkness, let’s make sure your pantry is stocked with everything you’ll need. Accuracy in measurement is key for baking, especially when working with finicky ingredients like black cocoa.
For the Black Velvet Cake:
- 2 ½ cups (300g) all-purpose flour
- 1 ½ cups (140g) black cocoa powder
- 2 teaspoons baking soda
- 1 teaspoon baking powder
- 1 teaspoon salt
- 1 teaspoon espresso powder (instant coffee powder works too!)
- 1 cup (226g) unsalted butter, softened
- 2 cups (400g) granulated sugar
- 4 large eggs, at room temperature
- 1 ½ cups (360ml) buttermilk, at room temperature
- 1 cup (240ml) hot water
- 1 teaspoon vanilla extract
For the Black Cocoa Buttercream:
- 1 cup (226g) unsalted butter, softened
- 1 ½ cups (140g) black cocoa powder
- 4-5 cups (480-600g) powdered sugar, sifted
- ¼ teaspoon salt
- ½ cup (120ml) heavy cream, cold
- 1 teaspoon vanilla extract
- Optional: a few drops of black gel food coloring (for extra depth, if desired)

Conjuring Your Cake: Step-by-Spooky-Step
Baking this cake is a delightful process, not overly complicated, but it does benefit from attention to detail. Follow these steps for a perfectly spooky result.
Prepping for Perfection
First things first, preheat your oven to 350°F (175°C). Then, grease and flour two 8-inch round cake pans. You can also line the bottoms with parchment paper for extra insurance against sticking. This little step saves so much heartache later.
Mixing the Dry Magic
In a large bowl, whisk together the flour, black cocoa powder, baking soda, baking powder, salt, and espresso powder. Make sure there are no lumps; a well-combined dry mixture ensures an even bake. Set this aside for a moment.
Creaming the Wet Elixir
In another large bowl (or the bowl of a stand mixer fitted with the paddle attachment), cream together the softened butter and granulated sugar until light and fluffy. This usually takes about 3-5 minutes on medium-high speed. Scrape down the sides of the bowl often.
Adding the Eggs and Vanilla
Beat in the eggs one at a time, ensuring each egg is fully incorporated before adding the next. Stir in the vanilla extract. The mixture might look a little curdled at this point, but don’t worry, it will come together.
Alternating Wet and Dry
Now, it’s time to combine everything. With the mixer on low speed, gradually add the dry ingredients to the wet ingredients, alternating with the buttermilk. Begin and end with the dry ingredients. Mix just until combined; overmixing can lead to a tough cake.
The Hot Water Trick
Finally, carefully pour in the hot water. The batter will be quite thin, and that’s exactly what you want! Mix just until smooth. This hot water helps to “bloom” the cocoa, intensifying its flavor and creating a super moist crumb.
Baking the Velvet Layers
Divide the batter evenly between your prepared cake pans. Bake for 30-35 minutes, or until a wooden skewer inserted into the center comes out with only a few moist crumbs. Tip: Resist the urge to open the oven door too early, as this can cause your cakes to sink in the middle. Let them bake undisturbed for at least 25 minutes before checking.
Cooling Down
Allow the cakes to cool in their pans for about 10-15 minutes before inverting them onto a wire rack to cool completely. They must be entirely cool before frosting, otherwise, your beautiful buttercream will melt into a sad, sugary mess.

Whipping Up the Wicked Buttercream
This buttercream is the perfect dark counterpart to our black velvet cake, providing a rich, smooth finish.
Creaming the Butter
In a large bowl, beat the softened butter on medium speed until it’s light and fluffy, about 2-3 minutes. This aerates the butter, making for a lighter frosting.
Adding the Cocoa and Salt
Gradually add the black cocoa powder and salt to the butter, beating until fully incorporated. It will look quite stiff at first.
Incorporating Powdered Sugar and Cream
With the mixer on low, gradually add the sifted powdered sugar, alternating with splashes of cold heavy cream. Begin and end with powdered sugar. Once all is added, increase the speed to medium-high and beat for another 3-5 minutes, until the frosting is light, fluffy, and smooth. Stir in the vanilla extract. Note: If you want an even deeper, more intense black color, now is the time to add a few drops of black gel food coloring. Gel coloring is best as it won’t thin out your frosting.
Assembling Your Spooky Masterpiece
Once your cake layers are completely cool and your buttercream is ready, it’s time to bring this Halloween dream to life!
Place one cooled cake layer on your serving plate or cake stand. Spread a generous layer of black cocoa buttercream over the top, making sure it’s even. Carefully place the second cake layer on top. Cover the entire cake with a thin “crumb coat” of frosting – this seals in any loose crumbs. Chill the cake for about 15-20 minutes to set the crumb coat. After chilling, apply the remaining frosting, smoothing it with an offset spatula or bench scraper, or pipe decorative designs as desired. For a truly eerie effect, try piping some spider webs or dripping patterns!
FAQ: Your Haunted Baking Questions Answered
Can I use regular cocoa powder instead of black cocoa?
While you can, using regular cocoa powder will result in a dark brown cake, not a true black. The flavor will also be different – less intense and more traditionally chocolatey. For the authentic “black velvet” look and taste, black cocoa is essential.
How do I get my cake layers to be perfectly flat?
For super flat layers, you can use baking strips around your cake pans. These help the cake bake more evenly, preventing a domed top. Alternatively, you can level your cooled cake layers with a serrated knife before frosting.
My buttercream is too stiff/too thin. What should I do?
If your buttercream is too stiff, add a teaspoon of heavy cream at a time until it reaches the desired consistency. If it’s too thin, add a tablespoon of sifted powdered sugar at a time until it thickens. Always adjust slowly to avoid overcorrecting.
Can I make this cake ahead of time?
Absolutely! The cake layers can be baked, cooled, wrapped tightly in plastic wrap, and stored at room temperature for up to 2 days, or frozen for up to a month. The buttercream can be made up to 3 days in advance and stored in the refrigerator; bring to room temperature and re-whip before using.
What are some fun decorating ideas for a Halloween Black Velvet Cake?
Beyond simple frosting, you could add edible glitter for a shimmering effect, place candy spiders or gummy worms, create eerie green or purple drips with colored white chocolate ganache, or even use stencils to dust powdered sugar in spooky shapes onto the top. A few strategically placed edible eyeballs always do the trick!
Storage and Serving Your Creepy Creation
Once your black velvet Halloween cake is complete, it will be the star of any frightful feast. To keep it fresh, store the cake in an airtight container at room temperature for up to 3 days. If you need it to last longer, or if your kitchen is particularly warm, refrigerate it for up to 5 days. Just be sure to bring it back to room temperature for about 30 minutes to an hour before serving for the best flavor and texture.
Serve slices with a scoop of vanilla bean ice cream, a dollop of whipped cream, or simply on its own. The intense chocolate flavor and velvety texture are truly captivating.

The Ultimate Black Velvet Halloween Cake
A decadent black velvet Halloween cake with a deep chocolate flavor, moist texture, and rich black cocoa buttercream. Perfect for spooky celebrations!
📝 Ingredients
👩🍳 Instructions
- 1Preheat oven to 350°F (175°C). Grease and flour two 8-inch round cake pans; line bottoms with parchment paper if desired.
- 2In a large bowl, whisk together the flour, black cocoa powder, baking soda, baking powder, salt, and espresso powder. Set aside.
- 3In another large bowl (or stand mixer), cream softened butter and granulated sugar until light and fluffy (3-5 minutes).
- 4Beat in eggs one at a time, ensuring each is incorporated. Stir in vanilla extract.
- 5With mixer on low, gradually add dry ingredients to wet, alternating with buttermilk. Begin and end with dry. Mix until just combined.
- 6Carefully pour in the hot water and mix just until smooth. The batter will be thin.
- 7Divide batter evenly between prepared pans. Bake for 30-35 minutes, or until a wooden skewer inserted into the center comes out with a few moist crumbs.
- 8Cool cakes in pans for 10-15 minutes, then invert onto a wire rack to cool completely.
- 9FOR THE BUTTERCREAM: Beat softened butter until light and fluffy (2-3 minutes).
- 10Gradually add black cocoa powder and salt, beating until incorporated.
- 11On low speed, add sifted powdered sugar alternately with cold heavy cream. Begin and end with powdered sugar.
- 12Increase speed to medium-high and beat for 3-5 minutes until light and fluffy. Stir in vanilla extract and gel coloring if using.
- 13Assemble the cake: Place one cooled layer on a plate. Spread with frosting. Top with the second layer. Apply a thin crumb coat and chill for 15-20 minutes. Finish frosting the entire cake.
💡 Notes
Ensure all cold ingredients (butter, eggs, buttermilk) are at room temperature for best results. For an extra rich chocolate flavor, use high-quality black cocoa. Cake layers can be frozen for up to a month. Bring the frosted cake to room temperature for optimal flavor before serving.



