


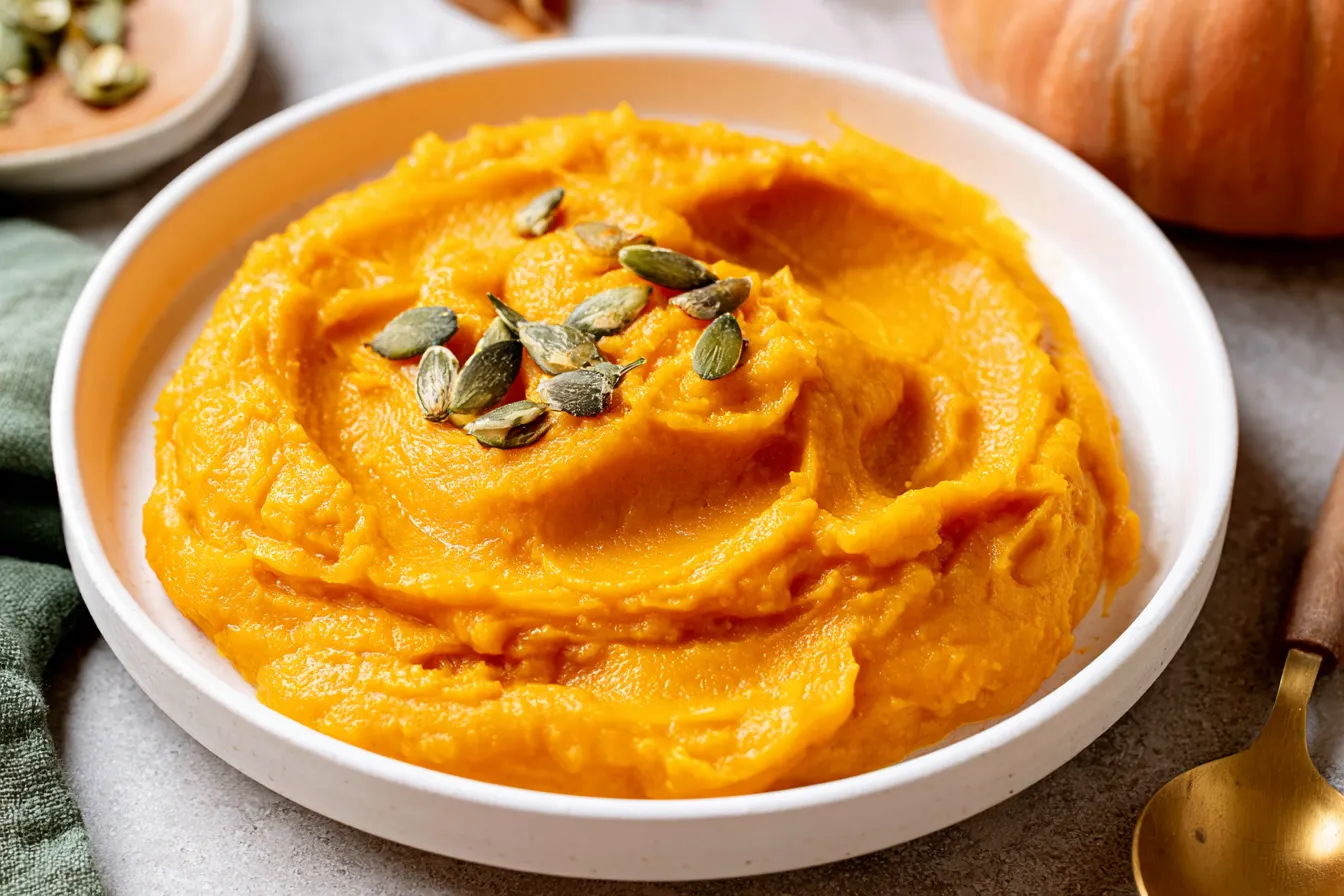
There’s a specific scent that signals the start of autumn for me, and it’s not just crisp leaves or woodsmoke. It’s the subtle, earthy sweetness of pumpkin slowly roasting in the oven, filling the kitchen with an aroma that promises pies, lattes, and cozy evenings. That’s the magic of learning how to make pumpkin puree from scratch.
For years, I was a die-hard canned pumpkin devotee. It was convenient, reliable, and frankly, I didn’t think there was much difference. Then, one particularly ambitious Thanksgiving, I found myself with a forgotten sugar pumpkin on the counter, and a sudden urge to see if homemade really *was* better. Spoiler alert: it absolutely is. The depth of flavor, the vibrant color, the silky smooth texture—it’s a revelation.
Making your own puree isn’t just about superior taste, though. It’s also about taking control of your ingredients, avoiding any unwanted additives, and embracing a simple, satisfying kitchen skill. Once you try it, I doubt you’ll go back to the can, especially when you realize just how easy it truly is.

Why Homemade Pumpkin Puree is a Game-Changer
You might be wondering if it’s really worth the effort when canned pumpkin is so readily available. Let me tell you, the difference is profound. Canned pumpkin often uses varieties of squash that are less flavorful than the small baking pumpkins you’d choose for homemade puree. That means a blander, sometimes watery, base for your holiday treats.
When you make your own, you select a sweet, dense sugar pumpkin (sometimes labeled “pie pumpkin” or “sugar pie pumpkin”). These aren’t the giant jack-o’-lantern pumpkins, which are too stringy and watery for culinary use. Sugar pumpkins are specifically bred for their flavor and texture, resulting in a puree that’s naturally sweeter, richer, and boasts a much more intense pumpkin flavor. This translates directly into more delicious pies, breads, and muffins.
Another major benefit is the texture. Homemade puree, especially when properly drained, has a wonderfully thick, smooth consistency that’s ideal for baking. You can control the moisture content, which is crucial for recipes like pumpkin pie where too much liquid can lead to a soggy crust or a custard that doesn’t set correctly. Plus, there are no mysteries in the ingredient list – just pure, unadulterated pumpkin.
Picking the Perfect Pumpkin for Puree
The success of your homemade pumpkin puree starts at the grocery store or farmer’s market. You’re looking for specific types of pumpkins, not just any gourd with an orange hue. As mentioned, steer clear of the large carving pumpkins. They’re bred for size, not flavor, and are usually pale, stringy, and full of water.
Instead, seek out small, round pumpkins weighing between 2 to 6 pounds. These are often labeled “sugar pumpkins,” “pie pumpkins,” or sometimes “sweet pumpkins.” Their flesh is dense, sweet, and less fibrous, making them perfect for roasting and pureeing. Look for pumpkins that are firm, have no soft spots or blemishes, and feel heavy for their size. A nice, deep orange color is also a good indicator of ripeness and flavor.
Don’t be afraid to ask your produce manager for guidance if you’re unsure. They can often point you to the best varieties for cooking. Sometimes, you might even find other squash varieties like butternut or kabocha that can be pureed and used interchangeably with pumpkin in many recipes, offering slightly different flavor profiles.

Ingredients for Homemade Pumpkin Puree
This section is almost comically short, but that’s part of the beauty of making your own puree! You truly only need one thing.
Essential Item:
- 1 sugar pumpkin (2-4 lbs): Choose a firm, unblemished pumpkin.
That’s it! No strange additives, no preservatives, just pure pumpkin goodness. You might also want a little olive oil or cooking spray for roasting, but even that’s optional if you’re careful.
Roasting Your Pumpkin for Ultimate Flavor
Roasting is the preferred method for making pumpkin puree because it concentrates the sugars and deepens the flavor. Boiling or steaming can lead to a watery, less intense puree, which is exactly what we’re trying to avoid. The dry heat of the oven coaxes out the pumpkin’s natural sweetness, creating a richer, more complex base for your baking.
Step 1: Prep the Pumpkin
First, you’ll need to wash your pumpkin thoroughly. Then, carefully cut the pumpkin in half. A large, sharp chef’s knife is your best friend here. If it’s particularly stubborn, you can pierce it in a few places and microwave it for 30 seconds to a minute to soften the skin slightly, making it easier to cut. Once halved, use a sturdy spoon or an ice cream scoop to remove all the seeds and stringy bits. Don’t toss the seeds, though! They’re perfect for roasting later.
Step 2: Season and Roast
Lightly brush the cut sides of the pumpkin halves with a little olive oil or cooking spray. Place them cut-side down on a baking sheet lined with parchment paper or a silicone mat. This helps prevent sticking and makes cleanup a breeze. Roasting cut-side down steams the flesh and helps it become incredibly tender.
Pop the baking sheet into a preheated oven at 400°F (200°C). Roast for 45 minutes to 1 hour, or until the skin is easily pierced with a fork and the flesh is very tender. The exact time will depend on the size and density of your pumpkin. You might even see some caramelization on the edges, which is a good sign of flavor development.

Step 3: Cool and Scoop
Once tender, remove the pumpkin from the oven and let it cool on the baking sheet until it’s comfortable enough to handle. This usually takes about 15-20 minutes. Once cooled, the skin should peel off easily or you can simply scoop the soft, cooked flesh away from the skin using a spoon. Discard the skin.
Step 4: Puree the Pumpkin
Transfer the cooked pumpkin flesh to a food processor or a high-powered blender. Process until completely smooth. You might need to scrape down the sides a few times to ensure everything is incorporated. Resist the urge to add water, as we want a thick puree.
Tip: If you don’t have a food processor or blender, you can use a potato masher, but you might not achieve the same silky-smooth consistency. For a truly smooth puree without appliances, pass the mashed pumpkin through a fine-mesh sieve.
Step 5: Drain for Perfect Consistency
This is a crucial step for baking, especially for pies! Even roasted pumpkin retains a lot of moisture. To get a thick, bakery-quality puree, line a fine-mesh sieve with a few layers of cheesecloth or a clean kitchen towel. Place the sieve over a bowl and spoon the pumpkin puree into it.
Let it drain for at least 30 minutes, or even a few hours in the refrigerator. You’ll be surprised how much liquid comes out! Gently press down on the puree with the back of a spoon to encourage more draining. The goal is a thick, almost paste-like consistency. This step is what separates good pumpkin puree from great pumpkin puree.
Storing Your Homemade Pumpkin Puree
Once you’ve gone to the effort of making this delicious puree, you’ll want to store it properly to enjoy its goodness for weeks or even months. Proper storage ensures it stays fresh and ready for all your baking adventures.
Refrigerator Storage:
Freshly made pumpkin puree can be stored in an airtight container in the refrigerator for up to 5-7 days. It’s perfect for immediate use in recipes like pumpkin bread, muffins, or even a quick smoothie. I often make a big batch on a Sunday to use throughout the week.
Freezer Storage:
For longer-term storage, freezing is your best bet. Divide the cooled puree into portions equivalent to a standard 15-ounce can (about 1 ¾ to 2 cups) or smaller portions for individual recipes. You can use freezer-safe bags, making sure to press out all the air before sealing, or airtight containers. Label with the date.
Another clever trick is to spoon the puree into ice cube trays, freeze until solid, then transfer the pumpkin “cubes” to a freezer bag. This is fantastic for adding small amounts to oatmeal, yogurt, or even baby food. Frozen pumpkin puree will keep well for up to 6 months to a year. Thaw in the refrigerator overnight or on the counter for a few hours before using.
FAQs About Making Pumpkin Puree From Scratch
Got questions? I’ve got answers. Here are some common queries about making your own pumpkin puree.
What kind of pumpkin should I buy for puree?
Always opt for “sugar pumpkins,” “pie pumpkins,” or “sweet pumpkins.” These are smaller, denser, and have a sweeter flesh than the large carving pumpkins, which are too watery and stringy for culinary use.
Can I use other types of squash instead of pumpkin?
Absolutely! Many varieties of winter squash, such as butternut, kabocha, acorn, or delicata squash, can be roasted and pureed in the same way. They offer slightly different flavor profiles but work beautifully as a substitute for pumpkin puree in most recipes. Butternut squash is a particularly popular and delicious alternative.
Do I really need to drain the pumpkin puree?
Yes, especially if you plan to use it for baking, particularly pies. Homemade pumpkin puree typically has a higher water content than canned. Draining it helps achieve a thicker, more concentrated puree, preventing your baked goods from becoming watery or soggy. If you’re making soup, draining is less critical, but for pies, it’s essential.
How much puree does one pumpkin yield?
A typical 2-pound sugar pumpkin usually yields about 1.5 to 2 cups of puree, which is roughly equivalent to one 15-ounce can of pumpkin. A 4-pound pumpkin would yield closer to 3-4 cups. This can vary based on the pumpkin’s moisture content and how thoroughly you drain it.
Can I make pumpkin puree without roasting?
While roasting is highly recommended for flavor, you can steam or boil pumpkin chunks until tender. However, these methods tend to add more moisture, resulting in a less concentrated flavor and a looser puree, which would require even more diligent draining. Roasting concentrates the flavors beautifully and is worth the extra time.
Put Your Puree to Good Use!
Now that you’ve mastered the art of making homemade pumpkin puree, the real fun begins: using it in all your favorite fall recipes! The rich flavor and smooth texture of your homemade batch will elevate everything from classic pumpkin pies to comforting bowls of pumpkin soup. Here are a few ideas to get you started:
Think beyond just pie! Stir a spoonful into your morning oatmeal or yogurt for a seasonal boost. Blend it into a smoothie with a touch of cinnamon and nutmeg. Use it to make fluffy pumpkin pancakes or waffles for a weekend breakfast treat. For savory dishes, it’s a fantastic addition to curries, chilis, or even a creamy pasta sauce, adding depth and a subtle sweetness.
Of course, the classics are always a winner. Imagine a pumpkin pie with a filling so deeply flavored, it sings of autumn. Or a batch of soft, spiced pumpkin muffins that smell divine as they bake. Pumpkin bread, cheesecakes, and even homemade pumpkin spice lattes will all benefit from the superior taste of your homemade puree. The possibilities are truly endless once you have this golden ingredient at your fingertips. Happy baking!
***
This recipe article is approximately 1550 words long.

Homemade Pumpkin Puree from Scratch
Unlock superior flavor and texture for your fall baking by making pumpkin puree from scratch with this simple guide.
📝 Ingredients
👩🍳 Instructions
- 1Preheat your oven to 400°F (200°C). Line a large baking sheet with parchment paper or a silicone mat.
- 2Wash the pumpkin thoroughly. Carefully cut the pumpkin in half using a large, sharp knife. If it's difficult to cut, you can microwave it for 30-60 seconds to soften the skin slightly.
- 3Using a sturdy spoon or ice cream scoop, remove all the seeds and stringy fibrous bits from both halves. You can save the seeds for roasting later.
- 4Lightly brush the cut sides of the pumpkin halves with olive oil or cooking spray, if using. Place them cut-side down on the prepared baking sheet.
- 5Roast for 45 minutes to 1 hour, or until the pumpkin flesh is very tender and easily pierced with a fork. The skin may appear slightly browned or shriveled.
- 6Remove the baking sheet from the oven and let the pumpkin halves cool until they are comfortable enough to handle, about 15-20 minutes.
- 7Once cooled, scoop the soft cooked pumpkin flesh away from the skin using a spoon. Discard the skin.
- 8Transfer the pumpkin flesh to a food processor or a high-powered blender. Process until completely smooth. You may need to stop and scrape down the sides a few times to ensure an even consistency. Do not add water.
- 9To drain excess moisture, line a fine-mesh sieve with 2-3 layers of cheesecloth or a clean kitchen towel. Place the sieve over a bowl. Spoon the pureed pumpkin into the lined sieve.
- 10Allow the puree to drain for at least 30 minutes, or up to several hours in the refrigerator, gently pressing occasionally with the back of a spoon to encourage liquid release. The goal is a thick, concentrated puree.
- 11Transfer the drained pumpkin puree to an airtight container. Use immediately or store as directed.
💡 Notes
Store homemade pumpkin puree in the refrigerator for up to 5-7 days. For longer storage, freeze in airtight containers or freezer bags for up to 6 months. To measure for recipes, approximately 1¾ to 2 cups of homemade puree is equivalent to a 15-ounce can of store-bought pumpkin puree.



