


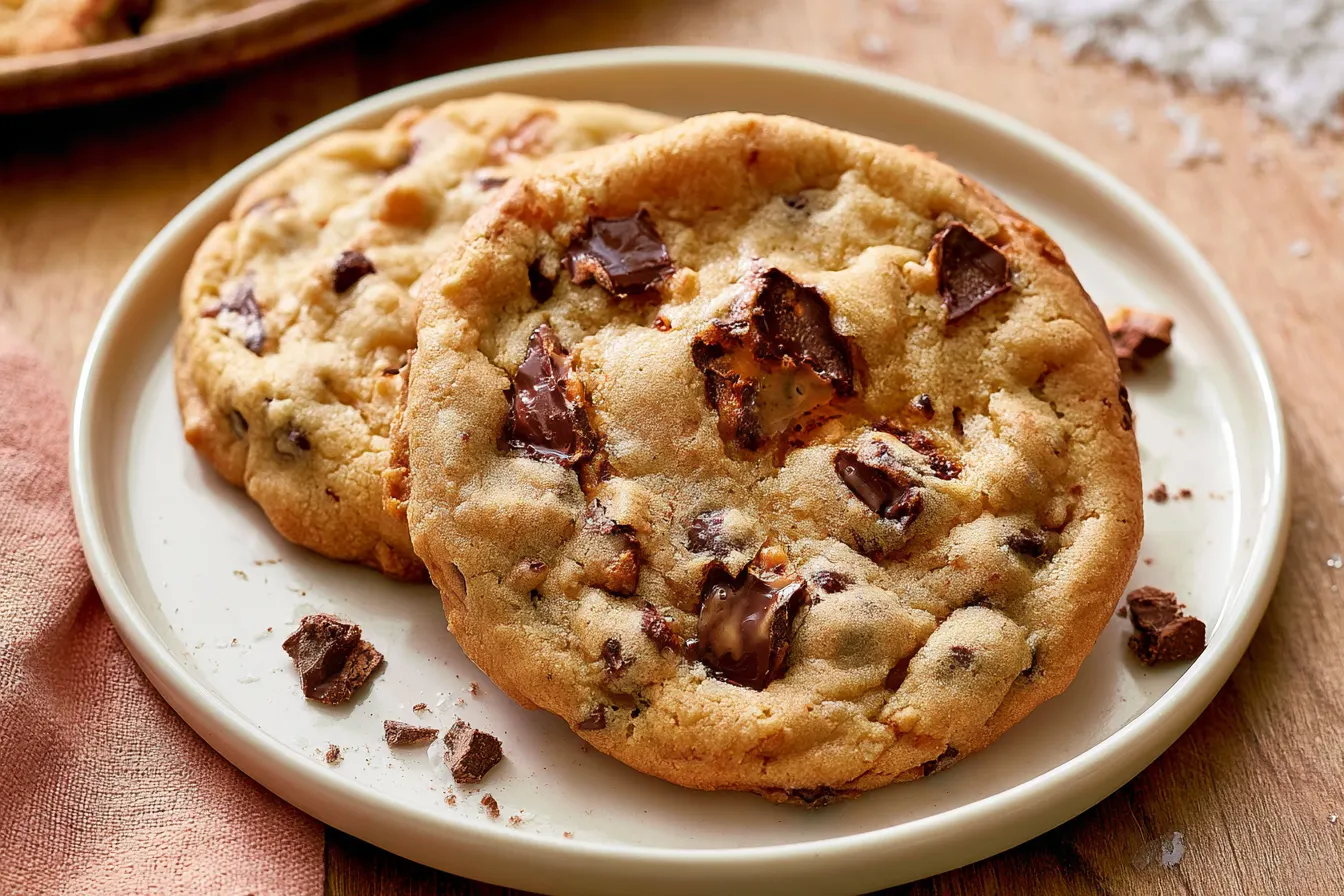
Have you ever bitten into a chocolate chip cookie from a really good bakery – you know, the kind that’s impossibly thick, gloriously chewy, with a slightly crisp edge and a molten, gooey center? That’s the dream, right? Well, today, I’m pulling back the curtain on exactly how to recreate those perfect bakery-style chocolate chip cookies right in your own kitchen.

The Secret Sauce: What Makes These Cookies So Special?
You might be thinking, “Another chocolate chip cookie recipe? What makes *this* one different?” And it’s a fair question! The internet is swimming in them. But what sets these apart are a few key techniques and ingredient choices that work in harmony to produce that iconic bakery texture and flavor. We’re not just throwing ingredients in a bowl; we’re building a cookie. First, there’s the thoughtful combination of sugars. Using both brown and granulated sugar isn’t new, but the *ratio* here is crucial for that chewy texture and moist interior. Then, we introduce a secret weapon: cornstarch. A tiny bit of cornstarch helps keep these cookies incredibly soft and tender, preventing them from becoming too cakey or too crumbly. It’s a game-changer for that signature chew. We also focus on the butter. Not just any butter, but properly softened butter, creamed until light and fluffy, which incorporates air and contributes to the cookie’s rise and overall tenderness. And let’s not forget the chocolate – a mix of chips and chopped chocolate is essential for those glorious melty pools. This isn’t just a recipe; it’s a blueprint for cookie success.Ingredients You’ll Need for Cookie Perfection
Gathering your ingredients is the first step on our journey to cookie nirvana. You’ll notice some familiar faces and perhaps one or two that might surprise you. Each component plays a vital role in achieving that coveted bakery quality.For the Dough
- Unsalted Butter: 1 cup (226g), softened to room temperature. This is crucial for proper creaming.
- Granulated Sugar: ¾ cup (150g). Provides sweetness and contributes to spread and crisp edges.
- Light Brown Sugar: 1 ½ cups (300g), packed. This is where most of the chewiness and moisture come from.
- Large Eggs: 2, at room temperature. Binders and contribute to richness.
- Vanilla Extract: 2 teaspoons. Use good quality vanilla for the best flavor.
- All-Purpose Flour: 2 ½ cups (300g). The structure of our cookie.
- Baking Soda: 1 teaspoon. Our leavening agent for lift.
- Cornstarch: 1 ½ teaspoons. The secret to extra softness and chewiness.
- Salt: 1 teaspoon. Balances sweetness and enhances flavor.
The Chocolate
- Semi-Sweet Chocolate Chips: 1 cup (170g). Classic and reliable.
- Chopped Dark Chocolate Bar: 1 cup (170g), about 60-70% cacao. This melts beautifully and creates those coveted chocolate puddles.

Crafting Your Bakery-Style Chocolate Chip Cookies: A Step-by-Step Guide
Making these cookies isn’t overly complicated, but paying attention to each step will guarantee those professional-looking and tasting results. Take your time, enjoy the process, and soon your kitchen will smell incredible.Step 1: Prep the Oven and Pan
First things first, preheat your oven to 375°F (190°C). Line two large baking sheets with parchment paper or silicone baking mats. This prevents sticking and ensures even baking.
Step 2: Cream the Butter and Sugars
In the bowl of a stand mixer fitted with the paddle attachment (or a large bowl with an electric hand mixer), cream together the softened butter, granulated sugar, and packed light brown sugar. Beat on medium speed for 2-3 minutes until the mixture is light in color and fluffy. This aeration is key for tender cookies.
Step 3: Add Eggs and Vanilla
Crack in one egg at a time, beating well after each addition until fully incorporated. Scrape down the sides of the bowl as needed. Stir in the vanilla extract until just combined. Don’t overmix here; we just want everything to come together.
Step 4: Whisk Dry Ingredients
In a separate medium bowl, whisk together the all-purpose flour, baking soda, cornstarch, and salt. Make sure there are no lumps of baking soda or cornstarch. This ensures even distribution throughout the dough.
Step 5: Combine Wet and Dry
Gradually add the dry ingredients to the wet ingredients, mixing on low speed until just combined. Be careful not to overmix the dough once the flour is added; overmixing develops gluten, which can lead to tough cookies. Stop mixing as soon as you no longer see streaks of dry flour.
Step 6: Fold in the Chocolate
Gently fold in both the chocolate chips and the chopped dark chocolate. You want them distributed throughout the dough, but don’t overwork it. Tip: If you want truly picture-perfect cookies, reserve about ¼ cup of chocolate chips/chunks to press into the tops of the cookie dough balls just before baking.
Step 7: Portion and Chill (Optional, but Recommended)
Using a large cookie scoop (about 3 tablespoons of dough), scoop mounds onto a plate or small baking sheet. These cookies are quite substantial! While you can bake them immediately, chilling the dough for at least 30 minutes (or up to 24 hours) allows the flavors to meld and prevents excessive spreading, resulting in thicker cookies. This is a pro-bakery trick!

Step 8: Bake to Golden Perfection
Place the scooped cookie dough balls (about 6-8 per baking sheet, giving them plenty of space) onto your prepared baking sheets. Bake for 10-13 minutes, or until the edges are golden brown and set, but the centers still look slightly underbaked and soft. They will continue to cook as they cool.
Step 9: Cool and Enjoy
Remove the baking sheets from the oven and let the cookies cool on the sheets for about 5-10 minutes. This allows them to firm up without breaking. Then, transfer them to a wire rack to cool completely. Or, if you’re like me, enjoy one (or two!) warm, with a glass of cold milk. There’s nothing quite like a fresh-from-the-oven chocolate chip cookie.
Common Cookie Conundrums: Troubleshooting Tips
Even the most seasoned bakers can run into a few snags. Here are some common questions and issues that pop up when making chocolate chip cookies, and how to tackle them for perfect results every time.Why are my cookies spreading too much?
This is a common issue! It can be due to several factors: your butter might have been too warm (verging on melted), your oven temperature might be too low (get an oven thermometer!), or you might not have chilled your dough. Using too much butter or not enough flour can also contribute. Ensure your butter is just softened, not greasy, and consider chilling the dough for at least 30 minutes.
How do I get those perfectly gooey centers?
The key here is to slightly underbake them. When you pull them from the oven, the edges should be set and lightly golden, but the very center should still look a little soft and even slightly wet. They will continue to cook on the hot baking sheet as they cool, leading to that irresistible gooey texture.
Can I make these cookies ahead of time?
Absolutely! You can prepare the dough and store it in an airtight container in the refrigerator for up to 3 days. Alternatively, scoop the dough into balls and freeze them on a baking sheet until solid, then transfer to a freezer-safe bag. You can bake them directly from frozen; just add an extra 2-4 minutes to the baking time.
Why are my cookies cakey instead of chewy?
Cakey cookies often result from too much flour, too much baking soda, or overmixing the dough. Ensure you’re measuring your flour correctly (spoon into the measuring cup and level off) and not packing it in. The cornstarch in this recipe also helps combat cakeyness, promoting a softer, chewier crumb.
What kind of chocolate is best for these cookies?
For bakery-style cookies, a mix is best! Semi-sweet chocolate chips hold their shape well, while chopped chocolate (from a good quality bar, 60-70% cacao) melts into luscious pools. The different melt rates and textures create a more dynamic chocolate experience. Don’t be afraid to mix in milk chocolate chips or even white chocolate chunks for variety!
Storage & Reheating for Peak Freshness
If by some miracle you have any leftover cookies (a rare occurrence in my house!), proper storage ensures they stay delicious for as long as possible. Once completely cooled, store your bakery-style chocolate chip cookies in an airtight container at room temperature for up to 3-4 days. To keep them extra soft, you can add half a slice of bread into the container; the cookies will absorb moisture from the bread. If you want to enjoy that “fresh from the oven” experience again, pop a cookie into the microwave for 10-15 seconds, or warm it in a preheated oven at 300°F (150°C) for 5-7 minutes. This will bring back that gooey center and slightly crisp edge beautifully.
Bakery-Style Chocolate Chip Cookies
Thick, chewy, and gloriously gooey in the center, these bakery-style chocolate chip cookies are a true crowd-pleaser.
📝 Ingredients
👩🍳 Instructions
- 1Preheat your oven to 375°F (190°C). Line two large baking sheets with parchment paper or silicone baking mats.
- 2In a large bowl, or the bowl of a stand mixer, cream together the softened butter, granulated sugar, and light brown sugar on medium speed for 2-3 minutes, until light and fluffy.
- 3Add eggs one at a time, beating well after each addition. Stir in the vanilla extract.
- 4In a separate medium bowl, whisk together the all-purpose flour, baking soda, cornstarch, and salt.
- 5Gradually add the dry ingredients to the wet ingredients, mixing on low speed until just combined. Be careful not to overmix.
- 6Gently fold in the chocolate chips and chopped dark chocolate until evenly distributed.
- 7Using a large cookie scoop (about 3 tablespoons), scoop dough balls onto a plate. For best results, chill the dough for at least 30 minutes, or up to 24 hours.
- 8Place the chilled cookie dough balls onto the prepared baking sheets, leaving about 2 inches between them. Bake for 10-13 minutes, or until the edges are golden brown and set, but the centers still look slightly underbaked.
- 9Remove from the oven and let the cookies cool on the baking sheets for 5-10 minutes before transferring them to a wire rack to cool completely.
💡 Notes
For extra thick cookies, a minimum 30-minute chill time is highly recommended. To freeze cookie dough, scoop balls onto a baking sheet, freeze until solid, then transfer to a freezer-safe bag. Bake from frozen, adding 2-4 minutes to baking time. For perfect chocolate puddles, press a few extra chocolate chunks onto the top of each cookie dough ball before baking.



