


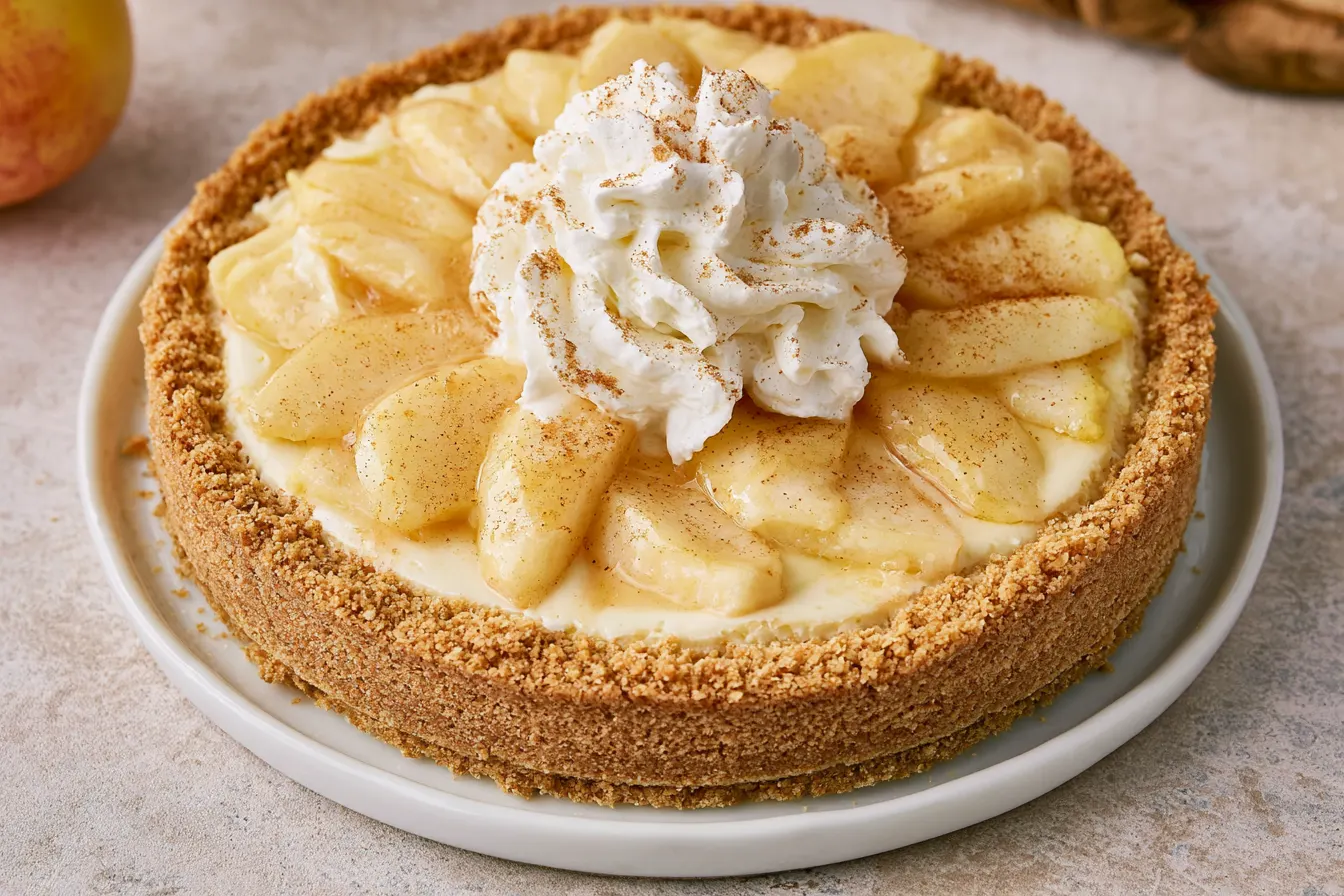
Ever had one of those moments when a holiday rolls around, and you’re just… oven-averse? Maybe your oven’s already crammed with a turkey and a casserole, or perhaps the thought of adding more heat to an already warm kitchen just doesn’t appeal. Whatever the reason, sometimes you want that quintessential holiday flavor without the fuss. That’s exactly how this delightful No-bake Apple Pie with Graham Cracker Crust came to be. It’s the perfect solution when you crave classic apple pie comfort but want to keep things cool and breezy in the kitchen.
I remember one particular Thanksgiving where my oven decided to stage a protest mid-roast. The horror! While we managed to coax it back to life, the experience left me vowing to have at least one spectacular dessert that didn’t rely on a fiery box. This no-bake wonder was my salvation, and it quickly became a household favorite, proving that you don’t need heat to create something truly special.
This pie isn’t just about convenience; it’s about capturing those warm, spiced apple flavors in a refreshing, creamy texture. Think of it as a chilled apple crisp meets a silky pudding, all nestled in a buttery, crumbly crust. It’s surprisingly simple to put together, leaving you more time to enjoy the festivities (and less time hovering over a hot stove!).

Let’s be honest, traditional apple pie, while undeniably delicious, can be a bit of an undertaking. Peeling, coring, slicing, making a perfect crust, blind baking, then the long bake itself—it’s a labor of love. But what if you could shortcut most of that, without sacrificing any of that beloved apple pie essence? That’s the magic we’re exploring today with this incredible no-bake version. It’s a game-changer for busy holidays or any time you’re craving something sweet and comforting without the culinary marathon.
This recipe focuses on bringing out the best of fresh apples and warm spices, all wrapped up in a delightful, crunchy graham cracker crust. The filling is smooth, rich, and infused with cinnamon and nutmeg, offering a beautiful contrast to the crisp crust. You’ll be amazed at how quickly this comes together, and even more amazed at how quickly it disappears once served.
Gather Your Goodies: What You’ll Need
The beauty of a no-bake recipe often lies in its simplicity, and this no-bake apple pie is no exception. You don’t need a pantry full of obscure ingredients; most of these are likely staples in your kitchen already. Fresh, crisp apples are the star here, so pick varieties known for their flavor and texture, even when not cooked.
For the Irresistible Graham Cracker Crust
- Graham Cracker Crumbs: About 10-12 full sheets, finely crushed. You can buy them pre-crushed for ultimate ease!
- Granulated Sugar: Just a touch to sweeten the crust.
- Unsalted Butter: Melted. This binds everything together, giving you that perfect crumbly-yet-firm texture.
For the Silky Apple Pie Filling
- Fresh Apples: 4-5 medium apples, peeled, cored, and finely diced. Honeycrisp, Granny Smith, Fuji, or even a mix work wonderfully. Granny Smith adds a nice tartness that balances the sweetness.
- Apple Juice or Cider: This forms the base of our luscious filling.
- Granulated Sugar: To sweeten the apples and the filling. Adjust to your apple’s sweetness.
- Cornstarch: Our thickening agent. It ensures a beautifully set filling.
- Ground Cinnamon: Essential for that classic apple pie flavor.
- Ground Nutmeg: A pinch enhances the warmth of the cinnamon.
- Lemon Juice: A splash brightens the flavors and prevents the apples from browning.
- Vanilla Extract: Pure vanilla adds depth and aroma.
For the Dreamy Whipped Topping (Optional, but highly recommended!)
- Heavy Cream: Cold, straight from the fridge.
- Powdered Sugar: To sweeten the cream and give it a silky texture.
- Vanilla Extract: Just a hint.

Bringing It All Together: Step-by-Step Guidance
This recipe is designed for maximum ease and minimal fuss. Follow these steps, and you’ll have a stunning dessert ready to chill in no time. The key is to prepare your components and then assemble.
Building the Graham Cracker Foundation
- Crush the Crackers: If you’re using whole graham crackers, place them in a Ziploc bag and crush them with a rolling pin until fine crumbs form. Alternatively, pulse them in a food processor. You’ll need about 1 ½ cups of crumbs.
- Combine & Press: In a medium bowl, mix the graham cracker crumbs and granulated sugar. Pour in the melted butter and stir until all the crumbs are moistened. It should look like wet sand.
- Form the Crust: Press the mixture firmly into the bottom and up the sides of a 9-inch pie plate. Use the back of a spoon or the bottom of a flat-bottomed glass to get an even, compact layer. Pop it into the refrigerator while you prepare the filling. This helps it set.
Crafting the Velvety Apple Filling
- Prep the Apples: Peel, core, and finely dice your apples. Aim for small, uniform pieces so they soften evenly and blend well into the filling. Toss them with a tablespoon of lemon juice to prevent browning.
- Simmer the Sauce: In a medium saucepan, combine the apple juice (or cider), granulated sugar, cinnamon, and nutmeg. Bring the mixture to a gentle simmer over medium heat, stirring until the sugar dissolves.
- Thicken It Up: In a small bowl, whisk together the cornstarch with 2 tablespoons of cold water to create a slurry. Slowly pour the cornstarch slurry into the simmering apple juice mixture, whisking constantly. The mixture will begin to thicken almost immediately. Continue to cook and stir for another minute or two, until it’s thick and translucent.
- Infuse the Apples: Remove the saucepan from the heat. Stir in the diced apples and vanilla extract. The residual heat from the sauce will slightly soften the apples, giving them a pleasant bite without making them mushy. You want them to retain a little texture.
- Cool the Filling: Let the apple filling cool down to room temperature. This is crucial! Pouring a hot filling into a chilled crust can make the crust soggy. Stir occasionally to help it cool faster.

Assembling and Chilling Your Masterpiece
- Fill the Crust: Once the apple filling has cooled, pour it evenly into your prepared graham cracker crust. Spread it out gently with a spatula.
- Chill Out: Cover the pie loosely with plastic wrap and refrigerate for at least 4 hours, or preferably overnight. This chilling time is essential for the filling to fully set and for the flavors to meld beautifully.
- Whip the Topping (Optional): If you’re making the whipped cream, combine cold heavy cream, powdered sugar, and vanilla extract in a chilled bowl. Beat with an electric mixer on medium-high speed until stiff peaks form. Don’t overbeat, or you’ll get butter!
- Serve & Enjoy: Once thoroughly chilled, slice the pie with a sharp knife (running it under hot water between slices helps for clean cuts). Serve plain or with a generous dollop of fresh whipped cream. A sprinkle of extra cinnamon or a drizzle of caramel sauce wouldn’t hurt either!
Tip: For an extra layer of flavor and a slightly more “cooked” apple texture, you can gently sauté the diced apples in a tablespoon of butter with a pinch of cinnamon and sugar for 5-7 minutes before adding them to the thickened sauce. Just let them cool completely afterward.
Why This No-Bake Wonder Works So Well
This pie isn’t just a convenience hack; it’s a carefully balanced symphony of flavors and textures designed to satisfy that apple pie craving without ever touching an oven. The key is in the interplay between the crisp graham cracker crust, the sweet-tart apples, and the creamy, spiced sauce.
Many no-bake desserts can feel a bit one-note, but this one truly delivers on complexity. The fresh apples retain some of their natural crispness, offering a delightful contrast to the smooth, almost custardy filling they’re suspended in. The warmth from the cinnamon and nutmeg makes it feel just as comforting as a baked pie, even though it’s served chilled. It’s the perfect bridge between a refreshing dessert and a hearty, nostalgic treat.
Common Questions About This Easy Apple Pie
Got questions? I’ve got answers! Here are some of the most common queries I hear about this no-bake sensation.
Can I use canned apple pie filling for this recipe?
While you technically could, I strongly recommend against it for this specific recipe. The magic here comes from the fresh, diced apples that slightly soften in the warm sauce, retaining some of their texture. Canned fillings are usually too soft and sweet, and the consistency won’t be the same. Plus, making the filling from scratch is incredibly easy and tastes so much better!
What are the best types of apples to use?
For the best flavor and texture, I love using a mix! Granny Smith apples offer a lovely tartness that cuts through the sweetness, while Honeycrisp or Fuji apples add natural sweetness and a great crisp texture. Gala or Pink Lady also work beautifully. Avoid very soft, mealy apples like Red Delicious, as they won’t hold up well.
How long does this no-bake apple pie last in the refrigerator?
When stored properly, covered tightly with plastic wrap, this pie will last for about 3-4 days in the refrigerator. The crust might soften slightly over time, but the flavors will remain delicious. It’s best enjoyed within the first 2 days for optimal texture.
Can I freeze this pie?
I wouldn’t recommend freezing this particular no-bake apple pie. The filling contains cornstarch, which can become grainy and watery when thawed. The graham cracker crust also tends to get soggy after freezing and thawing. This dessert is definitely best enjoyed fresh and chilled.
Can I make this pie dairy-free?
Yes, you can! Substitute the butter in the crust with a plant-based butter alternative. For the optional whipped topping, you can use a dairy-free whipped topping alternative made from coconut cream or a plant-based whipping cream. Just be sure to read labels carefully.
Beyond the Basic: Fun Flavor Twists
While this no-bake apple pie is fantastic as is, there are always ways to play with the flavors and make it uniquely yours. A little experimentation can lead to delicious discoveries!
- Caramel Drizzle: A swirl of store-bought or homemade caramel sauce over the top before serving takes this pie to a whole new level. Apple and caramel are a classic pairing for a reason!
- Spiced Up Crust: Add a pinch of cinnamon or a tiny bit of ground ginger to your graham cracker crust mixture for an extra layer of warmth.
- Nutty Crunch: Fold in a handful of finely chopped toasted pecans or walnuts into the apple filling, or sprinkle them over the top for added texture and flavor.
- Bourbon Boost: For an adult twist, add a tablespoon of bourbon to the apple filling alongside the vanilla extract. It deepens the flavor wonderfully.
- Cream Cheese Layer: For an even richer pie, consider a thin layer of sweetened cream cheese (like a no-bake cheesecake base) between the graham cracker crust and the apple filling. Just beat 8 oz softened cream cheese with ½ cup powdered sugar and a teaspoon of vanilla until smooth, then spread it over the crust before adding the apple mixture.
These variations are simple ways to elevate the pie and tailor it to your preferences or the occasion. Don’t be afraid to get creative!
Perfect Pairings and Serving Suggestions
This no-bake apple pie is a versatile dessert that shines in many settings. It’s light enough for an after-dinner treat but decadent enough to be the star of a holiday dessert table.
For Thanksgiving, it offers a refreshing counterpoint to heavier, baked dishes. Imagine a slice alongside a strong cup of coffee or a glass of sparkling cider. It also pairs beautifully with a scoop of vanilla bean ice cream (if you’re not going with the whipped cream, or even if you are!).
During warmer months, it’s a fantastic choice for a potluck or backyard barbecue, as it doesn’t require turning on the oven. Consider garnishing with a few fresh mint leaves for a pop of color and a hint of freshness. For a truly elegant presentation, dust the top lightly with a fine mesh sieve full of cinnamon or powdered sugar just before serving.
Storing Your Leftover Slices
Should you be lucky enough to have any leftovers, proper storage is key to keeping this pie delicious.
Make sure the pie is completely cool. Cover the pie plate tightly with plastic wrap, ensuring it doesn’t touch the whipped cream topping if you’ve added it. Alternatively, transfer individual slices to airtight containers. Store in the refrigerator for up to 3-4 days. While the crust may soften a bit, the filling will remain flavorful and the pie will still be a delightful treat. It’s truly at its best when eaten within the first 48 hours, though!
I truly hope this no-bake apple pie becomes a staple in your dessert rotation, especially when the oven is otherwise occupied or you just want something easy and delicious. It’s a testament to the fact that sometimes, the simplest solutions yield the most satisfying results. Happy baking (or rather, no-baking)!

No-Bake Apple Pie with Graham Cracker Crust
Enjoy classic apple pie flavor without the oven! This easy no-bake dessert with a crisp graham cracker crust is perfect for holidays.
📝 Ingredients
👩🍳 Instructions
- 1Prepare the Graham Cracker Crust: In a medium bowl, combine the graham cracker crumbs and 1/4 cup granulated sugar. Pour in the melted butter and stir until all the crumbs are moistened and resemble wet sand.
- 2Press the mixture firmly into the bottom and up the sides of a 9-inch pie plate. Use the back of a spoon or the bottom of a flat-bottomed glass for an even, compact layer. Refrigerate while you prepare the filling.
- 3Make the Apple Pie Filling: In a medium saucepan, combine the apple juice (or cider), 1/2 cup granulated sugar, cinnamon, and nutmeg. Bring to a gentle simmer over medium heat, stirring until the sugar dissolves.
- 4In a small bowl, whisk together the cornstarch with 2 tablespoons of cold water to create a slurry. Slowly pour the cornstarch slurry into the simmering apple juice mixture, whisking constantly. Continue to cook and stir for 1-2 minutes, until the mixture has thickened and is translucent.
- 5Remove the saucepan from the heat. Stir in the finely diced apples, lemon juice, and 1 teaspoon vanilla extract. Stir occasionally as the filling cools to room temperature. This step is important for preventing a soggy crust.
- 6Assemble and Chill: Once the apple filling has cooled to room temperature, pour it evenly into your prepared graham cracker crust. Spread gently with a spatula.
- 7Cover the pie loosely with plastic wrap and refrigerate for at least 4 hours, or preferably overnight, to allow the filling to set completely.
- 8Prepare Whipped Topping (Optional): If making, combine cold heavy cream, powdered sugar, and 1/2 teaspoon vanilla extract in a chilled bowl. Beat with an electric mixer on medium-high speed until stiff peaks form.
- 9Slice the chilled pie and serve plain or with a generous dollop of fresh whipped cream. Garnish with a sprinkle of cinnamon, if desired.
💡 Notes
For best results, use a mix of sweet and tart apples. Ensure the apple filling is completely cooled before pouring into the crust to prevent the crust from becoming soggy. This pie is best enjoyed within 2-3 days of making.



