


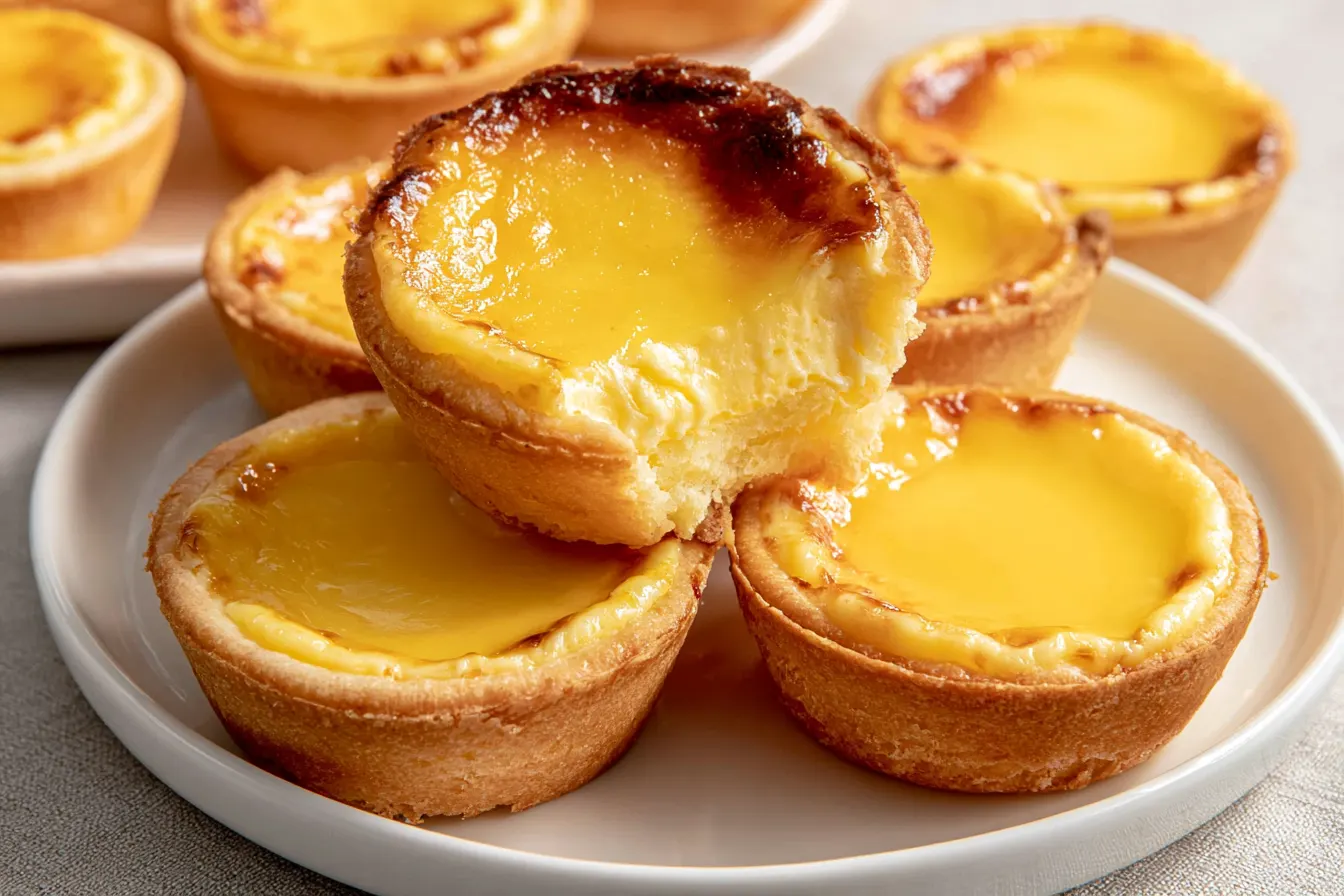
Okay, let’s be real: sometimes you just need a dessert that punches you in the face with flavor, but in the most delightful way possible. That’s exactly how I feel about these Hokkaido Baked Cheese Tarts. There’s something utterly magical about that first bite – the buttery, almost shortbread-like crust giving way to a creamy, tangy, sweet, and just-a-touch-savory cheese filling. It’s a symphony of textures and tastes that’s hard to beat.

What Makes These Hokkaido Baked Cheese Tarts So Special?
You might be thinking, “It’s just a cheese tart, how different can it be?” Ah, my friend, that’s where the magic lies. The secret to an authentic Hokkaido Baked Cheese Tart isn’t just one thing, but a combination of elements that create an unparalleled dessert experience. It starts with the crust – it’s not your average pie crust. This is a rich, shortbread-style pastry, almost like a giant, buttery shortbread cookie that forms the perfect vessel for the filling. It bakes up incredibly tender, crumbly, and golden, providing a delightful contrast to the smooth interior. Think of a cookie and a tart shell having a delicious baby. Then there’s the filling. Oh, the filling! It’s a delicate dance of cream cheese, mascarpone, and a touch of Parmesan (yes, Parmesan!) that gives it that distinct sweet-and-savory complexity. The mascarpone adds a luxurious creaminess, while a hint of lemon brightens everything up, cutting through the richness beautifully. It’s whipped until light and airy, creating a melt-in-your-mouth texture that’s utterly divine. The combination of these cheeses, along with a precise baking method, results in a tart that’s firm enough to hold its shape but still wonderfully gooey and soft on the inside. Many recipes miss this crucial balance, either making the filling too dense or too runny. We’re aiming for that perfect custardy sweet spot. Finally, the unique baking method is key. We first blind bake the crusts to ensure they’re perfectly crisp and cooked through, preventing a soggy bottom (the ultimate pastry sin!). Then, the filled tarts are baked at a high temperature for a short burst, which gives the cheese filling that beautiful, slightly bronzed top and creamy center, almost like a crème brûlée. It’s this careful attention to each component and baking stage that elevates these tarts from good to utterly unforgettable.Gather Your Ingredients: The Building Blocks of Bliss
Creating these delectable treats requires a few specific ingredients, but nothing too obscure. Quality really makes a difference here, especially for the cheeses. Don’t skimp on the good stuff!For the Buttery Shortcrust Pastry
- All-purpose flour: 1 ½ cups (180g) – measured precisely.
- Unsalted butter: 1 stick (113g), very cold and cut into small cubes. This is essential for a flaky, tender crust.
- Granulated sugar: ¼ cup (50g) – for a touch of sweetness.
- Egg yolk: 1 large – for richness and binding.
- Ice water: 2-3 tablespoons – only use what you need to bring the dough together.
- Pinch of salt: Enhances all the flavors.
For the Signature Creamy Cheese Filling
- Cream cheese: 8 oz (226g), full-fat, softened to room temperature. This forms the backbone of our filling.
- Mascarpone cheese: 4 oz (113g), softened to room temperature. Adds incredible richness and a smooth texture.
- Granulated sugar: ½ cup (100g) – adjust slightly to your preference.
- Heavy cream: ¼ cup (60ml) – for extra creaminess and a lighter texture.
- Egg yolk: 1 large – for richness and helping the filling set.
- Fresh lemon juice: 1 tablespoon – don’t skip this! It brightens the flavor and adds that essential tang.
- Vanilla extract: 1 teaspoon – pure vanilla for the best flavor.
- Grated Parmesan cheese: 1 tablespoon (optional, but highly recommended) – this is the secret ingredient for that subtle savory depth that makes these tarts truly unique.

Crafting Your Tarts: Step-by-Step Perfection
Making these Hokkaido Baked Cheese Tarts might seem a little involved because of the two components, but trust me, each step is straightforward and incredibly rewarding. Precision is your friend here!Step 1: Preparing the Shortcrust Pastry
In a large bowl, whisk together the flour, sugar, and salt. Add the cold, cubed butter. Using a pastry blender, your fingertips, or a food processor, cut the butter into the flour mixture until it resembles coarse crumbs with some pea-sized pieces of butter remaining. This texture is key for a tender crust. Next, add the egg yolk and mix until just combined.
Gradually add the ice water, one tablespoon at a time, mixing until the dough just comes together. Be careful not to overmix! The dough should be soft but not sticky. Form the dough into a disc, wrap it tightly in plastic wrap, and refrigerate for at least 30 minutes, or up to an hour. This chill time prevents shrinking and makes the dough easier to handle.
Step 2: Blind Baking the Tart Shells
Preheat your oven to 375°F (190°C). Lightly flour your work surface and roll out the chilled dough to about 1/8-inch thickness. Using a 3-inch round cutter or the rim of a glass, cut out circles. Gently press each circle into the cavities of a 12-cup standard muffin tin or mini tart molds, pressing firmly against the bottom and sides.
Prick the bottom of each crust several times with a fork. Line each tart shell with a small piece of parchment paper and fill with pie weights or dried beans. Bake for 15-18 minutes, or until the edges are lightly golden. Remove the parchment and weights, then bake for another 5-7 minutes, until the bottoms are dry and golden. Let them cool completely on a wire rack. Tip: If you notice any puffing in the center of the crust during the second bake, gently press it down with the back of a spoon.

Step 3: Whipping Up the Dreamy Cheese Filling
While the crusts are cooling, prepare the filling. In a medium bowl, beat the softened cream cheese and mascarpone cheese with an electric mixer on medium speed until smooth and creamy, about 2-3 minutes. Make sure there are no lumps.
Add the granulated sugar, heavy cream, egg yolk, lemon juice, vanilla extract, and grated Parmesan (if using). Beat on low speed until just combined, then increase to medium-high and beat for another 2-3 minutes until the mixture is light, fluffy, and completely smooth. Scrape down the sides of the bowl as needed. The filling should be thick enough to hold its shape but still airy.
Step 4: Assembling and Final Bake
Reduce the oven temperature to 350°F (175°C). Spoon or pipe the cheese filling into the cooled tart shells, filling them almost to the brim. You can use a piping bag for a neater look, but a spoon works just as well. Smooth the tops with the back of a spoon or an offset spatula.
Bake for 12-15 minutes, or until the filling is puffed, set around the edges, and slightly jiggly in the center. The tops should be lightly golden, with a few beautifully browned spots. Note: Don’t overbake! The filling will continue to set as it cools, and you want that creamy center. Remove from the oven and let the tarts cool completely in the muffin tin before gently removing them. Serve warm or chilled.
Common Questions About Hokkaido Baked Cheese Tarts
Making these tarts might spark a few questions, especially if it’s your first time. Here are some common queries I get!Can I make the dough ahead of time?
Absolutely! The shortcrust pastry dough can be made up to 2-3 days in advance and stored tightly wrapped in plastic in the refrigerator. You can also freeze the dough for up to a month. Thaw in the refrigerator overnight before rolling.
What if I don’t have mascarpone cheese?
While mascarpone adds a unique richness, you can substitute it with an equal amount of full-fat cream cheese for a slightly tangier and less rich filling. The texture might be a touch denser, but it will still be delicious. Some people also use a combination of cream cheese and a little sour cream or crème fraîche for added tang.
How do I prevent the crust from shrinking?
Several factors contribute to crust shrinking: overworking the dough, not chilling it sufficiently, and not blind baking with weights. Make sure your butter is very cold, don’t overmix, give the dough ample chilling time, and always use pie weights during the first blind bake. Pricking the bottom also helps.
Can I freeze the baked cheese tarts?
Yes, you can! Once completely cooled, place the tarts in a single layer on a baking sheet and freeze until solid. Then transfer them to an airtight freezer-safe container or bag. They will keep for up to 1 month. Thaw in the refrigerator overnight or at room temperature for a few hours before serving. You can even warm them slightly in a low oven for a “freshly baked” feel.
What’s the best way to serve these tarts?
Hokkaido Baked Cheese Tarts are fantastic served warm, at room temperature, or chilled. Each temperature offers a slightly different experience. Warm, the filling is gooier; chilled, it’s firmer and more cheesecake-like. I personally love them slightly warm, so the cheese filling is just starting to melt. They are perfect on their own, but a sprinkle of powdered sugar or a fresh berry wouldn’t hurt!
Storage and Reheating Tips
These tarts are best enjoyed within 2-3 days for optimal freshness, but they’ll last a bit longer if stored properly. Keep them in an airtight container in the refrigerator. To reheat, you can pop them in a toaster oven or a regular oven at 300°F (150°C) for about 5-10 minutes, until just warmed through. Be careful not to overheat, or the filling might melt too much.Why This Recipe is a Must-Try
Look, there are a lot of dessert recipes out there. A lot. But these Hokkaido Baked Cheese Tarts truly stand out from the crowd. They offer that elusive balance of sweet and savory, a crumbly crust, and a creamy, tangy filling that’s utterly unique. This isn’t just another cheesecake or custard tart; it’s a specialty item that, once you master it, will impress everyone who tries it. Imagine the aroma filling your kitchen as they bake, that golden-brown top emerging from the oven – it’s pure baking joy. Plus, they’re perfectly portioned, making them ideal for gatherings or just a delightful treat for yourself after a long day. If you’re looking for a dessert that’s a little different, incredibly delicious, and truly satisfying, this is it. Don’t hesitate; give these a try! You won’t regret it.
Seriously Addictive Hokkaido Baked Cheese Tarts
These Hokkaido Baked Cheese Tarts feature a buttery shortcrust and a creamy, tangy sweet-savory cheese filling, a true Japanese dessert delight.
📝 Ingredients
👩🍳 Instructions
- 1To make the shortcrust pastry: In a large bowl, whisk together flour, ¼ cup sugar, and salt. Cut in the cold butter using a pastry blender or your fingertips until the mixture resembles coarse crumbs with some pea-sized pieces of butter.
- 2Add 1 egg yolk and mix until just combined. Gradually add ice water, 1 tablespoon at a time, mixing until the dough just comes together. Form into a disc, wrap in plastic, and refrigerate for at least 30 minutes.
- 3Preheat oven to 375°F (190°C). Lightly flour your work surface and roll out the chilled dough to about 1/8-inch thickness. Cut out 3-inch circles and press them into a 12-cup standard muffin tin or mini tart molds.
- 4Prick the bottom of each crust with a fork. Line each with parchment paper and fill with pie weights. Bake for 15-18 minutes, then remove weights and parchment and bake for another 5-7 minutes, until golden. Let cool completely.
- 5To make the cheese filling: In a medium bowl, beat softened cream cheese and mascarpone until smooth and creamy (2-3 minutes).
- 6Add ½ cup sugar, heavy cream, 1 egg yolk, lemon juice, vanilla extract, and optional Parmesan cheese. Beat on low until combined, then increase to medium-high and beat for 2-3 minutes until light and fluffy.
- 7Reduce oven to 350°F (175°C). Spoon or pipe the cheese filling into the cooled tart shells, filling almost to the brim. Smooth the tops.
- 8Bake for 12-15 minutes, until the filling is puffed, set around the edges, and lightly golden. The center should still be slightly jiggly. Do not overbake.
- 9Remove from oven and let tarts cool completely in the muffin tin before gently removing. Serve warm, at room temperature, or chilled.
💡 Notes
Ensure all dairy ingredients for the filling are at room temperature for a smooth consistency. For a bolder savory note, don't skip the Parmesan. Tarts can be frozen after baking for up to one month.



