


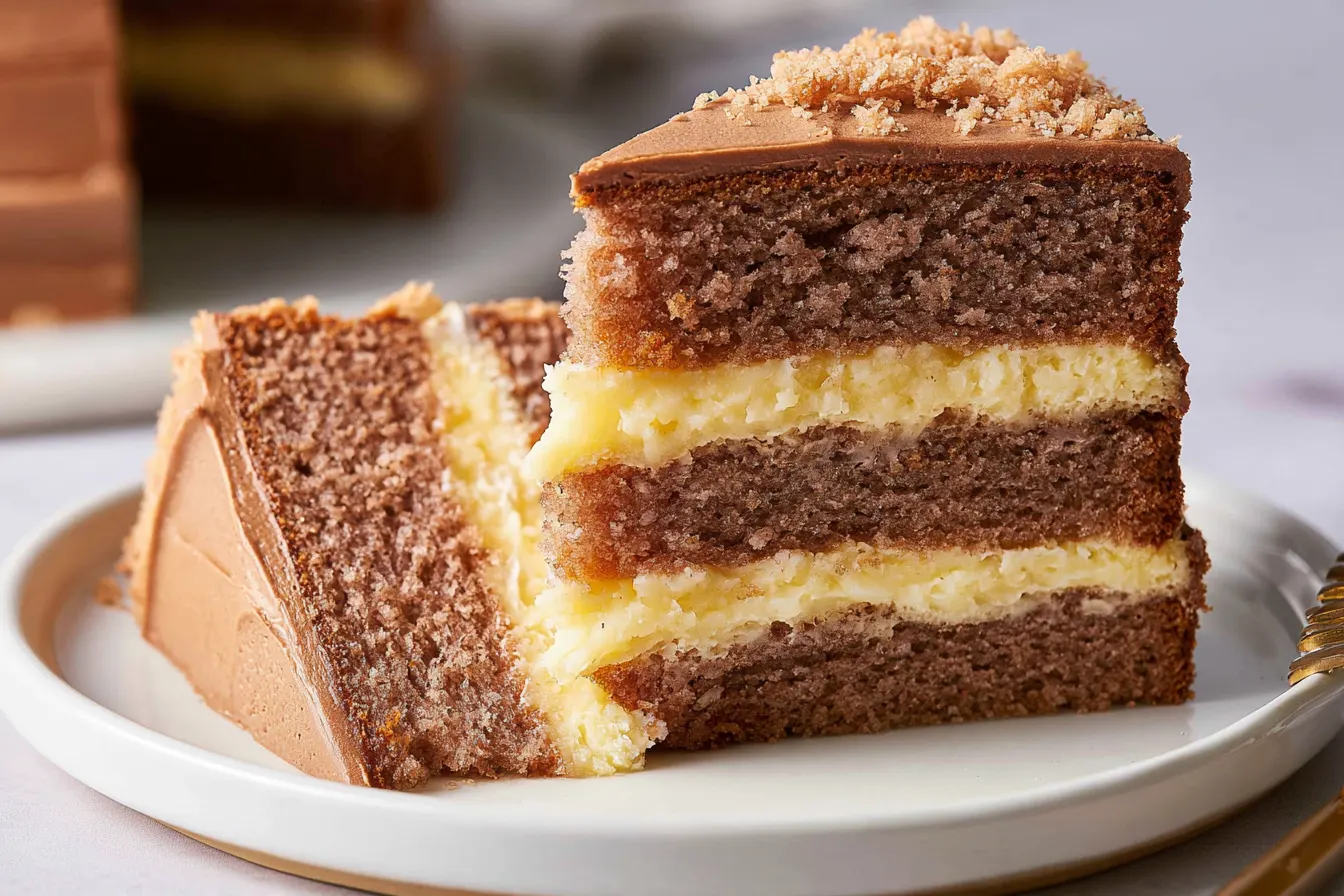
I used to believe that true bakery-style cakes were an art form best left to the professionals. You know the kind—perfectly moist, impossibly tender, with a crumb so fine it melts in your mouth, all cloaked in frosting that’s both rich and light. For years, my homemade attempts, while delicious, just didn’t quite hit that ethereal mark. That is, until I cracked the code with this vanilla bean dream cake, a recipe that consistently delivers that “how did you *make* this?” reaction every single time.
- Why This Vanilla Bean Dream Cake Reigns Supreme
- Gather Your Baking Essentials: Ingredients for Perfection
- Crafting Your Masterpiece: Step-by-Step Guide
- Whipping Up the Dreamy Vanilla Bean Buttercream
- Assembling Your Masterpiece
- Common Questions About Baking the Perfect Vanilla Cake
- Variations to Keep Things Exciting

Why This Vanilla Bean Dream Cake Reigns Supreme
What makes this particular vanilla bean cake so extraordinary? It’s a culmination of a few crucial techniques and ingredient choices that work in harmony to create a truly superior dessert. We’re not just throwing ingredients in a bowl; we’re building layers of flavor and texture that result in a cake that’s both robust and delicate. First, we’re using a combination of butter and oil. Butter brings that incredible flavor and richness, while a touch of oil ensures a moist, tender crumb that stays soft for days. This dual-fat approach is a game-changer for homemade cakes, preventing them from drying out too quickly. Then there’s the vanilla itself. We’re not just using extract here; we’re scraping the precious seeds from a vanilla bean. Those tiny black specks aren’t just for aesthetics; they infuse the cake with an unparalleled floral, sweet, and complex vanilla flavor that extract alone can’t replicate. It’s the difference between a good vanilla cake and an unforgettable one. Finally, the method matters. We’re employing a reverse creaming method for the cake batter, which coats the flour in fat before liquid is added. This minimizes gluten development, leading to an incredibly tender, almost velvety crumb. It’s a little extra step that yields huge rewards in texture.Gather Your Baking Essentials: Ingredients for Perfection
Creating this magnificent cake starts with quality ingredients. For the best results, ensure your butter and eggs are at room temperature – this helps everything emulsify beautifully, leading to a smoother batter and a more consistent bake.For the Irresistible Vanilla Bean Cake Layers:
- Unsalted Butter: 1 ½ cups (3 sticks), softened
- Granulated Sugar: 3 cups
- All-Purpose Flour: 3 ½ cups, sifted
- Baking Powder: 1 tablespoon
- Baking Soda: 1 teaspoon
- Salt: ½ teaspoon
- Large Eggs: 4, at room temperature
- Egg Yolks: 2 large, at room temperature (for extra richness!)
- Full-Fat Buttermilk: 1 ½ cups, at room temperature
- Vegetable Oil: ½ cup (or another neutral oil like canola)
- Vanilla Bean: 1 whole pod, split and scraped (or 2 teaspoons high-quality vanilla extract if absolutely necessary)
For the Silky Vanilla Bean Buttercream Frosting:
- Unsalted Butter: 2 cups (4 sticks), softened
- Powdered Sugar: 6-8 cups, sifted (depending on desired sweetness and consistency)
- Heavy Cream: ¼ – ½ cup, cold
- Vanilla Bean: ½ whole pod, split and scraped (or 1 teaspoon high-quality vanilla extract)
- Pinch of Salt: Balances the sweetness

Crafting Your Masterpiece: Step-by-Step Guide
This recipe might seem like it has a few steps, but each one is straightforward and contributes to the final, spectacular result. Take your time, enjoy the process, and you’ll be rewarded with an absolutely stunning vanilla bean dream cake.Prep Your Pans and Preheat
First things first, preheat your oven to 350°F (175°C). Grease and flour three 8-inch round cake pans. For an extra measure against sticking, you can line the bottoms with parchment paper. This preparation is key for easy release and beautifully shaped layers.
Whip Up the Cake Batter (Reverse Creaming Method)
In the bowl of a stand mixer fitted with the paddle attachment, combine the sifted flour, granulated sugar, baking powder, baking soda, and salt. Mix on low speed for about 30 seconds to ensure everything is well combined.
Next, add the softened butter and vegetable oil to the dry ingredients. Mix on low speed until the mixture resembles coarse crumbs and all the flour is coated with fat. This is the magic of reverse creaming!
In a separate medium bowl, whisk together the room temperature eggs, egg yolks, buttermilk, and the scraped vanilla bean seeds. Gradually add this wet mixture to the dry ingredients in three additions, mixing on medium-low speed for about 30 seconds after each addition, until just combined and no streaks of flour remain. Be careful not to overmix! Overmixing develops gluten, which can make your cake tough.
Bake Those Beautiful Layers
Divide the batter evenly among your three prepared cake pans. I like to use a kitchen scale for this to ensure even layers that bake at the same rate. Gently tap the pans on the counter a few times to release any air bubbles.
Bake for 28-32 minutes, or until a wooden skewer inserted into the center of a cake comes out clean or with a few moist crumbs attached. The tops should be lightly golden and spring back when gently pressed.
Tip: Don’t open the oven door too early in the baking process, as this can cause your cakes to sink in the middle. Wait until at least two-thirds of the baking time has passed.
Cool Down Properly
Once baked, let the cake layers cool in their pans on a wire rack for about 10-15 minutes. This allows them to firm up slightly. After that, carefully invert them onto the wire rack to cool completely. It’s crucial that the cakes are entirely cool before frosting, otherwise, your buttercream will melt into a messy puddle.

Whipping Up the Dreamy Vanilla Bean Buttercream
This buttercream is incredibly stable, silky smooth, and bursting with vanilla flavor. It’s the perfect complement to the tender cake layers.Cream the Butter
In the bowl of your stand mixer fitted with the paddle attachment, beat the softened butter on medium-high speed for 3-5 minutes until it’s light, fluffy, and pale in color. This step is vital for a light buttercream.
Add Sugar and Vanilla
Gradually add the sifted powdered sugar, one cup at a time, mixing on low speed until incorporated before increasing the speed to medium. Continue until all the sugar is added and the mixture is thick. Scrape down the sides of the bowl often.
Add the scraped vanilla bean seeds and the pinch of salt. Mix until just combined.
Achieve the Perfect Consistency
With the mixer on low speed, slowly drizzle in the cold heavy cream, one tablespoon at a time, until your desired consistency is reached. You might not need all of it. Beat on medium-high speed for another 2-3 minutes until the buttercream is light, airy, and fluffy. If it’s too thick, add a tiny bit more cream; if too thin, add a tablespoon or two more powdered sugar.
Assembling Your Masterpiece
Once your cake layers are completely cool and your buttercream is ready, it’s time for the fun part: assembly!- If your cake layers have domed tops, use a serrated knife to level them. This creates a more professional look and a stable base for stacking.
- Place one cake layer on your serving platter or cake stand. Spread about ¾ to 1 cup of buttercream evenly over the top.
- Carefully place the second cake layer on top, pressing gently to secure. Repeat with another layer of buttercream.
- Place the final cake layer on top.
- Apply a thin “crumb coat” of buttercream all over the cake – sides and top. This traps any loose crumbs. Chill the cake in the refrigerator for 15-20 minutes to set this coat.
- Once the crumb coat is firm, apply the remaining buttercream to the cake, smoothing it out with an offset spatula or bench scraper. Decorate as desired, perhaps with a few extra vanilla bean specks sprinkled on top!
Common Questions About Baking the Perfect Vanilla Cake
Even experienced bakers have questions! Here are some common queries about creating this vanilla bean dream.What if I don’t have buttermilk?
No problem! You can easily make a buttermilk substitute at home. For 1 ½ cups of buttermilk, simply pour 1 ½ tablespoons of white vinegar or lemon juice into a liquid measuring cup, then fill the rest with regular milk (whole milk works best) up to the 1 ½ cup line. Stir gently and let it sit for 5-10 minutes until it slightly curdles. This acidity is important for the cake’s tender texture and to activate the baking soda.
Can I make this cake ahead of time?
Absolutely! The cake layers can be baked up to 2 days in advance. Once completely cooled, wrap each layer tightly in plastic wrap and store at room temperature, or freeze for up to 2 weeks. Thaw frozen layers in the refrigerator overnight. The buttercream can also be made 2-3 days ahead and stored in an airtight container in the refrigerator. Before using, let it come to room temperature and then re-whip it with your stand mixer until it’s light and fluffy again.
Why is my cake dry?
A few culprits can lead to a dry cake. Overmixing the batter is a common one, as it develops too much gluten, making the cake tough and dry. Overbaking is another major factor – always keep an eye on your oven and test for doneness promptly. Using ingredients that aren’t at room temperature can also affect the emulsion and result in a less moist cake. This recipe’s use of oil alongside butter also helps tremendously in keeping it moist.
How do I store leftover cake?
Once frosted, this cake is best stored in an airtight cake carrier or under a cake dome at room temperature for up to 2-3 days. If you live in a very warm or humid climate, or if you need to store it longer, it can be refrigerated for up to 5 days. Just be sure to bring it back to room temperature for about 30-60 minutes before serving for the best flavor and texture.
Can I use vanilla extract instead of a vanilla bean?
While I highly recommend using a fresh vanilla bean for that unparalleled depth of flavor and those beautiful specks, you certainly can substitute with high-quality vanilla extract. For the cake layers, use 2 teaspoons of pure vanilla extract, and for the buttercream, use 1 teaspoon. Just be aware that the flavor profile will be slightly less complex, but still delicious!
Variations to Keep Things Exciting
While this vanilla bean dream cake is perfect as is, sometimes it’s fun to play around with flavors. Here are a couple of ideas to switch things up:Lemon Vanilla Dream
Add the zest of 1-2 lemons to your cake batter along with the vanilla bean. For the buttercream, you can add another teaspoon of lemon zest and a tablespoon of fresh lemon juice for a bright, tangy twist. This is especially lovely in the spring and summer!
Berry Vanilla Bliss
Fold in 1 cup of fresh raspberries or blueberries into the cake batter just before dividing it into pans. Be gentle to avoid crushing the berries too much. You could even make a simple berry compote to spread between the cake layers for an extra burst of fruitiness.
Almond Vanilla Fusion
Substitute ¼ teaspoon of almond extract for ¼ teaspoon of the vanilla extract in the cake batter (if using extract instead of bean). In the buttercream, add ½ teaspoon of almond extract. This adds a subtle, nutty undertone that pairs beautifully with vanilla.

Vanilla Bean Dream Cake
An exquisite homemade vanilla bean cake with silky buttercream, rivaling any bakery creation with its moist crumb and rich flavor.
📝 Ingredients
👩🍳 Instructions
- 1Preheat oven to 350°F (175°C). Grease and flour three 8-inch round cake pans. Line bottoms with parchment paper if desired.
- 2In a stand mixer bowl with the paddle attachment, combine sifted flour, granulated sugar, baking powder, baking soda, and ½ teaspoon salt. Mix on low for 30 seconds.
- 3Add 1 ½ cups softened butter and vegetable oil to dry ingredients. Mix on low until coarse crumbs form and flour is coated.
- 4In a separate bowl, whisk together eggs, egg yolks, buttermilk, and scraped vanilla bean seeds (from 1 bean).
- 5Gradually add the wet mixture to the dry mixture in three additions, mixing on medium-low for 30 seconds after each addition until just combined. Do not overmix.
- 6Divide batter evenly among prepared pans. Bake for 28-32 minutes, or until a wooden skewer comes out clean. Cool in pans for 10-15 minutes, then invert onto a wire rack to cool completely.
- 7For buttercream: In a clean stand mixer bowl with paddle attachment, beat 2 cups softened butter on medium-high for 3-5 minutes until light and pale.
- 8Gradually add sifted powdered sugar, 1 cup at a time, mixing on low until incorporated, then increase speed to medium. Scrape down bowl as needed.
- 9Add scraped vanilla bean seeds (from ½ bean) and a pinch of salt. Mix to combine.
- 10With mixer on low, slowly drizzle in cold heavy cream, 1 tablespoon at a time, until desired consistency is reached. Beat on medium-high for 2-3 minutes until light and fluffy.
- 11To assemble: Level cake layers if needed. Place one layer on a serving plate, spread with ¾-1 cup buttercream. Repeat with remaining layers. Apply a thin crumb coat to the entire cake and chill for 15-20 minutes. Finish frosting with remaining buttercream.
💡 Notes
Ensure all dairy and eggs are at room temperature for best results. Cake layers can be baked 2 days ahead and wrapped tightly. Buttercream can be made 2-3 days ahead, refrigerated, and re-whipped before use. Store frosted cake at room temperature in an airtight container for up to 3 days, or refrigerate for longer. Bring to room temperature before serving.



