


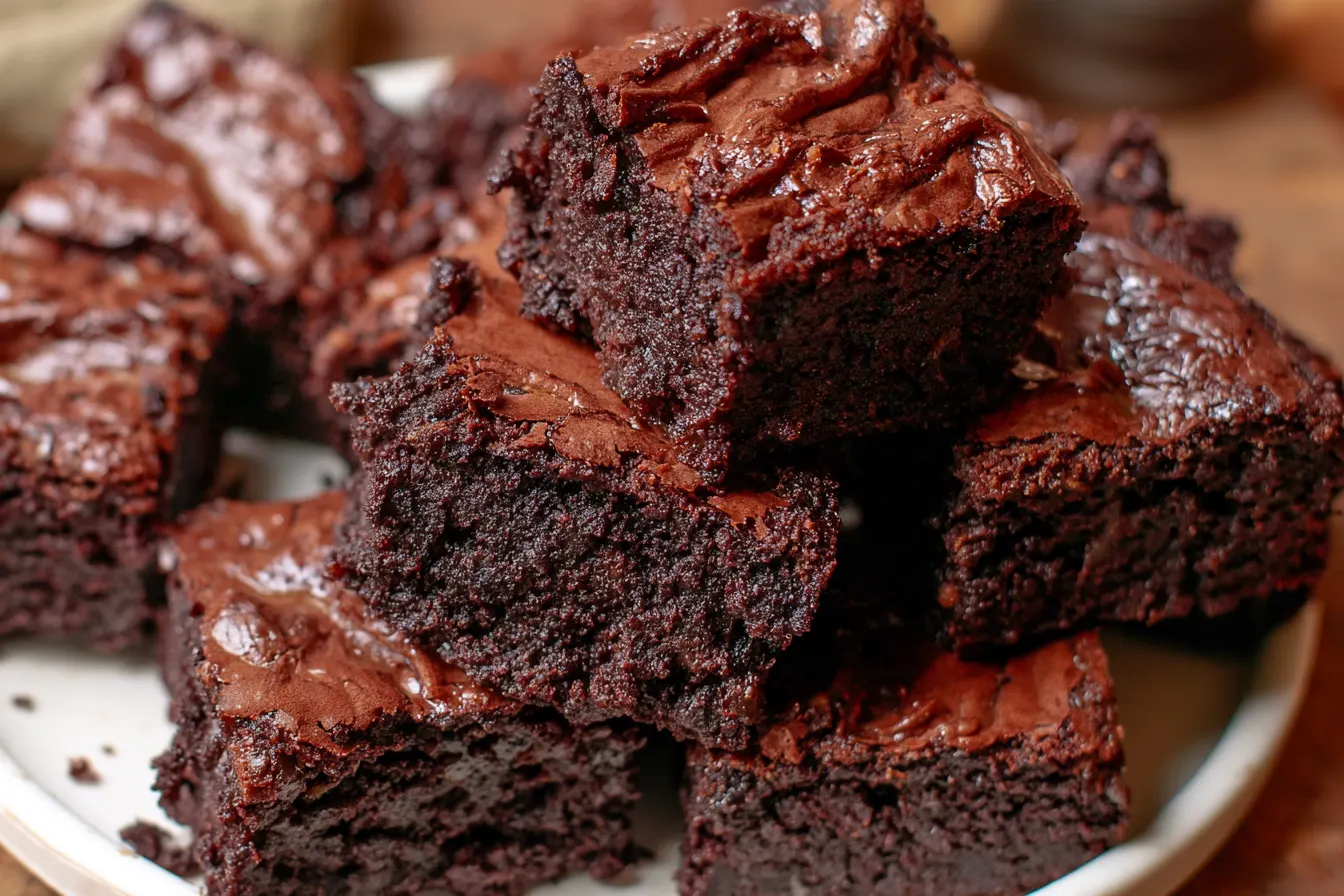
Ever bitten into a brownie and felt that immediate, soul-satisfying give, that dense, almost gooey interior that just melts on your tongue? That’s the magic we’re chasing today. Forget those cakey imposters; we’re diving headfirst into the world of truly fudgy brown butter brownies, complete with that coveted, delicate crinkly top that whispers “homemade perfection.”

Why Brown Butter Changes the Brownie Game
Brown butter. It sounds fancy, but it’s really just butter that’s been gently cooked until its milk solids toast to a gorgeous nutty brown. This simple step is a flavor powerhouse, transforming plain butter into something complex, aromatic, and deeply satisfying. When you add this golden elixir to chocolate, magic happens. The nutty notes enhance the cocoa, adding a sophisticated depth that a regular brownie just can’t touch. It’s the kind of subtle upgrade that makes people say, “What *is* that incredible flavor?” It’s not just about the taste, though. The process of browning the butter also slightly alters its structure, contributing to that signature chewy-fudgy texture we’re aiming for. It’s a foundational flavor that elevates the entire profile of these brownies. Trust me, once you go brown butter, you won’t want to go back.The Ingredients: A Symphony of Richness
Every component in this recipe plays a crucial role in building the ultimate fudgy brownie. We’re not just throwing things in a bowl; we’re carefully selecting and combining for maximum impact.For the Deeply Flavorful Base
- Unsalted Butter: The star of our brown butter show. Unsalted gives you control over the final seasoning.
- Granulated Sugar & Brown Sugar: A blend for both sweetness and moisture. Granulated sugar helps with that crinkly top, while brown sugar adds a subtle caramel note and chewiness.
- Large Eggs & An Extra Yolk: Eggs provide structure and richness. That extra yolk is our secret weapon for an unbelievably fudgy texture, adding fat without extra liquid.
- Vanilla Extract: A classic enhancer that brightens and complements the chocolate. Don’t skip it!
- All-Purpose Flour: Just enough to bind everything together without making them cakey. Less flour equals more fudginess.
- Unsweetened Dutch-Processed Cocoa Powder: This is key for a dark, intense chocolate flavor without bitterness. Dutch-processed cocoa has been treated to reduce its acidity, resulting in a smoother, richer taste.
- Dark Chocolate (Chopped): Use good quality chocolate here, at least 60-70% cacao. This provides a deep, complex chocolate flavor and helps achieve that melt-in-your-mouth texture. Chocolate chips work in a pinch, but chopped bar chocolate melts more smoothly and contributes better to the overall texture.
- Espresso Powder (Optional, but highly recommended): Don’t worry, it won’t make your brownies taste like coffee! A tiny bit of espresso powder intensifies the chocolate flavor, making it taste even more profound and complex.
- Dry Milk Powder: This might seem like an odd addition, but it’s a game-changer. It adds another layer of toasted, milky flavor, mimicking some of the deep notes you get from high-quality European chocolate, and contributes to a wonderfully chewy texture.
- Salt: Essential for balancing sweetness and enhancing all the other flavors.

Crafting the Perfect Fudgy Brownies: Step-by-Step
Patience is a virtue, especially when making brownies this good. Each step builds on the last to create a truly exceptional dessert.Step 1: Get That Butter Brown
Melt the unsalted butter in a medium saucepan over medium heat. Keep stirring it with a rubber spatula or whisk. It will foam, then sizzle, and eventually, the milk solids at the bottom will turn golden brown and smell wonderfully nutty. Once you see those golden flecks and smell that aroma, immediately remove it from the heat and pour it into a large, heat-proof bowl to stop the cooking. This prevents it from burning.
Step 2: Dissolve the Chocolate
While the brown butter is still warm (but not scorching hot), add your chopped dark chocolate to the bowl. Let it sit for a minute or two to soften, then whisk until smooth and glossy. The residual heat from the butter will melt the chocolate beautifully. If it’s not melting completely, you can place the bowl over a saucepan of simmering water (a bain-marie) for a moment, making sure the bottom of the bowl doesn’t touch the water.
Step 3: Whip in the Sugars and Eggs
Once the chocolate-butter mixture has cooled slightly (it should be warm to the touch, but not hot enough to scramble eggs), whisk in both granulated and brown sugars. Mix well until fully combined. Next, add the eggs and the extra egg yolk one at a time, whisking vigorously after each addition for about 30 seconds. This vigorous whisking is crucial! It incorporates air and helps create that desirable crinkly top. Finally, stir in the vanilla extract.
Step 4: Combine the Dry Ingredients
In a separate medium bowl, whisk together the all-purpose flour, Dutch-processed cocoa powder, dry milk powder, espresso powder (if using), and salt. Ensure there are no lumps of cocoa or milk powder.

Step 5: Gently Fold to Combine
Add the dry ingredients to the wet ingredients in two additions, folding gently with a spatula until just combined. Be careful not to overmix! Overmixing develops the gluten in the flour, leading to tough, cakey brownies instead of fudgy ones. Stop folding as soon as you no longer see streaks of dry flour. A few small lumps are perfectly fine.
Tip: If you want to add chocolate chips or nuts, fold them in gently at this stage. About 1/2 to 1 cup is usually perfect.
Step 6: Bake to Perfection
Pour the batter into your prepared 8×8 inch baking pan (lined with parchment paper, with an overhang on two sides for easy lifting). Spread it evenly. Bake in a preheated oven at 350°F (175°C) for 28-32 minutes. The edges should look set, and a toothpick inserted into the center should come out with moist crumbs, not wet batter. Crucially, don’t overbake! Undercooked brownies are fudgy; overcooked brownies are dry.
Step 7: Cool and Cut
Let the brownies cool completely in the pan on a wire rack before attempting to cut them. This is the hardest part, I know! But cooling allows them to fully set, making them easier to slice cleanly and ensuring that ultimate fudgy texture. For extra clean cuts, you can even chill them in the refrigerator for an hour or two before slicing. Use a sharp, warm knife for the best results, wiping the blade clean between cuts.
Achieving That Coveted Crinkly Top
That shiny, paper-thin, crackled top is the hallmark of a truly great brownie. It’s not just for looks; it signifies a perfectly balanced texture within. Here’s how we nail it every time: Vigorous Whisking of Eggs and Sugar: As mentioned in Step 3, really get some air into those eggs after adding the sugar. This creates a meringue-like top layer that bakes up beautifully. Melting Sugar: Ensure your sugar is well dissolved in the warm butter-chocolate mixture. Undissolved sugar can create a grainy texture and hinder the crinkle. Right Baking Temperature: A slightly higher initial temperature can help shock the top into forming that crust. Cooling Slowly: Resist the urge to dive in too soon! Allowing the brownies to cool slowly helps the top set properly.Common Mistakes to Sidestep
Even the simplest recipes can have pitfalls. Here’s what to watch out for to ensure your fudgy brown butter brownies are always a triumph: Burning the Brown Butter: This is the most common mistake. Keep a close eye on it, stir constantly, and remove it from the heat as soon as you see those golden-brown bits. Burnt butter tastes bitter. Overmixing the Batter: Once the flour is added, mix only until just combined. A few streaks of flour are better than a tough brownie. Overbaking: This is the cardinal sin of brownie making. An extra minute or two can turn fudgy into cakey. Start checking at the lower end of the baking time. Remember, brownies continue to cook slightly from residual heat as they cool. Cutting Too Soon: Patience, my friend! Warm brownies are delicious, but they’ll fall apart. Let them cool completely for clean slices and optimal texture.Making These Brownies Ahead & Storing Them
These brownies are fantastic for making in advance, which makes them perfect for parties or just having a treat ready when a craving strikes. Make Ahead: You can bake these brownies a day or two before you plan to serve them. Store them uncut in an airtight container at room temperature. Storage: Once cooled and cut, store the brownies in an airtight container at room temperature for up to 4-5 days. They actually get even fudgier and more flavorful on day two! Freezing: For longer storage, wrap individual brownies tightly in plastic wrap, then place them in a freezer-safe bag or container. They can be frozen for up to 3 months. Thaw at room temperature for a few hours or warm gently in the microwave for a few seconds for a gooey treat.Frequently Asked Questions About Brownies
Got questions? I’ve got answers to help you perfect your brownie game.Can I use milk chocolate instead of dark chocolate?
While you *can* use milk chocolate, I highly recommend sticking with dark chocolate (60-70% cacao). Milk chocolate is much sweeter and has less intense chocolate flavor, which can result in overly sweet brownies without the rich depth we’re aiming for. If you must use it, consider reducing the sugar slightly.
What if I don’t have dry milk powder?
You can omit it, and your brownies will still be delicious. However, dry milk powder adds a subtle toasty, malty flavor and contributes to a chewier texture. If you’re serious about brownies, it’s worth getting some! You can find it in the baking aisle.
How do I get really clean cuts?
The secret is a combination of patience and a good knife. Ensure the brownies are completely cool (even chilled for an hour or two). Use a large, sharp knife and wipe the blade clean with a damp paper towel after each cut. For extra precision, you can run the knife under hot water, dry it, cut, and repeat.
My brownies came out cakey, what went wrong?
This is usually due to one of two things: too much flour or overmixing the batter. Ensure you’re measuring your flour correctly (spoon into the measuring cup and level off, don’t scoop directly from the bag). Also, mix the wet and dry ingredients only until just combined – overmixing develops gluten, leading to a cake-like texture.
Can I add nuts or other mix-ins?
Absolutely! Walnuts, pecans, chocolate chips, white chocolate chunks, or even a swirl of caramel or peanut butter can be delicious additions. Fold in about 1/2 to 1 cup of your chosen mix-ins during Step 5, just before pouring the batter into the pan.

Fudgy Brown Butter Brownies with Crinkly Tops
Rich, fudgy brown butter brownies with deep dark chocolate flavor, a chewy texture, and that irresistible crinkly top.
📝 Ingredients
👩🍳 Instructions
- 1Preheat your oven to 350°F (175°C). Line an 8x8 inch (20x20 cm) baking pan with parchment paper, leaving an overhang on two sides for easy removal. Lightly grease the exposed sides.
- 2Brown the butter: In a medium saucepan, melt the unsalted butter over medium heat. Continue cooking, stirring occasionally, until the butter foams, then sizzles, and eventually, the milk solids at the bottom turn golden brown and smell nutty. This usually takes 5-8 minutes. Immediately pour the browned butter into a large heat-proof bowl to stop the cooking.
- 3Melt the chocolate: Add the chopped dark chocolate to the warm browned butter. Let it sit for 2 minutes, then whisk until completely smooth and glossy. If needed, place the bowl over a pot of simmering water (bain-marie) briefly to fully melt the chocolate, ensuring the bottom of the bowl does not touch the water.
- 4Whisk in sugars and eggs: Allow the chocolate mixture to cool slightly (it should be warm but not hot). Add the granulated sugar and brown sugar, whisking until well combined. Add the cold eggs and extra egg yolk one at a time, whisking vigorously for 30 seconds after each addition. Stir in the vanilla extract. This vigorous whisking is key for crinkly tops!
- 5Combine dry ingredients: In a separate medium bowl, whisk together the all-purpose flour, Dutch-processed cocoa powder, dry milk powder (if using), espresso powder (if using), and salt until thoroughly combined and lump-free.
- 6Fold wet and dry: Add the dry ingredients to the wet ingredients in two additions. Using a rubber spatula, gently fold until just combined and no streaks of dry flour remain. Be careful not to overmix the batter.
- 7Bake: Pour the batter into the prepared baking pan and spread evenly. Bake for 28-32 minutes, or until the edges are set and a toothpick inserted into the center comes out with moist crumbs, not wet batter. Do not overbake!
- 8Cool and slice: Let the brownies cool completely in the pan on a wire rack for at least 2 hours before lifting out with the parchment paper overhang. For the cleanest cuts, chill the brownies for an hour in the refrigerator before slicing into squares. Enjoy!
💡 Notes
Using cold eggs helps achieve that desired crinkly top. For an extra chocolatey punch, fold in 1/2 cup of chocolate chips with the dry ingredients. Store brownies in an airtight container at room temperature for up to 5 days.



