


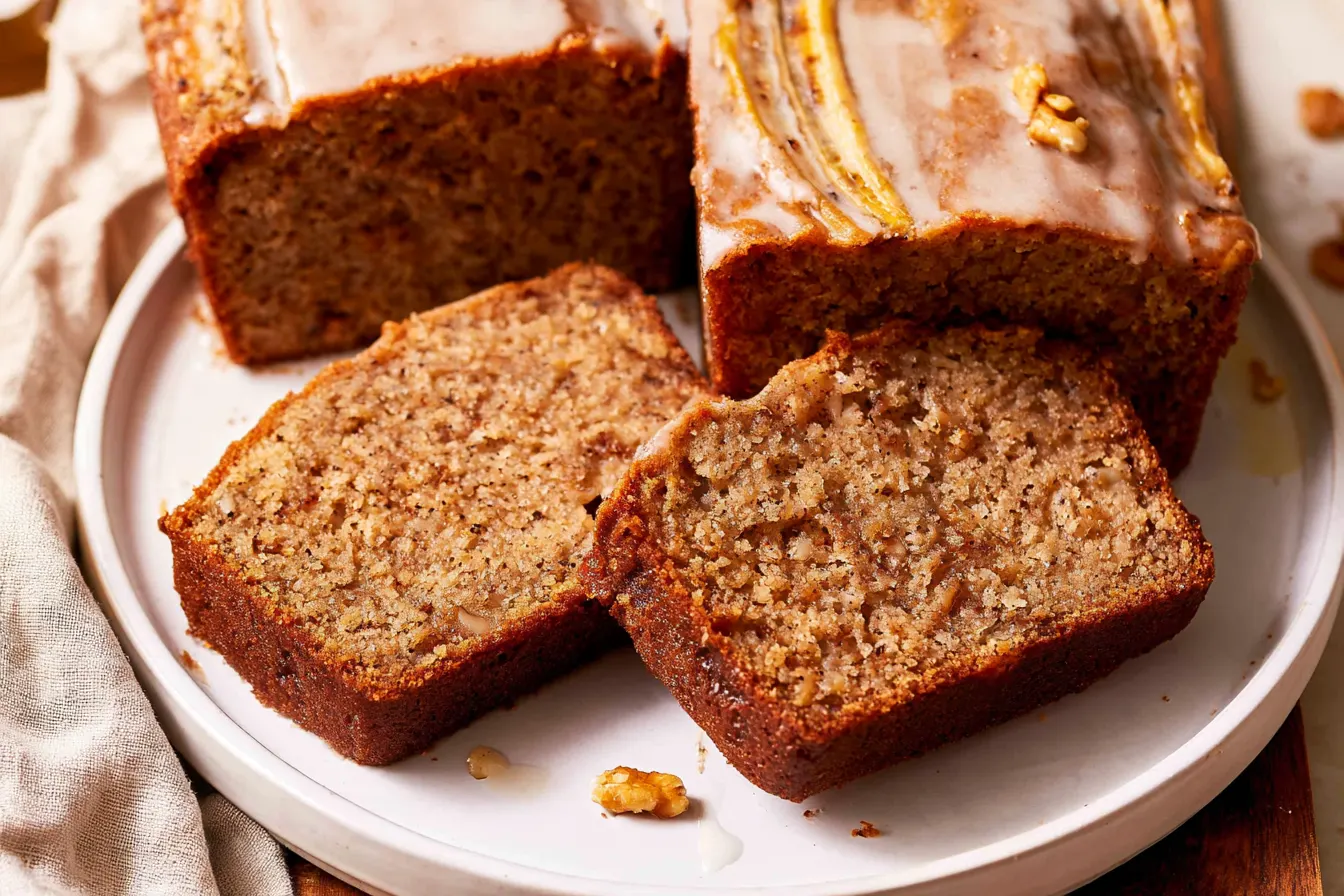
I used to think all banana bread was pretty much the same. You mash some overripe bananas, mix in the usual suspects, and bake. But then I stumbled upon a technique that transformed my humble loaf into something truly extraordinary: brown butter. This isn’t just regular banana bread; this is brown butter banana bread, and it’s a revelation. The nutty, caramelized notes of browned butter take that familiar comfort food to a whole new level of bakery-worthy deliciousness.
It’s funny how one small tweak can redefine a classic. That unmistakable aroma of toasted butter solids wafting through the kitchen is enough to make anyone stop in their tracks. When combined with the sweet, mellow flavor of ripe bananas, it creates a depth that’s simply irresistible.
Forget dry, crumbly loaves. This recipe is engineered for maximum moisture and a rich, complex flavor profile that will have everyone asking for your secret. Trust me, once you go brown butter, you won’t go back.

Why Brown Butter Changes Everything
Let’s talk about the magic of brown butter, or as the French call it, beurre noisette. It’s not just melted butter; it’s butter that’s been cooked gently until the milk solids separate and turn a beautiful amber color, releasing a nutty, almost caramel-like fragrance. This process adds a layer of sophisticated flavor that plain melted butter simply can’t achieve.
In banana bread, this means a richer, more nuanced taste. It complements the sweetness of the bananas and the warmth of any spices you might add, making each slice feel incredibly indulgent. It’s the difference between a good banana bread and an utterly unforgettable one.
Beyond flavor, using melted butter (browned or not) often contributes to a more tender and moist crumb in quick breads, as it helps distribute fats more evenly throughout the batter without the need for creaming. This is particularly beneficial for keeping banana bread from drying out.
The Art of Browning Butter
Browning butter isn’t complicated, but it does require a little attention. You’ll need a light-bottomed saucepan so you can easily see the color change. Melt the butter over medium heat, stirring occasionally. It will foam, then the foam will subside, and you’ll see small brown flecks forming at the bottom of the pan.
As soon as you smell that distinct nutty aroma and see those amber flecks, remove it from the heat immediately and pour it into a heatproof bowl to stop the cooking. This prevents it from burning, which happens quickly. It’s a small step that yields huge rewards.
Gather Your Goodies: The Ingredients
To whip up this incredible loaf, you’ll need a few common pantry staples, plus those star ingredients that make all the difference. Fresh, ripe bananas are non-negotiable here – the spottier, the better!
For the Banana Bread Batter:
- 1/2 cup (113g) unsalted butter
- 1 3/4 cups (220g) all-purpose flour
- 1 teaspoon baking soda
- 1/2 teaspoon salt
- 1 teaspoon ground cinnamon (optional, but highly recommended)
- 3 very ripe medium bananas (about 1 1/2 cups mashed)
- 1/2 cup (100g) granulated sugar
- 1/4 cup (50g) packed light brown sugar
- 1 large egg, at room temperature
- 1 teaspoon vanilla extract
- 1/4 cup sour cream or plain Greek yogurt, at room temperature
- 1/2 cup chopped walnuts or pecans (optional)

Let’s Get Baking: Step-by-Step Instructions
Preheating your oven and preparing your pan are crucial first steps for any baking project. This ensures an even bake and prevents sticking. Don’t skip them!
Prepare Your Pan and Oven
Preheat your oven to 350°F (175°C). Lightly grease and flour a 9×5-inch loaf pan, or line it with parchment paper for easy removal. A little parchment sling makes lifting the finished loaf out so much simpler.
Brown the Butter
Melt the unsalted butter in a light-bottomed saucepan over medium heat. Continue cooking, stirring occasionally, until the butter foams, then subsides, and the milk solids at the bottom turn golden brown and smell nutty. This usually takes about 5-7 minutes. Immediately pour the browned butter into a large heatproof bowl and let it cool for 5-10 minutes. This step is critical for flavor development.
Combine Dry Ingredients
In a separate medium bowl, whisk together the flour, baking soda, salt, and cinnamon (if using). Make sure there are no lumps; a well-combined dry mix means an even distribution later.
Mash the Bananas
In a third bowl, mash the very ripe bananas with a fork until mostly smooth but with a few small lumps remaining. Over-mashing can release too much liquid, so aim for a rustic consistency.
Mix Wet Ingredients
To the slightly cooled brown butter, add the granulated sugar and brown sugar. Whisk until well combined. Stir in the mashed bananas, egg, vanilla extract, and sour cream (or yogurt) until just incorporated. Don’t overmix; gentle handling keeps the batter light.
Tip: Using room temperature egg and sour cream helps them incorporate more smoothly into the batter, leading to a more uniform texture in your finished bread.

Combine Wet and Dry
Gradually add the dry ingredients to the wet ingredients, mixing until just combined. Be careful not to overmix the batter; overmixing can develop the gluten too much, leading to a tough loaf. A few streaks of flour are fine.
If you’re adding nuts, gently fold them in at this stage. Walnuts or pecans add a lovely crunch and extra texture.
Bake Your Loaf
Pour the batter into your prepared loaf pan and spread evenly. Bake for 50-65 minutes, or until a wooden skewer or toothpick inserted into the center comes out clean. The top should be golden brown and spring back when lightly touched.
Note: If the top starts to brown too quickly, you can loosely tent the loaf with aluminum foil for the last 15-20 minutes of baking.
Cool and Serve
Once baked, remove the loaf from the oven and let it cool in the pan for 10-15 minutes before transferring it to a wire rack to cool completely. Slicing it while warm is tempting, but a fully cooled loaf will hold its shape better and have a superior texture.
Why This Brown Butter Banana Bread is the Best
Every baker has their “best” banana bread recipe, but this one truly stands out. It’s not just the brown butter, though that’s a huge part of it. It’s the careful balance of ingredients and the attention to detail that make this loaf consistently moist, flavorful, and utterly satisfying.
We’re using both granulated and brown sugar here. Granulated sugar provides sweetness and crispness, while brown sugar adds moisture, a subtle molasses flavor, and helps keep the bread soft. The combination is pure harmony.
The addition of sour cream (or Greek yogurt) is another secret weapon for moisture. Its slight acidity also reacts with the baking soda, contributing to a tender crumb and a good rise. It’s a small amount, but it makes a significant difference.
Frequently Asked Questions About Banana Bread
Can I use under-ripe bananas?
While you can, I strongly advise against it. The riper the bananas, the sweeter and more flavorful your bread will be. Very ripe bananas (those with plenty of brown spots) also mash more easily and contribute more moisture. Green or yellow bananas won’t give you the same depth of flavor.
How do I store brown butter banana bread?
Store your banana bread at room temperature in an airtight container for up to 3-4 days. You can also refrigerate it for up to a week, though it might dry out slightly. For longer storage, see the freezing tips below.
Can I add chocolate chips or other mix-ins?
Absolutely! Chocolate chips (dark, milk, or white), dried cranberries, or shredded coconut would all be delicious additions. Fold in about 1/2 to 3/4 cup of your chosen mix-ins with the nuts, or just before pouring the batter into the pan.
My banana bread is dry. What went wrong?
There are a few common culprits for dry banana bread. Overmixing the batter can develop the gluten, making it tough and dry. Overbaking is another major factor; baking too long will suck out all the moisture. Make sure your oven temperature is accurate and check for doneness with a toothpick. Using under-ripe bananas can also lead to a less moist loaf.
What’s the best way to freeze banana bread?
Banana bread freezes beautifully! Once completely cooled, wrap the entire loaf tightly in plastic wrap, then again in aluminum foil. Freeze for up to 3 months. You can also slice it before freezing, wrapping individual slices for easy thawing. Thaw at room temperature or gently warm slices in the microwave or oven.
Serving Suggestions & Variations
This brown butter banana bread is utterly fantastic on its own, perhaps with a cup of coffee or tea. But if you’re feeling fancy, here are a few ideas:
- A Dollop of Cream: A spoonful of créme fraîche or whipped cream can elevate a slice into a true dessert.
- Toasted with Butter: A lightly toasted slice spread with a thin layer of salted butter is pure bliss.
- Nutella Swirl: Before baking, swirl a few spoonfuls of Nutella into the top of the batter for a chocolate-hazelnut twist.
- Caramel Drizzle: A light drizzle of homemade or store-bought caramel sauce adds an extra layer of decadence.
- Spiced Cream Cheese Frosting: For a more celebratory feel, a thin layer of cream cheese frosting with a hint of cinnamon or nutmeg would be divine.
Don’t be afraid to experiment with different spices too. A pinch of nutmeg or allspice can add another layer of warmth. You could even add a tablespoon of dark rum or bourbon to the wet ingredients for a grown-up twist, enhancing the flavor without making it boozy.
Make-Ahead & Meal Prep Tips
This recipe is perfect for making ahead. It actually tastes even better the next day as the flavors have more time to meld and develop. If you’re planning a weekend brunch or need a quick breakfast option for busy weekdays, baking a loaf (or two!) in advance is a smart move.
For meal prepping, you can bake the loaf on a Sunday and enjoy slices throughout the week. If you’re planning to freeze it, ensure it’s completely cool before wrapping. This prevents ice crystals from forming, which can lead to a soggy texture upon thawing. Individual slices are incredibly convenient for grab-and-go breakfasts or snacks.
Common Mistakes to Avoid
Even simple recipes like banana bread can go awry. Here are a few common pitfalls and how to steer clear of them to ensure your brown butter banana bread turns out perfectly every time:
- Under-ripe Bananas: We’ve said it before, but it bears repeating. Green or even slightly yellow bananas won’t provide the sweetness and moisture needed. Wait for those beautiful brown spots!
- Overmixing the Batter: Once the wet and dry ingredients meet, mix only until just combined. Overmixing develops gluten, resulting in a dense, tough loaf. A few small lumps are perfectly fine.
- Overbaking: Keep an eye on your bread, especially during the last 15-20 minutes. An overbaked loaf will be dry and crumbly. Test for doneness with a skewer or toothpick.
- Not Cooling Completely: While warm banana bread is tempting, slicing it too soon can cause it to crumble and lose its structure. Let it cool in the pan for a bit, then transfer to a wire rack to cool fully.
- Skipping the Brown Butter: Okay, you *could* skip it, but why would you? That nutty, rich flavor is what makes this recipe truly special! Don’t be intimidated; it’s an easy step with huge flavor payoff.
Paying attention to these details will ensure your banana bread is always a triumph. Happy baking!

Seriously Moist Brown Butter Banana Bread
Indulge in this incredibly moist brown butter banana bread, featuring a rich, nutty flavor from browned butter that elevates a classic to bakery-quality perfection.
📝 Ingredients
👩🍳 Instructions
- 1Preheat your oven to 350°F (175°C). Lightly grease and flour a 9x5-inch loaf pan, or line it with parchment paper.
- 2Melt the unsalted butter in a light-bottomed saucepan over medium heat. Continue cooking, stirring occasionally, until the butter foams, then subsides, and the milk solids at the bottom turn golden brown and smell nutty (about 5-7 minutes). Immediately pour the browned butter into a large heatproof bowl and let it cool for 5-10 minutes.
- 3In a separate medium bowl, whisk together the flour, baking soda, salt, and cinnamon (if using).
- 4In a third bowl, mash the very ripe bananas with a fork until mostly smooth but with a few small lumps remaining.
- 5To the slightly cooled brown butter, add the granulated sugar and brown sugar. Whisk until well combined. Stir in the mashed bananas, egg, vanilla extract, and sour cream (or yogurt) until just incorporated.
- 6Gradually add the dry ingredients to the wet ingredients, mixing until just combined. Be careful not to overmix the batter. If adding nuts, gently fold them in.
- 7Pour the batter into your prepared loaf pan and spread evenly. Bake for 50-65 minutes, or until a wooden skewer inserted into the center comes out clean. If the top browns too quickly, loosely tent with foil.
- 8Remove the loaf from the oven and let it cool in the pan for 10-15 minutes before transferring it to a wire rack to cool completely. Slice and serve.
💡 Notes
Ensure bananas are very ripe for optimal sweetness and moisture. Do not overmix the batter to avoid a tough loaf. This bread keeps well at room temperature in an airtight container for 3-4 days, or can be frozen for up to 3 months. Feel free to add chocolate chips or other nuts for variation.



