


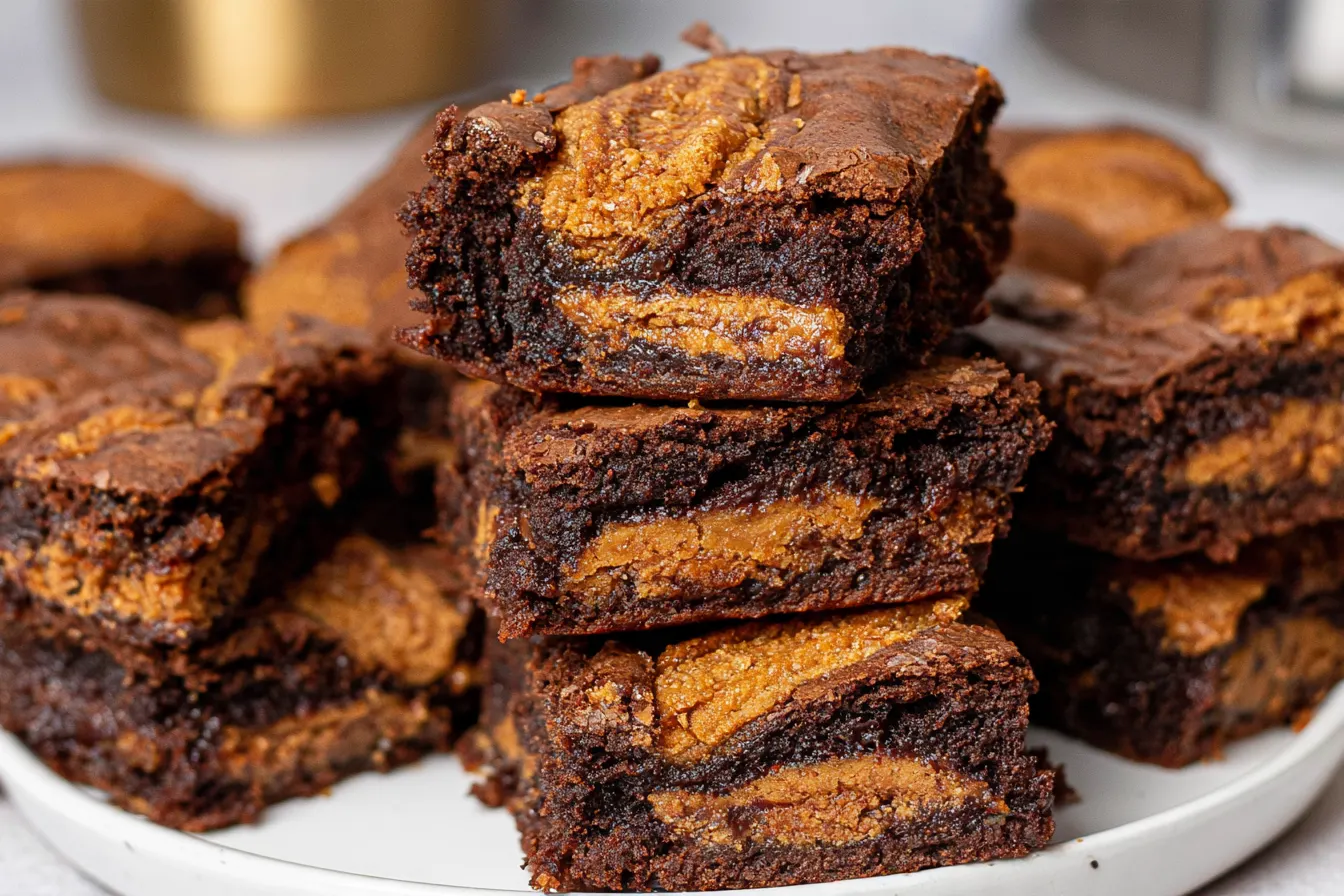
Okay, hands up if you’ve ever found yourself staring into the pantry, desperately craving something sweet, something familiar, but also something a little… extra. That’s exactly where I was last Tuesday afternoon. The usual chocolate brownie recipe felt a bit too mundane, and then my eyes landed on that beautiful jar of Biscoff spread. The answer was clear: we needed some seriously decadent Biscoff Brownies.
- For the Fudgy Brownie Base:
- For the Biscoff Magic:
- Step 1: Prep Your Pan and Oven
- Step 2: Melt the Butter and Sugars
- Step 3: Whisk in the Wet Ingredients
- Step 4: Fold in the Dry Ingredients
- Step 5: Add the Chocolate and Biscoff Swirl
- Step 6: Top with Crushed Cookies and Bake
- Step 7: Cool and Enjoy
- Can I use smooth or crunchy Biscoff spread?
- How do I get that perfect crinkly top on my brownies?
- My brownies came out cakey, what went wrong?
- Can I make these Biscoff brownies ahead of time?
- What’s the best way to cut fudgy brownies cleanly?
- White Chocolate Chips:
- A Drizzle of Caramel:
- A Touch of Espresso:
- Nutty Crunch:

Why These Biscoff Brownies Are Simply the Best
I’ve tinkered with more brownie recipes than I care to admit, all in pursuit of that elusive perfect texture and flavor. For these Biscoff beauties, I wasn’t just aiming for good; I was aiming for *unforgettable*. What makes this particular rendition stand out? It’s all about balance and maximizing that iconic Biscoff taste without overwhelming the chocolate. First, we’re talking fudgy. Not cakey, not dry, but dense, rich, and wonderfully chewy. That’s achieved through a careful ratio of butter, sugar, and chocolate, ensuring every bite melts in your mouth. Then comes the Biscoff spread, not just swirled on top, but generously folded into the batter itself. This infuses the entire brownie with that warm, spiced, caramel-like flavor right from the core. Finally, a layer of crushed Biscoff cookies on top provides that essential textural contrast and an extra hit of flavor that makes these truly sing. It’s a symphony of textures and tastes, where each element plays its part perfectly.Gathering Your Ingredients
To create these marvels, you’ll need a few pantry staples and, of course, the star of the show. Quality ingredients make a huge difference here, especially when it comes to your chocolate.For the Fudgy Brownie Base:
- Unsalted Butter: Good quality butter creates a rich foundation.
- Granulated Sugar & Light Brown Sugar: The combination gives depth and chewiness.
- Large Eggs: At room temperature, they emulsify better.
- Vanilla Extract: Pure vanilla, please! It makes all the difference.
- All-Purpose Flour: Don’t overmix, or your brownies will be tough.
- Unsweetened Cocoa Powder: A good quality Dutch-processed cocoa powder will give you a darker, richer brownie.
- Salt: Essential for balancing the sweetness and enhancing the chocolate flavor.
- Semi-Sweet Chocolate Chips or Chunks: Use a brand you love to eat on its own.
For the Biscoff Magic:
- Biscoff Cookie Butter/Spread: The star! Creamy, spiced, and utterly delicious.
- Biscoff Cookies: Crushed for that perfect crunchy topping.

Crafting Your Caramelized Masterpiece
Ready to get baking? This process is straightforward, but a few key steps will ensure your brownies come out perfectly fudgy and flavorful.Step 1: Prep Your Pan and Oven
First things first, preheat your oven to 350°F (175°C). Line an 8×8 inch baking pan with parchment paper, leaving an overhang on the sides. This “sling” makes it incredibly easy to lift the cooled brownies out later. Lightly grease the parchment paper for good measure. A well-prepared pan is half the battle won.
Step 2: Melt the Butter and Sugars
In a medium microwave-safe bowl or a saucepan over low heat, melt the unsalted butter. Once melted, stir in both the granulated sugar and light brown sugar until fully combined and smooth. It should look glossy. Let this mixture cool slightly for a few minutes; you don’t want to scramble your eggs!
Step 3: Whisk in the Wet Ingredients
Once the butter and sugar mixture has cooled a bit, whisk in the eggs one at a time, incorporating each fully before adding the next. Then, stir in the vanilla extract. You’ll want to whisk vigorously for about a minute or two after the eggs are in. This creates tiny air bubbles that contribute to that desirable crinkly top on your brownies. Tip: Don’t skip this whisking step! It’s crucial for that classic brownie crust.
Step 4: Fold in the Dry Ingredients
In a separate small bowl, whisk together the all-purpose flour, unsweetened cocoa powder, and salt. Gradually add the dry ingredients to the wet ingredients, folding gently with a spatula until just combined. Be careful not to overmix! Overmixing develops gluten, leading to tough brownies. A few streaks of flour are better than a dense brownie.
Step 5: Add the Chocolate and Biscoff Swirl
Fold in the semi-sweet chocolate chips or chunks. Now, spoon about two-thirds of the brownie batter into your prepared pan, spreading it evenly. Dollop half of the Biscoff cookie spread over the batter. Using a knife or a skewer, gently swirl the Biscoff spread into the batter. Repeat with the remaining brownie batter and the rest of the Biscoff spread. You want nice ribbons, not fully incorporated batter.
Step 6: Top with Crushed Cookies and Bake
Sprinkle the crushed Biscoff cookies evenly over the top of the swirled batter. This adds both flavor and a lovely crunch. Pop the pan into your preheated oven and bake for 28-32 minutes. The edges should look set, and a toothpick inserted into the center should come out with moist crumbs, not wet batter. Remember, brownies continue to cook slightly as they cool, so slightly underbaked is better than overbaked for fudginess.

Step 7: Cool and Enjoy
Remove the brownies from the oven and let them cool completely in the pan on a wire rack. This is arguably the hardest part, but cooling is essential for that perfect fudgy texture and clean cuts. Once fully cooled, use the parchment paper sling to lift them out, slice, and savor every single Biscoff-infused bite!
Common Questions About Biscoff Brownies
Can I use smooth or crunchy Biscoff spread?
Either works beautifully! For the swirl, smooth Biscoff spread is a little easier to work with and creates those lovely ribbons. If you only have crunchy, you can still use it, just expect a slightly different texture in the swirl. For the topping, definitely go with crunchy crushed cookies for that textural contrast.
How do I get that perfect crinkly top on my brownies?
The key to a crinkly top lies in whisking the butter and sugar vigorously with the eggs for a minute or two. This incorporates air and creates a meringue-like layer that sets and crinkles as it bakes. Also, ensuring your butter-sugar mixture has cooled slightly before adding the eggs helps prevent them from cooking prematurely.
My brownies came out cakey, what went wrong?
A cakey brownie usually means one of two things: too much flour or overmixing. When adding the dry ingredients, fold gently until just combined. Stop as soon as you don’t see any dry streaks. Also, ensure you’re measuring your flour correctly, preferably by weight if you have a kitchen scale, as scooping directly from the bag can compact it and add too much.
Can I make these Biscoff brownies ahead of time?
Absolutely! Brownies are often even better the next day as the flavors have time to meld and deepen. Store them in an airtight container at room temperature for up to 3-4 days. You can also freeze them (see storage tips below) for longer enjoyment.
What’s the best way to cut fudgy brownies cleanly?
Patience is key! Ensure your brownies are completely cooled before cutting. For super clean lines, chill the brownies in the refrigerator for at least an hour before slicing. Use a large, sharp knife and wipe it clean with a damp cloth after each cut to prevent sticking. A warm knife can also help, but make sure to dry it between cuts.
Storing Your Delicious Leftovers
Assuming you actually have any leftovers (a big assumption, I know!), proper storage will keep your Biscoff Brownies fresh and fudgy. Keep them in an airtight container at room temperature for up to 3-4 days. If you prefer a firmer texture, or if your kitchen is particularly warm, you can store them in the refrigerator, but let them come to room temperature for about 15-20 minutes before serving for the best texture. For longer storage, these brownies freeze beautifully. Wrap individual brownies tightly in plastic wrap, then place them in a freezer-safe bag or container. They’ll keep well in the freezer for up to 3 months. Thaw them at room temperature for a few hours, or pop a frozen brownie into the microwave for 15-20 seconds for a warm, gooey treat.Flavorful Variations to Explore
While these Biscoff Brownies are perfect as is, there are always ways to play with flavors and textures if you’re feeling adventurous.White Chocolate Chips:
Add a handful of white chocolate chips to the batter along with the semi-sweet chocolate. White chocolate and Biscoff are a match made in heaven, offering a lovely creamy contrast to the darker chocolate.
A Drizzle of Caramel:
Once the brownies are cooled, a light drizzle of store-bought or homemade salted caramel sauce would be an incredible addition. It would amplify the caramel notes already present in the Biscoff.
A Touch of Espresso:
For an even deeper chocolate flavor, dissolve a teaspoon of instant espresso powder into the melted butter mixture in Step 2. It won’t make your brownies taste like coffee, but it will enhance the cocoa beautifully.
Nutty Crunch:
If you’re a fan of nuts, a sprinkle of finely chopped pecans or walnuts over the top along with the Biscoff crumbs could add another layer of crunch and flavor. Just be mindful not to overpower the Biscoff!
Making Brownies an Experience
Don’t just eat these Biscoff Brownies; make them an experience. Serve them slightly warm with a scoop of vanilla bean ice cream, allowing the ice cream to melt into the fudgy edges. A dusting of powdered sugar adds a touch of elegance, or a glass of cold milk makes for the perfect comforting snack. They’re also fantastic as part of a dessert platter for a gathering, especially since they’re so easy to make ahead. The distinct Biscoff flavor really sets them apart from your standard brownie, making them a memorable treat for any occasion. Remember, baking should be fun, a chance to get a little messy and create something truly delicious. Don’t stress too much about perfection; embrace the process, and enjoy the incredible aromas filling your kitchen. These Biscoff Brownies are a testament to how a simple addition can transform a classic into something extraordinary. Happy baking!
Ultimate Biscoff Brownies
Indulge in rich, fudgy Biscoff Brownies with spiced cookie butter swirled through the batter and crunchy Biscoff crumbs on top.
📝 Ingredients
👩🍳 Instructions
- 1Preheat your oven to 350°F (175°C). Line an 8x8 inch (20x20cm) baking pan with parchment paper, leaving an overhang on the sides. Lightly grease the parchment paper.
- 2In a large bowl, whisk together the melted butter, granulated sugar, and light brown sugar until smooth and glossy. Let cool for 5-10 minutes.
- 3Add the eggs one at a time to the butter-sugar mixture, whisking well after each addition until fully incorporated. Stir in the vanilla extract. Continue whisking vigorously for 1-2 minutes to create a crinkly top.
- 4In a separate medium bowl, whisk together the flour, cocoa powder, and salt. Gradually add the dry ingredients to the wet ingredients, folding gently with a spatula until just combined. Do not overmix.
- 5Fold in the semi-sweet chocolate chips or chunks.
- 6Spoon about two-thirds of the brownie batter into the prepared pan and spread evenly. Dollop half (about 1/2 cup) of the Biscoff cookie butter spread over the batter. Using a knife or skewer, gently swirl the Biscoff spread into the batter.
- 7Add the remaining brownie batter over the swirled layer, spreading gently. Dollop the remaining Biscoff cookie butter spread over the top and swirl again with a knife.
- 8Evenly sprinkle the crushed Biscoff cookies over the swirled batter.
- 9Bake for 28-32 minutes, or until the edges are set and a toothpick inserted into the center comes out with moist crumbs, not wet batter. Avoid overbaking for fudgiest results.
- 10Remove from the oven and let cool completely in the pan on a wire rack before lifting out, slicing, and serving. This can take 2-3 hours for optimal fudginess and clean cuts.
💡 Notes
For the cleanest cuts, chill the cooled brownies in the refrigerator for at least an hour before slicing. Store brownies in an airtight container at room temperature for up to 3-4 days, or freeze for up to 3 months. For an extra treat, serve warm with a scoop of vanilla ice cream.



